

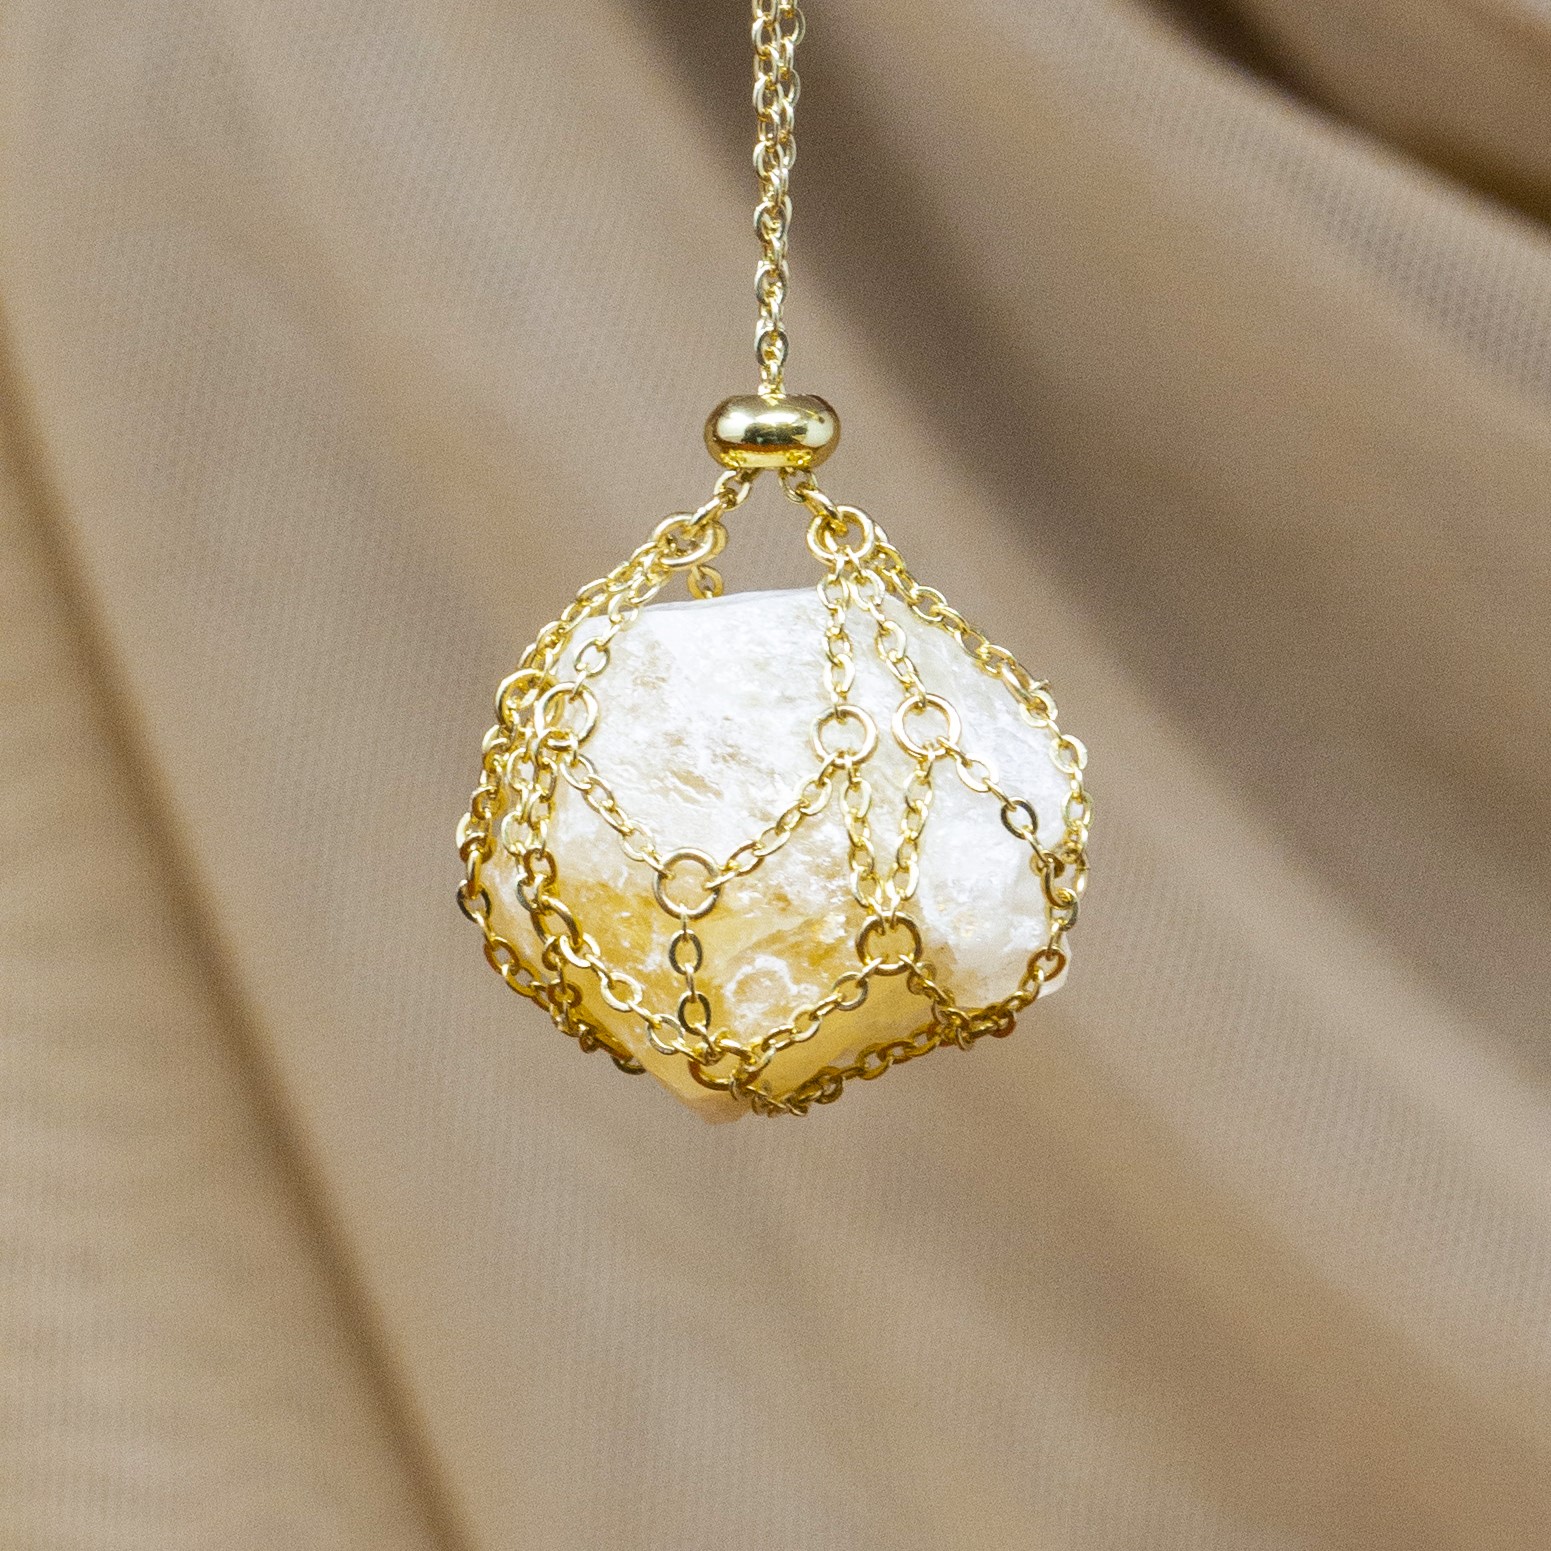
"Gem Keeper" Chain Cage Pendant Necklace
"Gem Keeper" Chain Cage Pendant Necklace
No hole no problem! Keep anything from gems with no holes, beads, baroque pearls, a cool rock you found on a hike, and more in this "Gem Keeper" Pendant Necklace. Can be made in all metal colors! The largest size bead this gem keeper will hold is about a 25mm round.
Materials Needed:
Necklace (approx. 24"):
- 3mm 22 gauge gold plated jump rings (28)
- Gold 1.7mm Petite Cable Chain (62")
- 14K Gold Plated 6mm Silicone Rondel Bead - 2mm Hole (1)
- 4mm 21 gauge gold plated jump ring (1)
- 9x5mm Gold Plated Trigger Clasp (1)
- 15-25mm Bead of your choice you can find some here - prisms, rounds and some ovals work best!
Tools Required:
Needle Nose Pliers (x2)
Instructions on Construction:
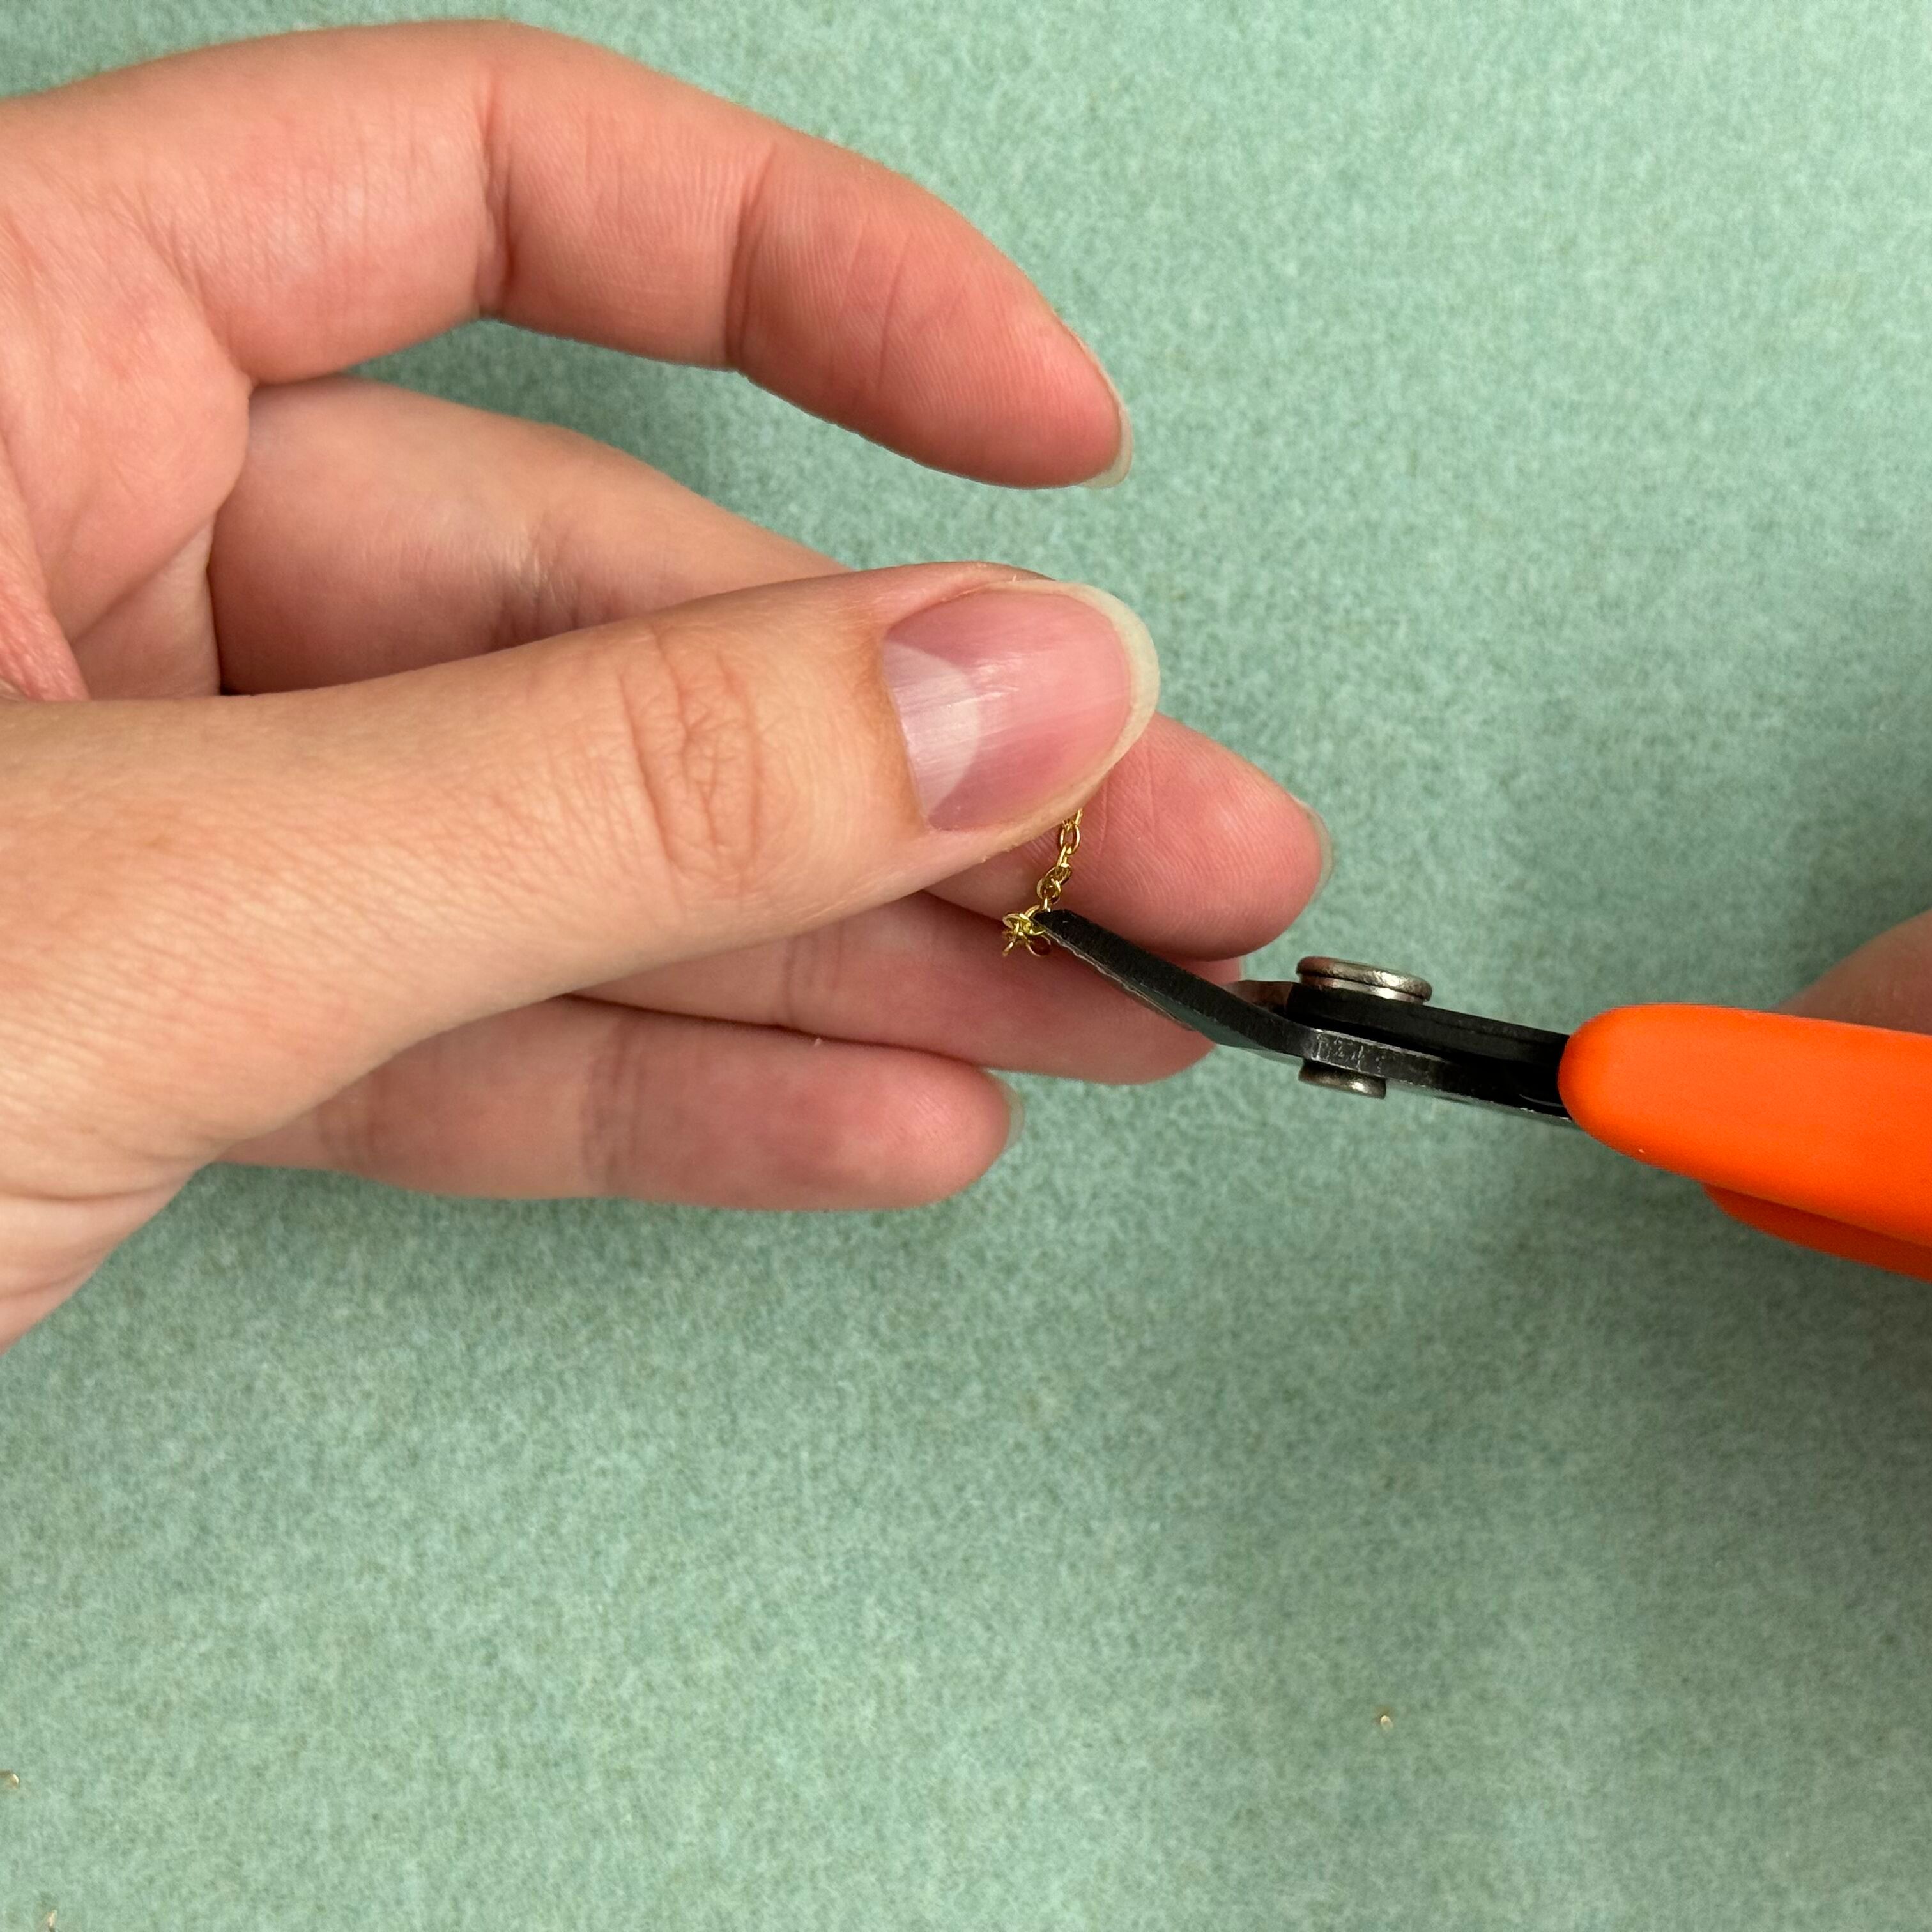
1. Cut 40 sections of chain measuring 6 links each
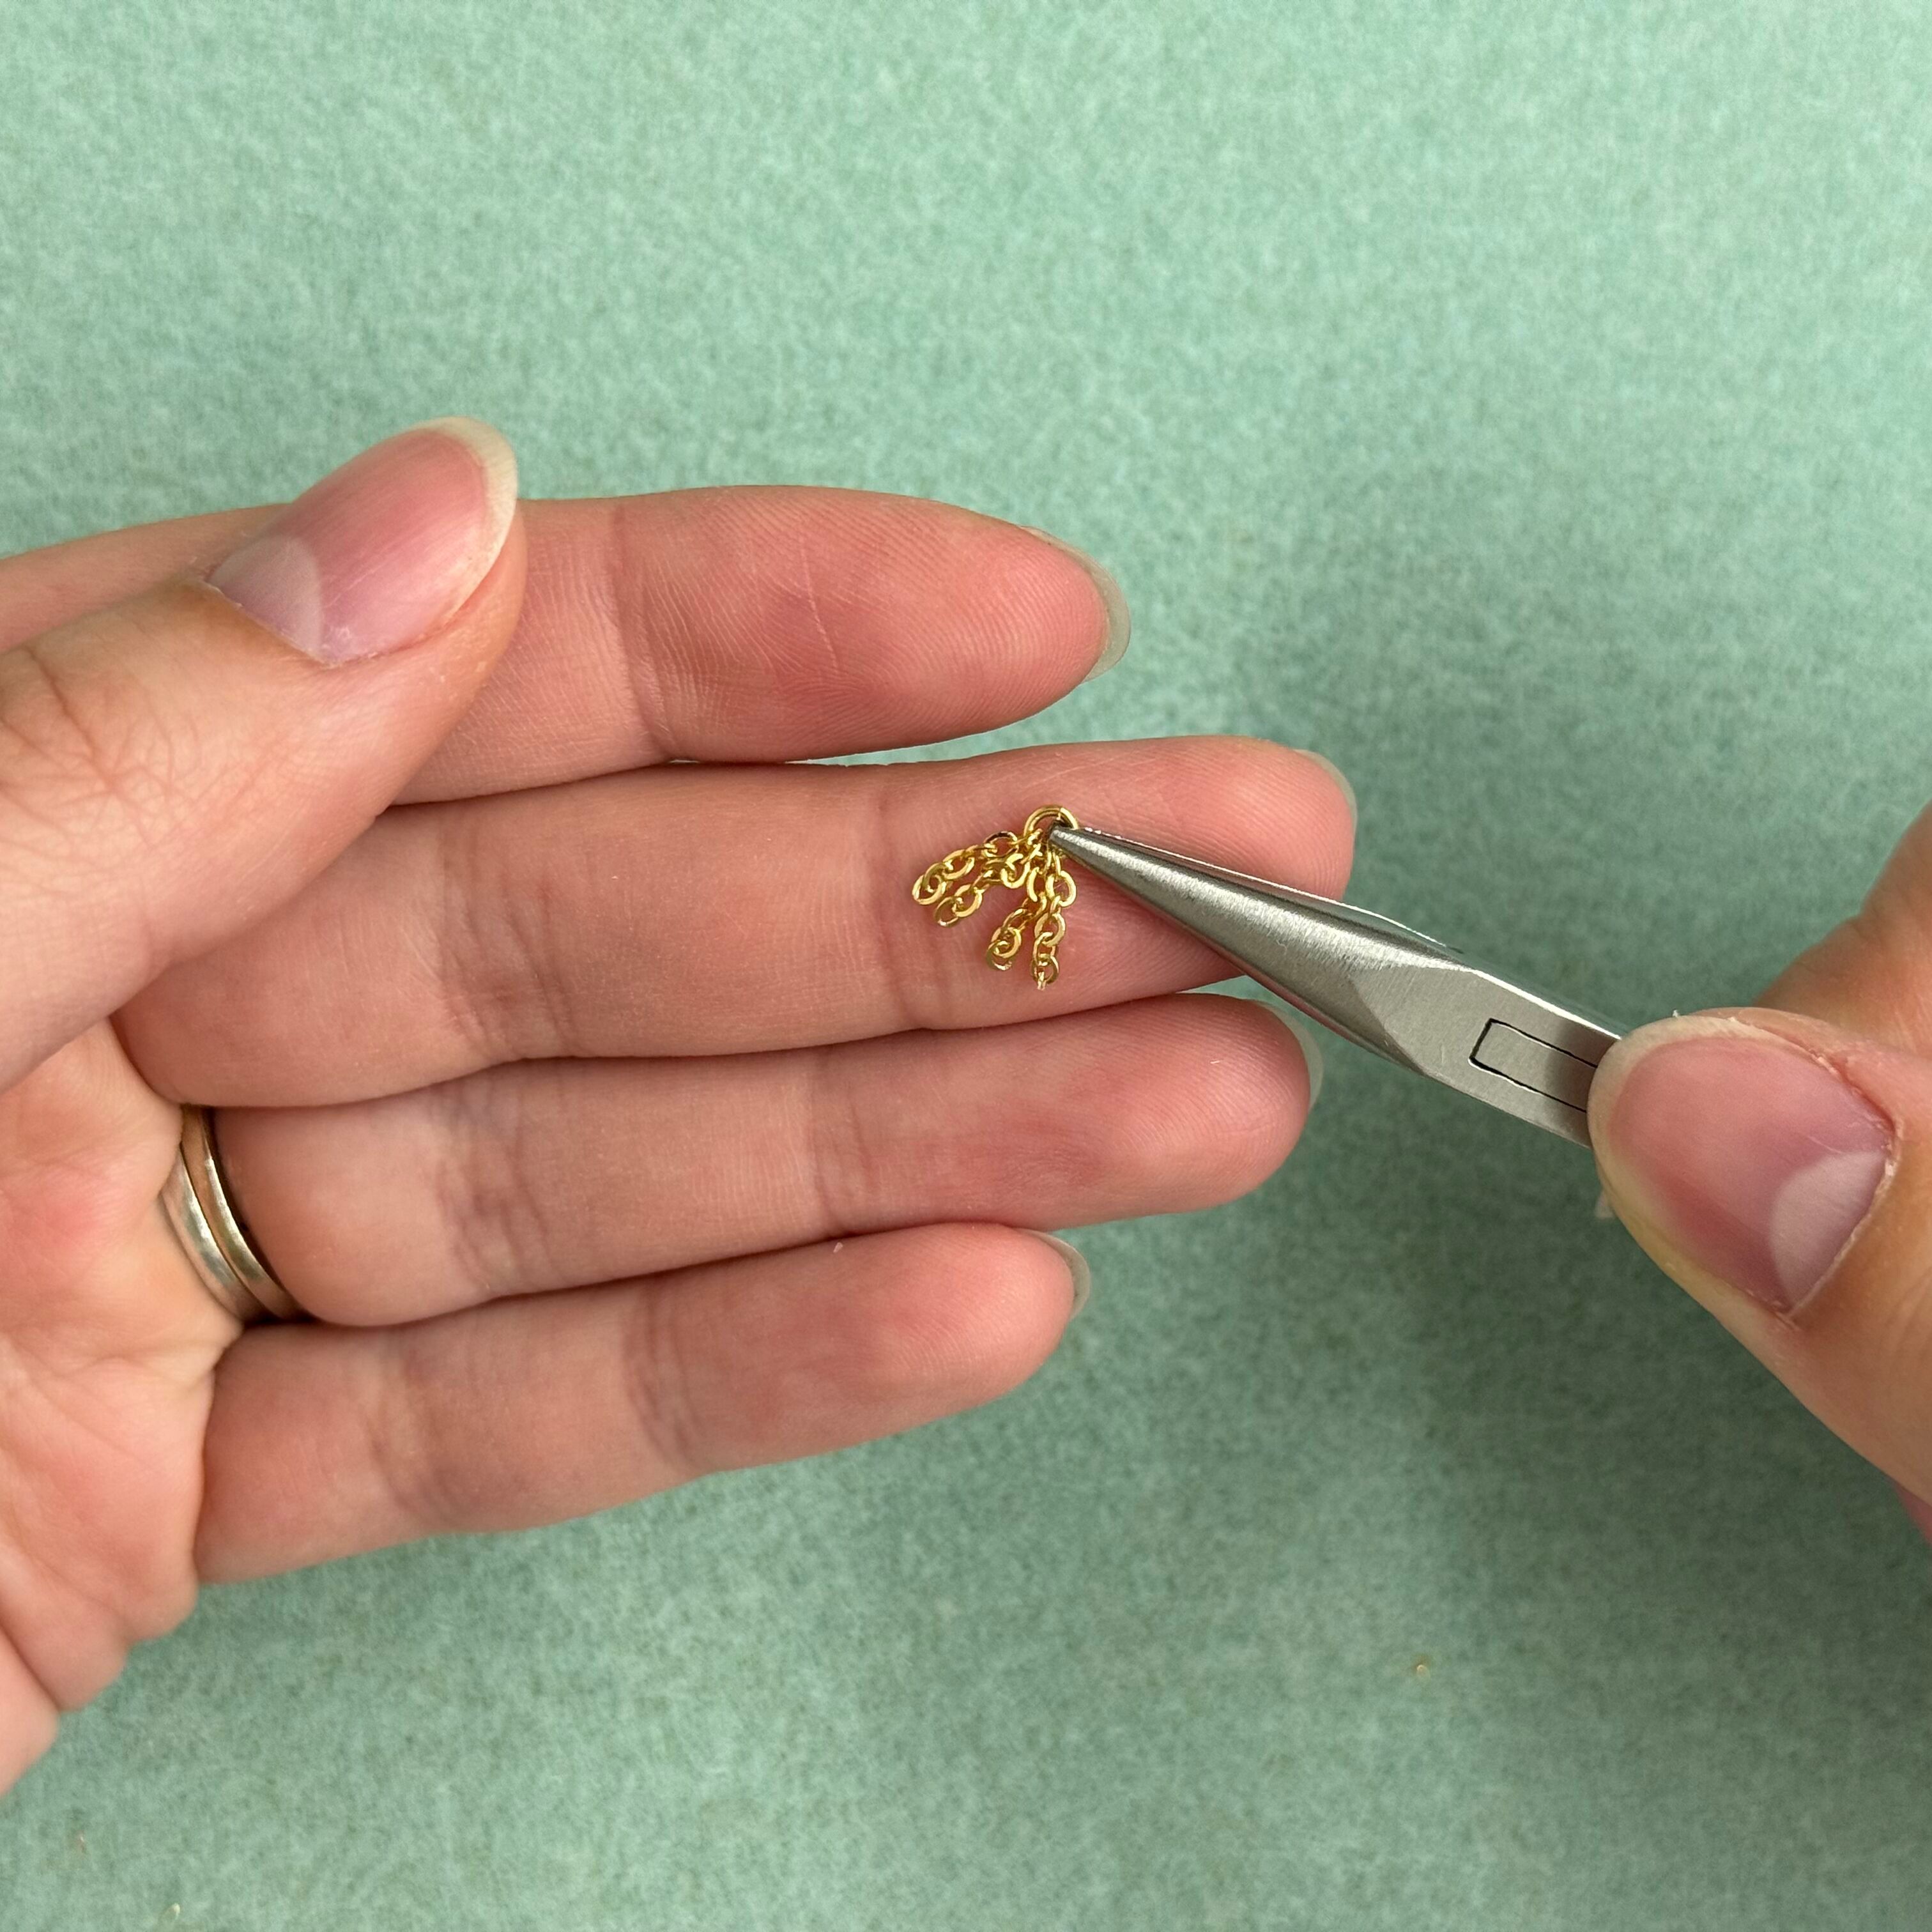
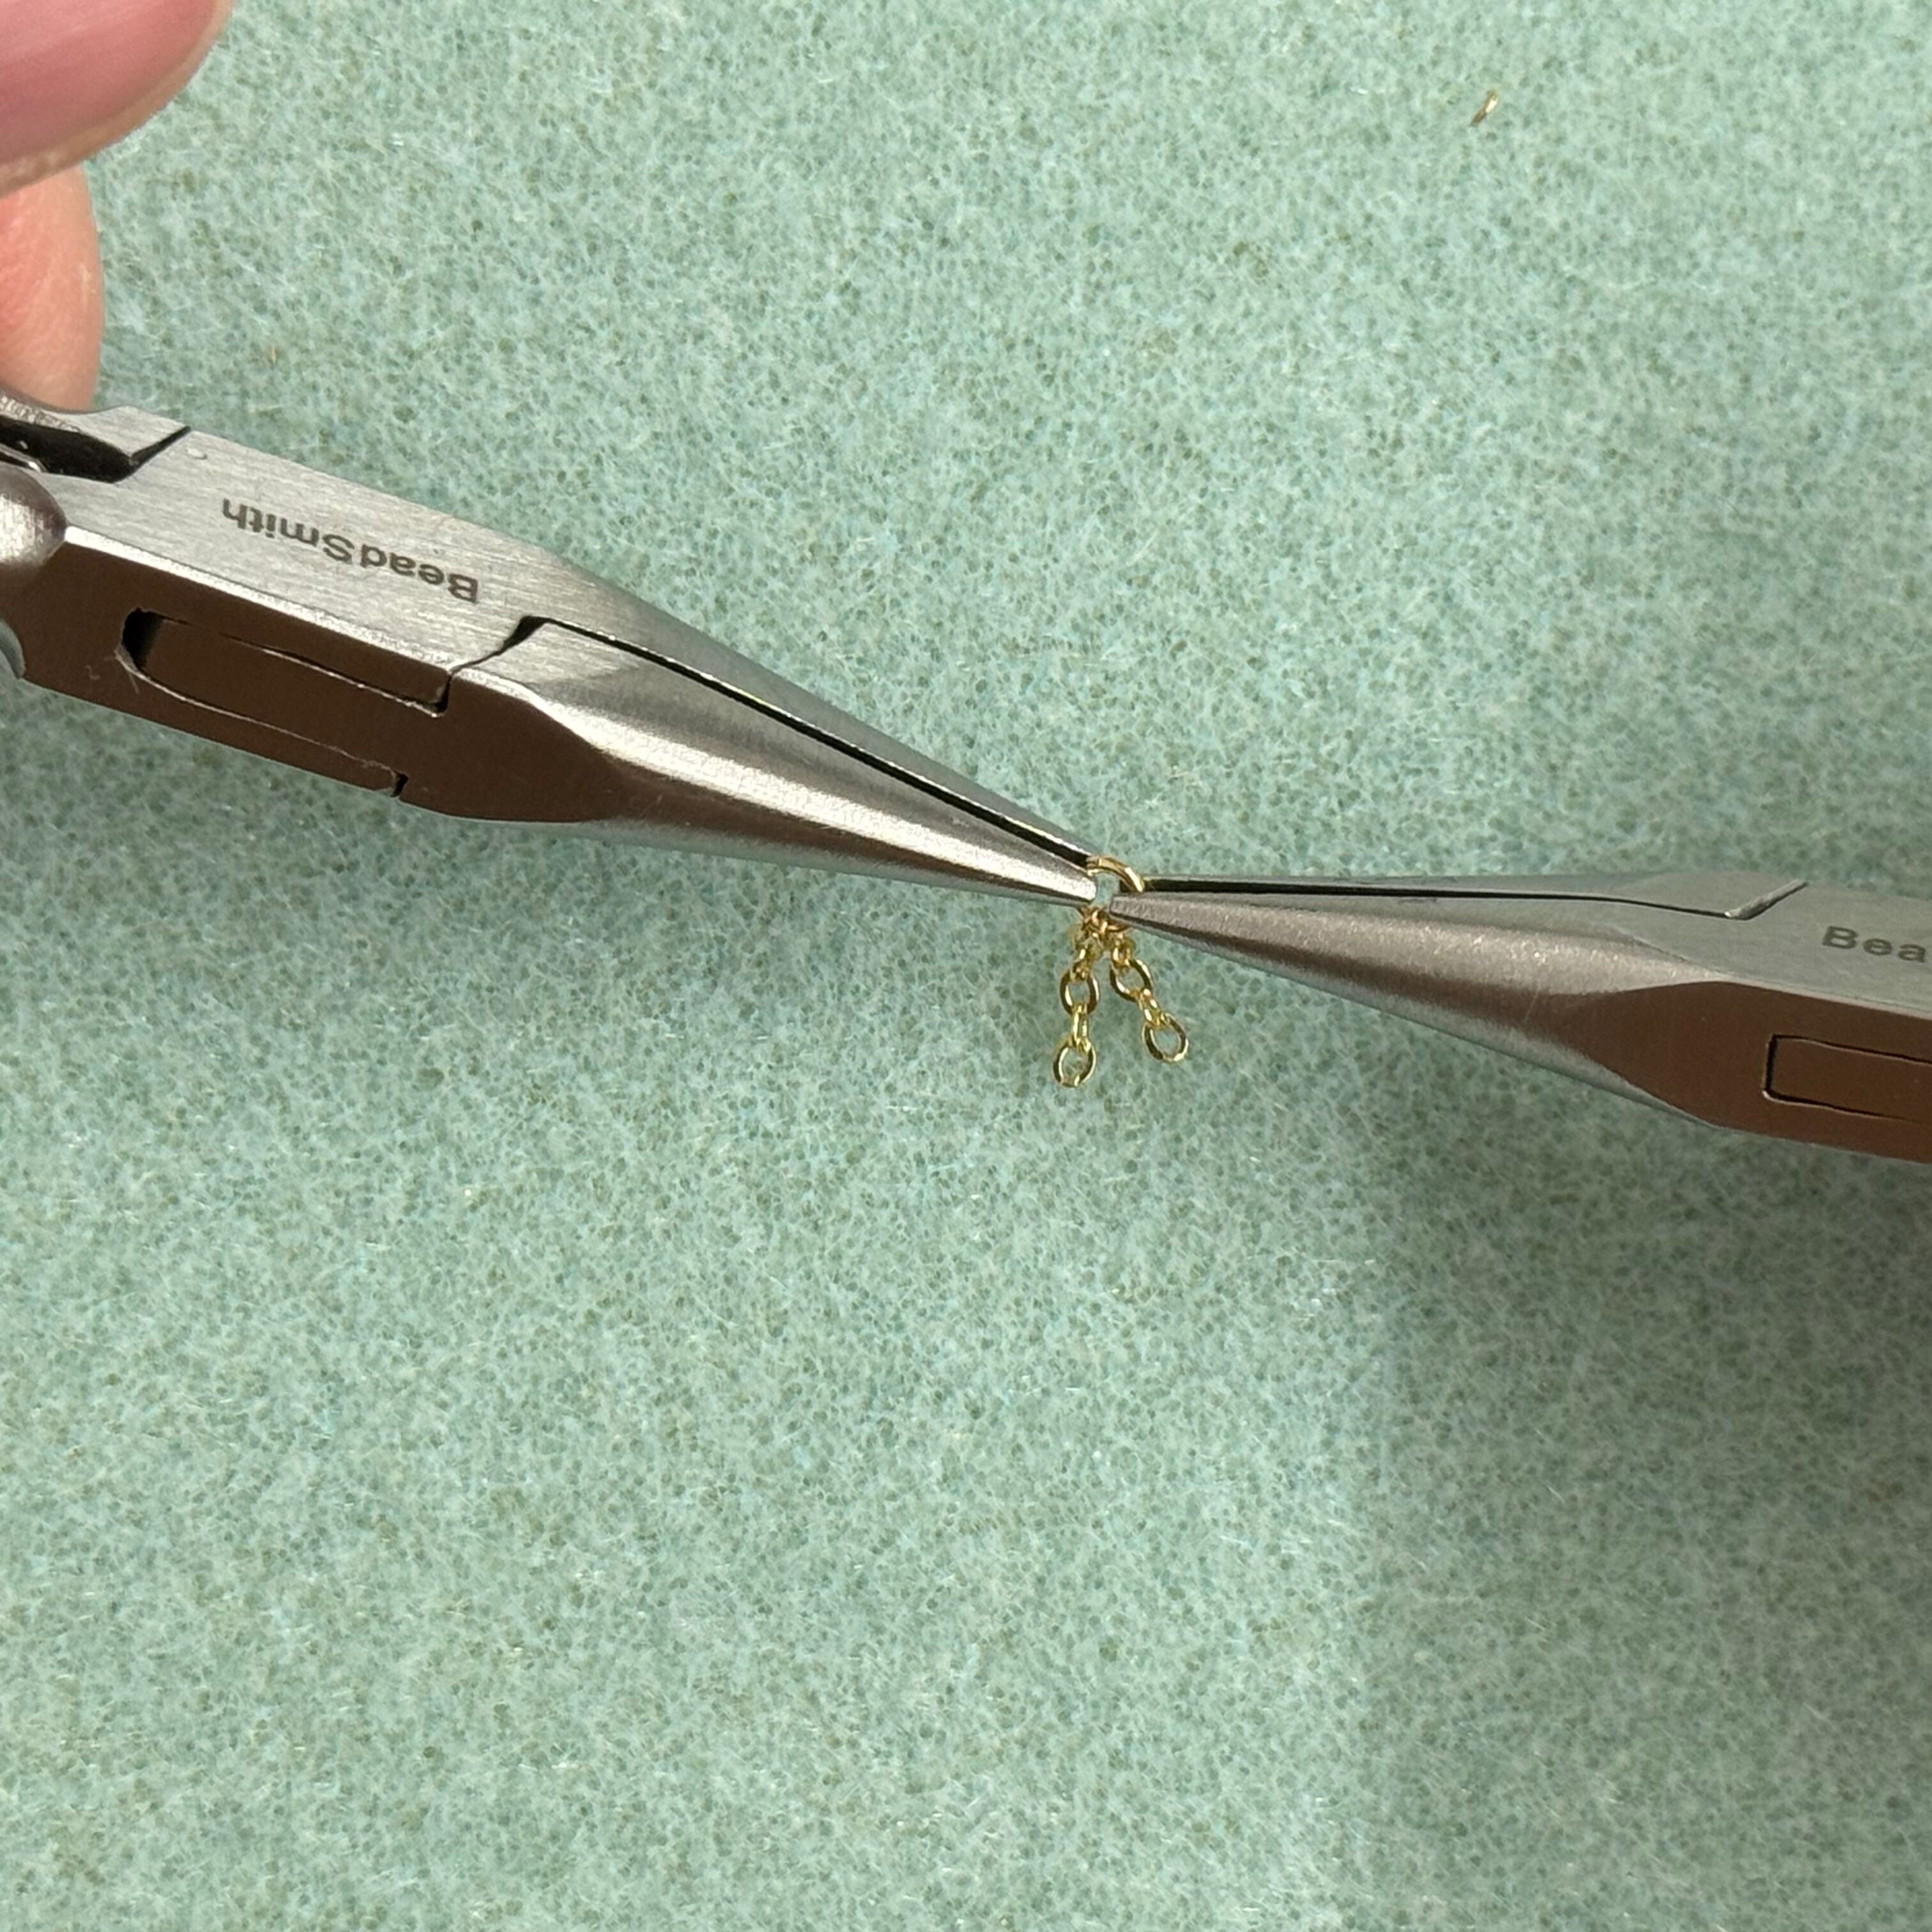
2. Open a 3mm jump ring and add 4 sections of chain. Close jump ring - traditionally, you would use a needle nose and flat nose pliers for closing and opening jump rings. But, with the size of this project, it is easier to use two needle nose pliers to accomplish opening, closing, and adding chain to such a dainty project.
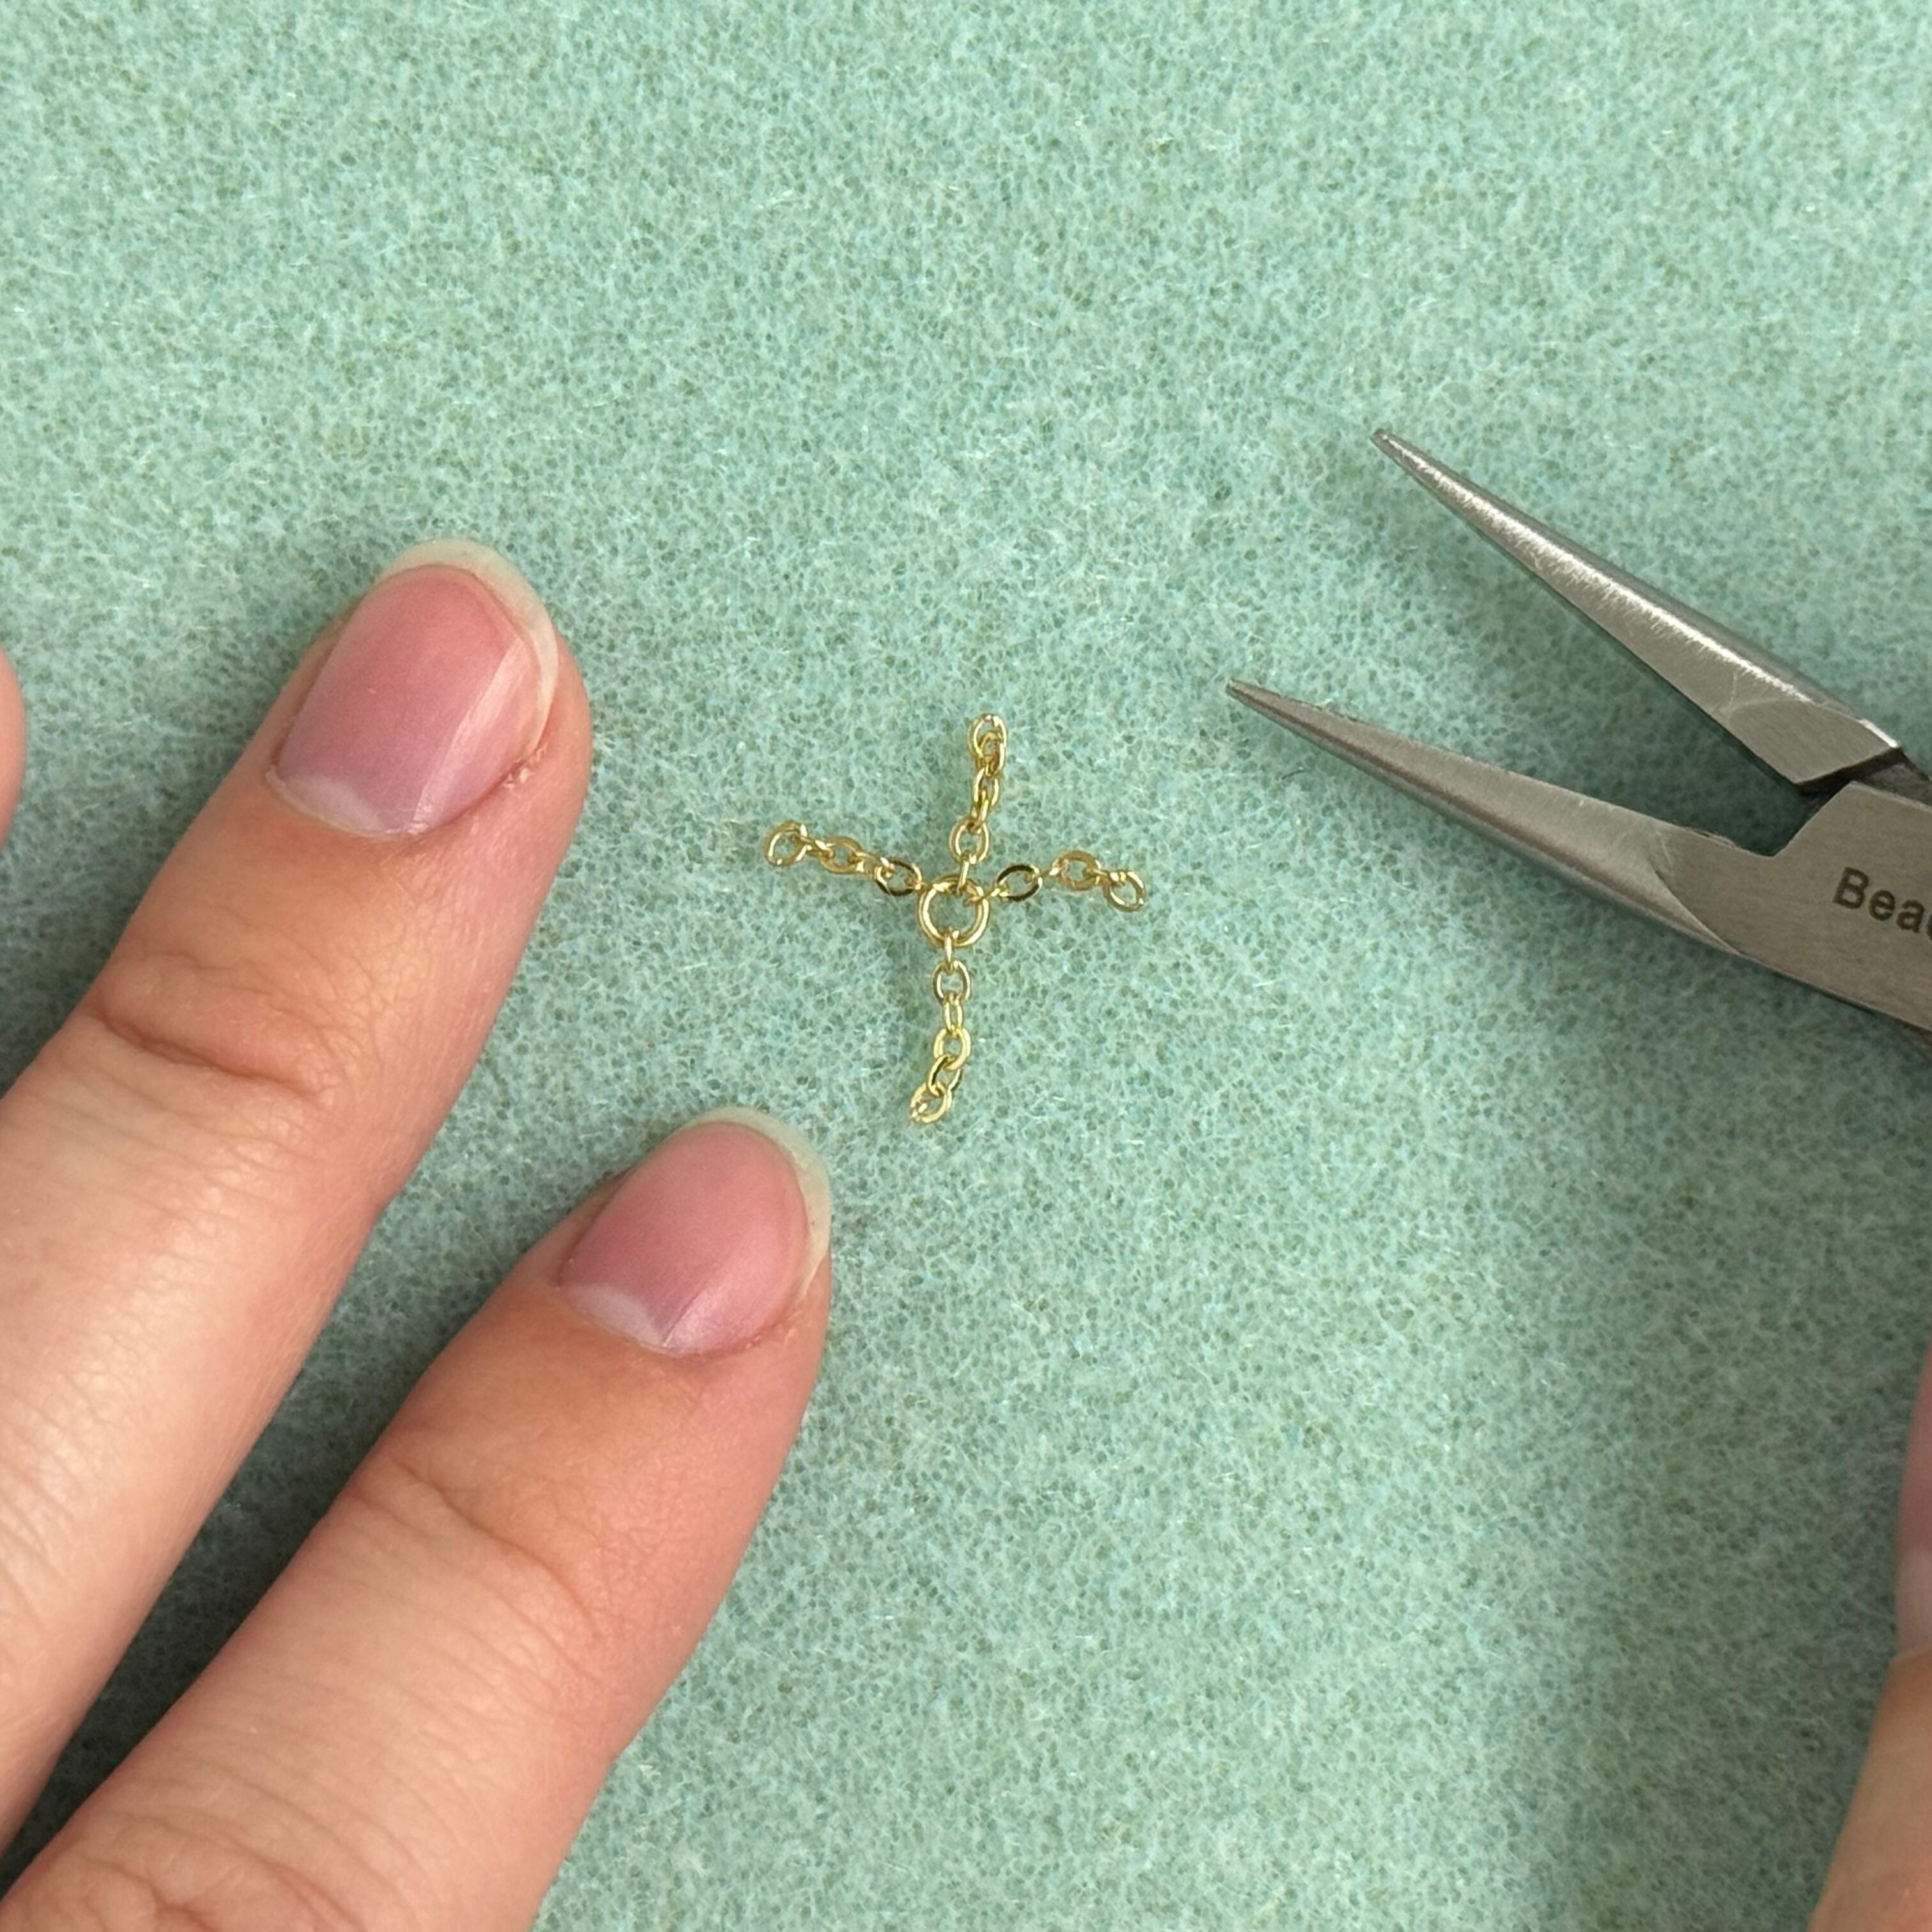
3. Once the jump ring is closed, spread your chain links like this.
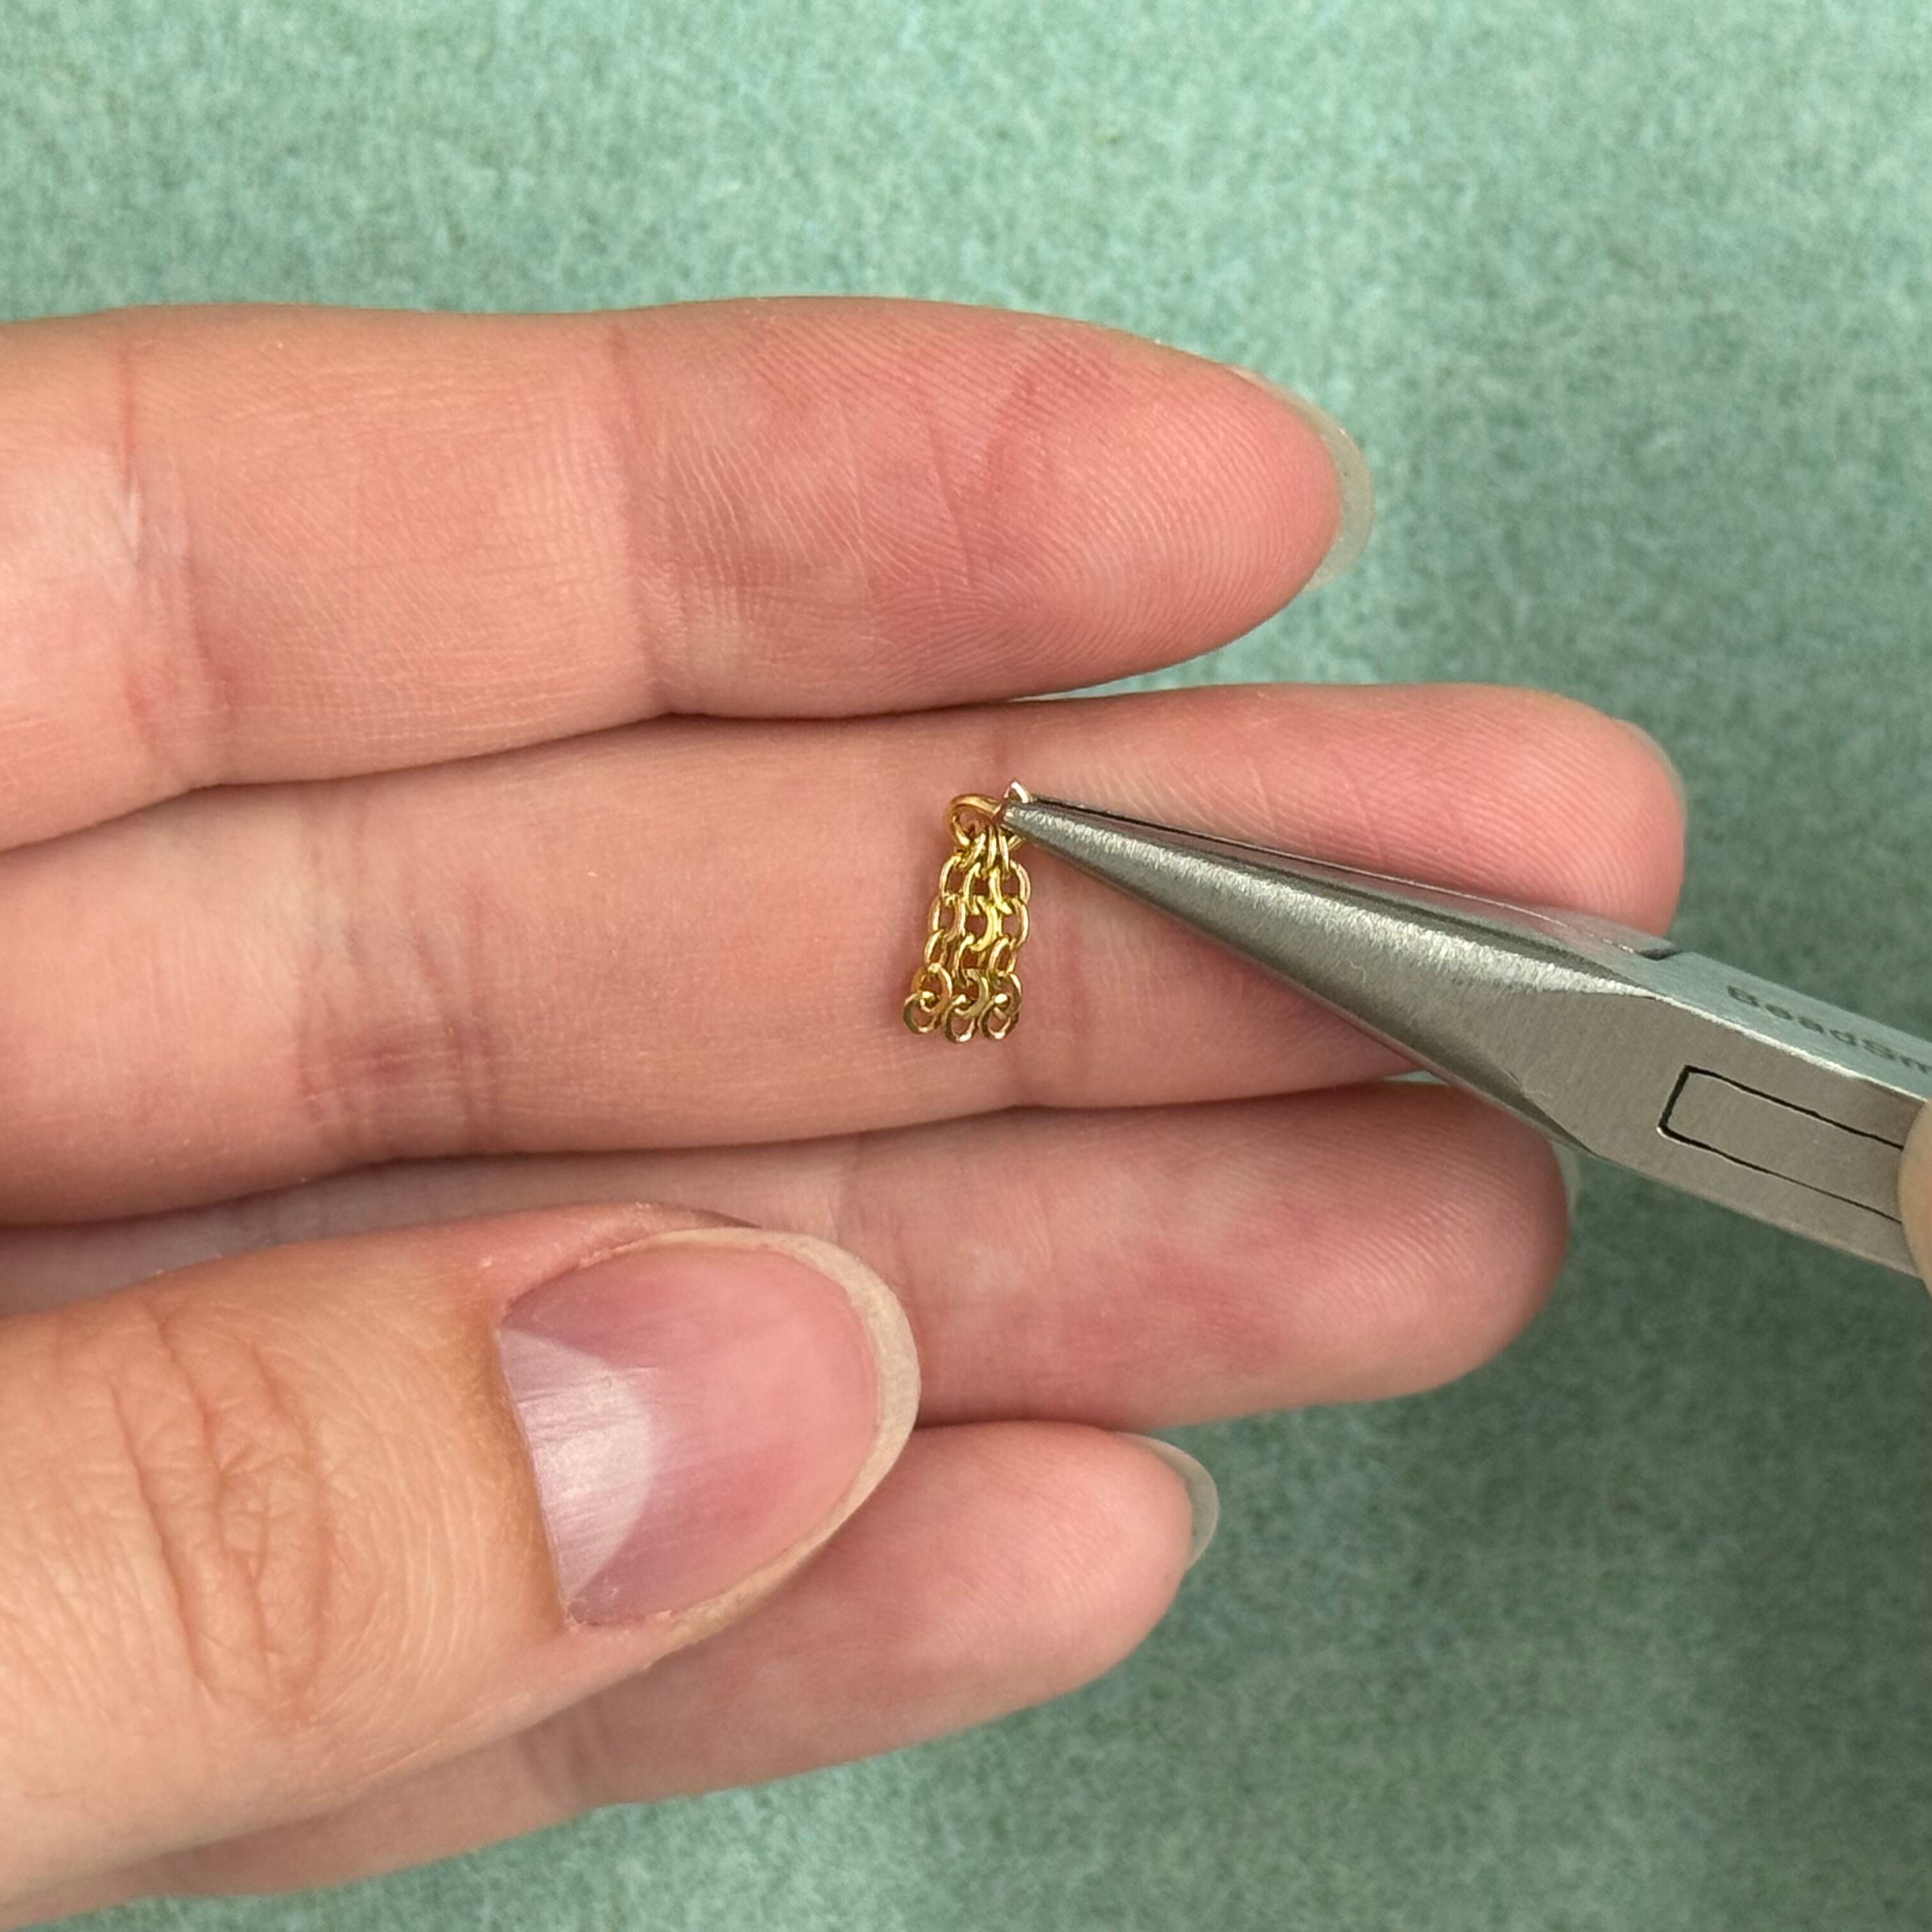
4. Open another jump ring and add 3 sections of chain - keep jump ring open for next step
5. Add on one of the links (any of them) of the jump ring containing 4 sections of chain, to the open jump ring from the previous step, close the jump ring
6. Your project will look like this
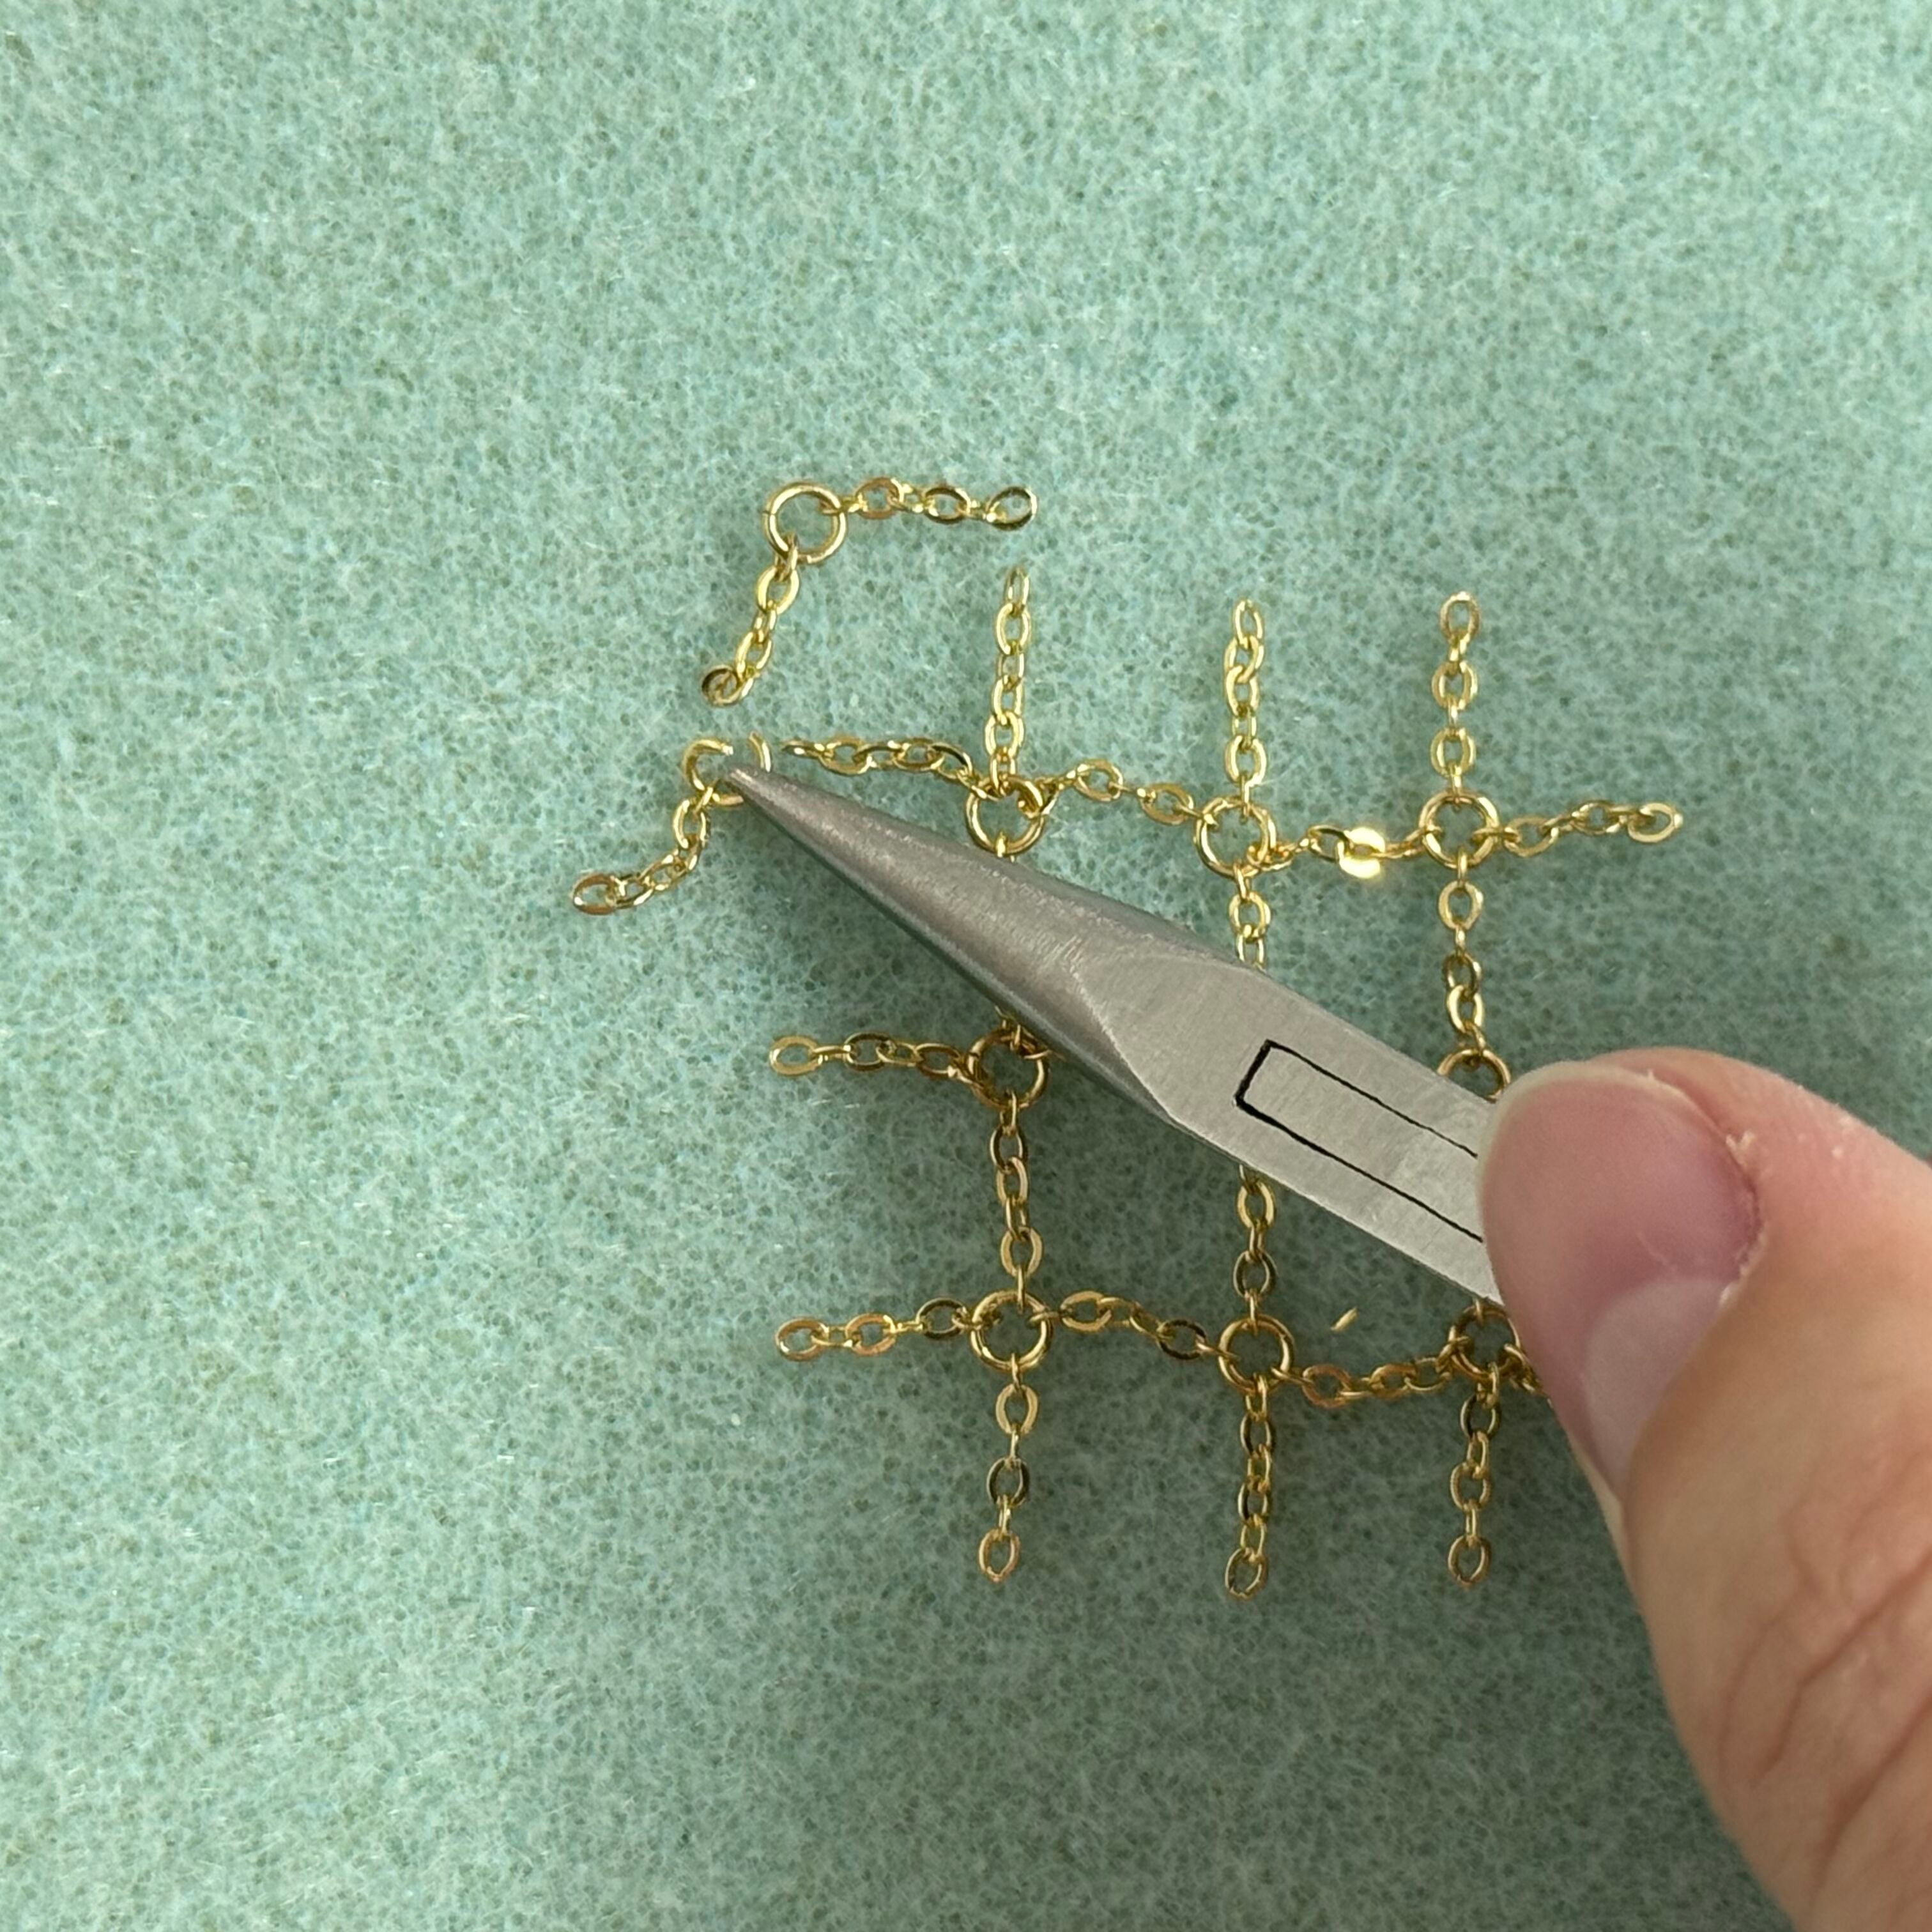
7. Open another jump ring and add 3 sections of chain - connect to the section of chain shown in the photo. Close the jump ring
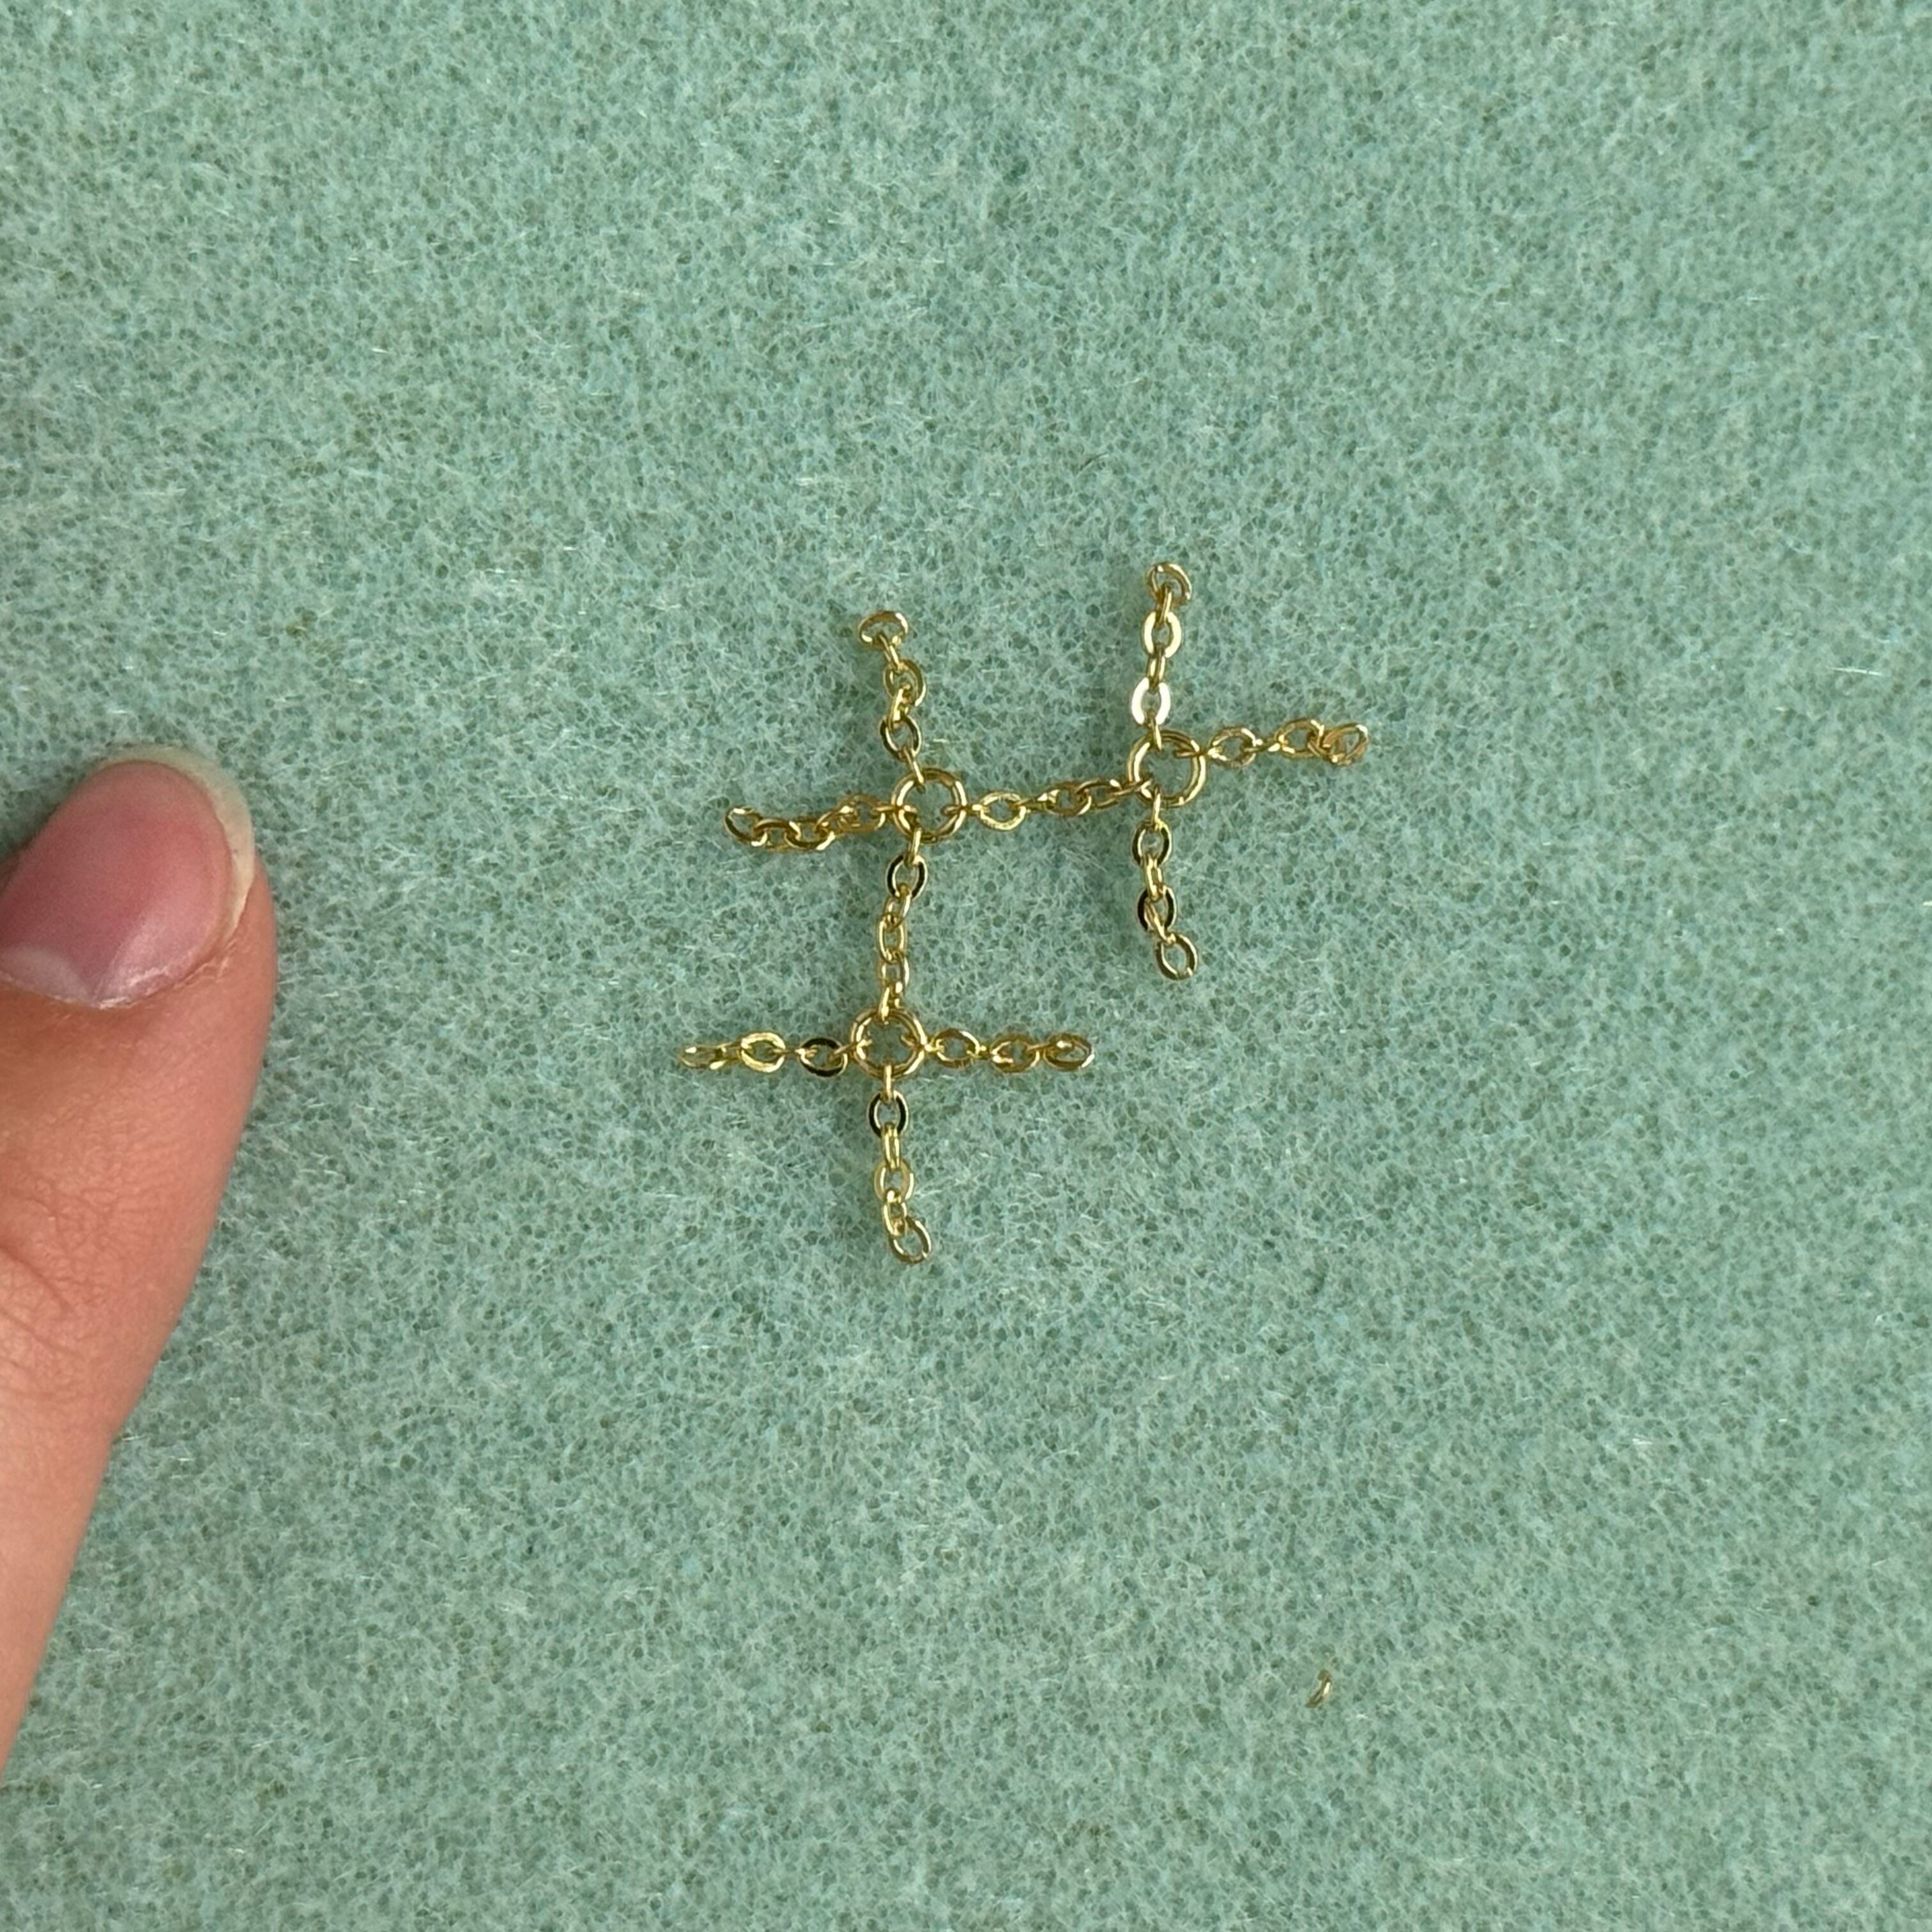
8. Your project will look like this.
**I find it helps to lay your project flat after each addition, this helps with making sure the chain doesn't get tangled together
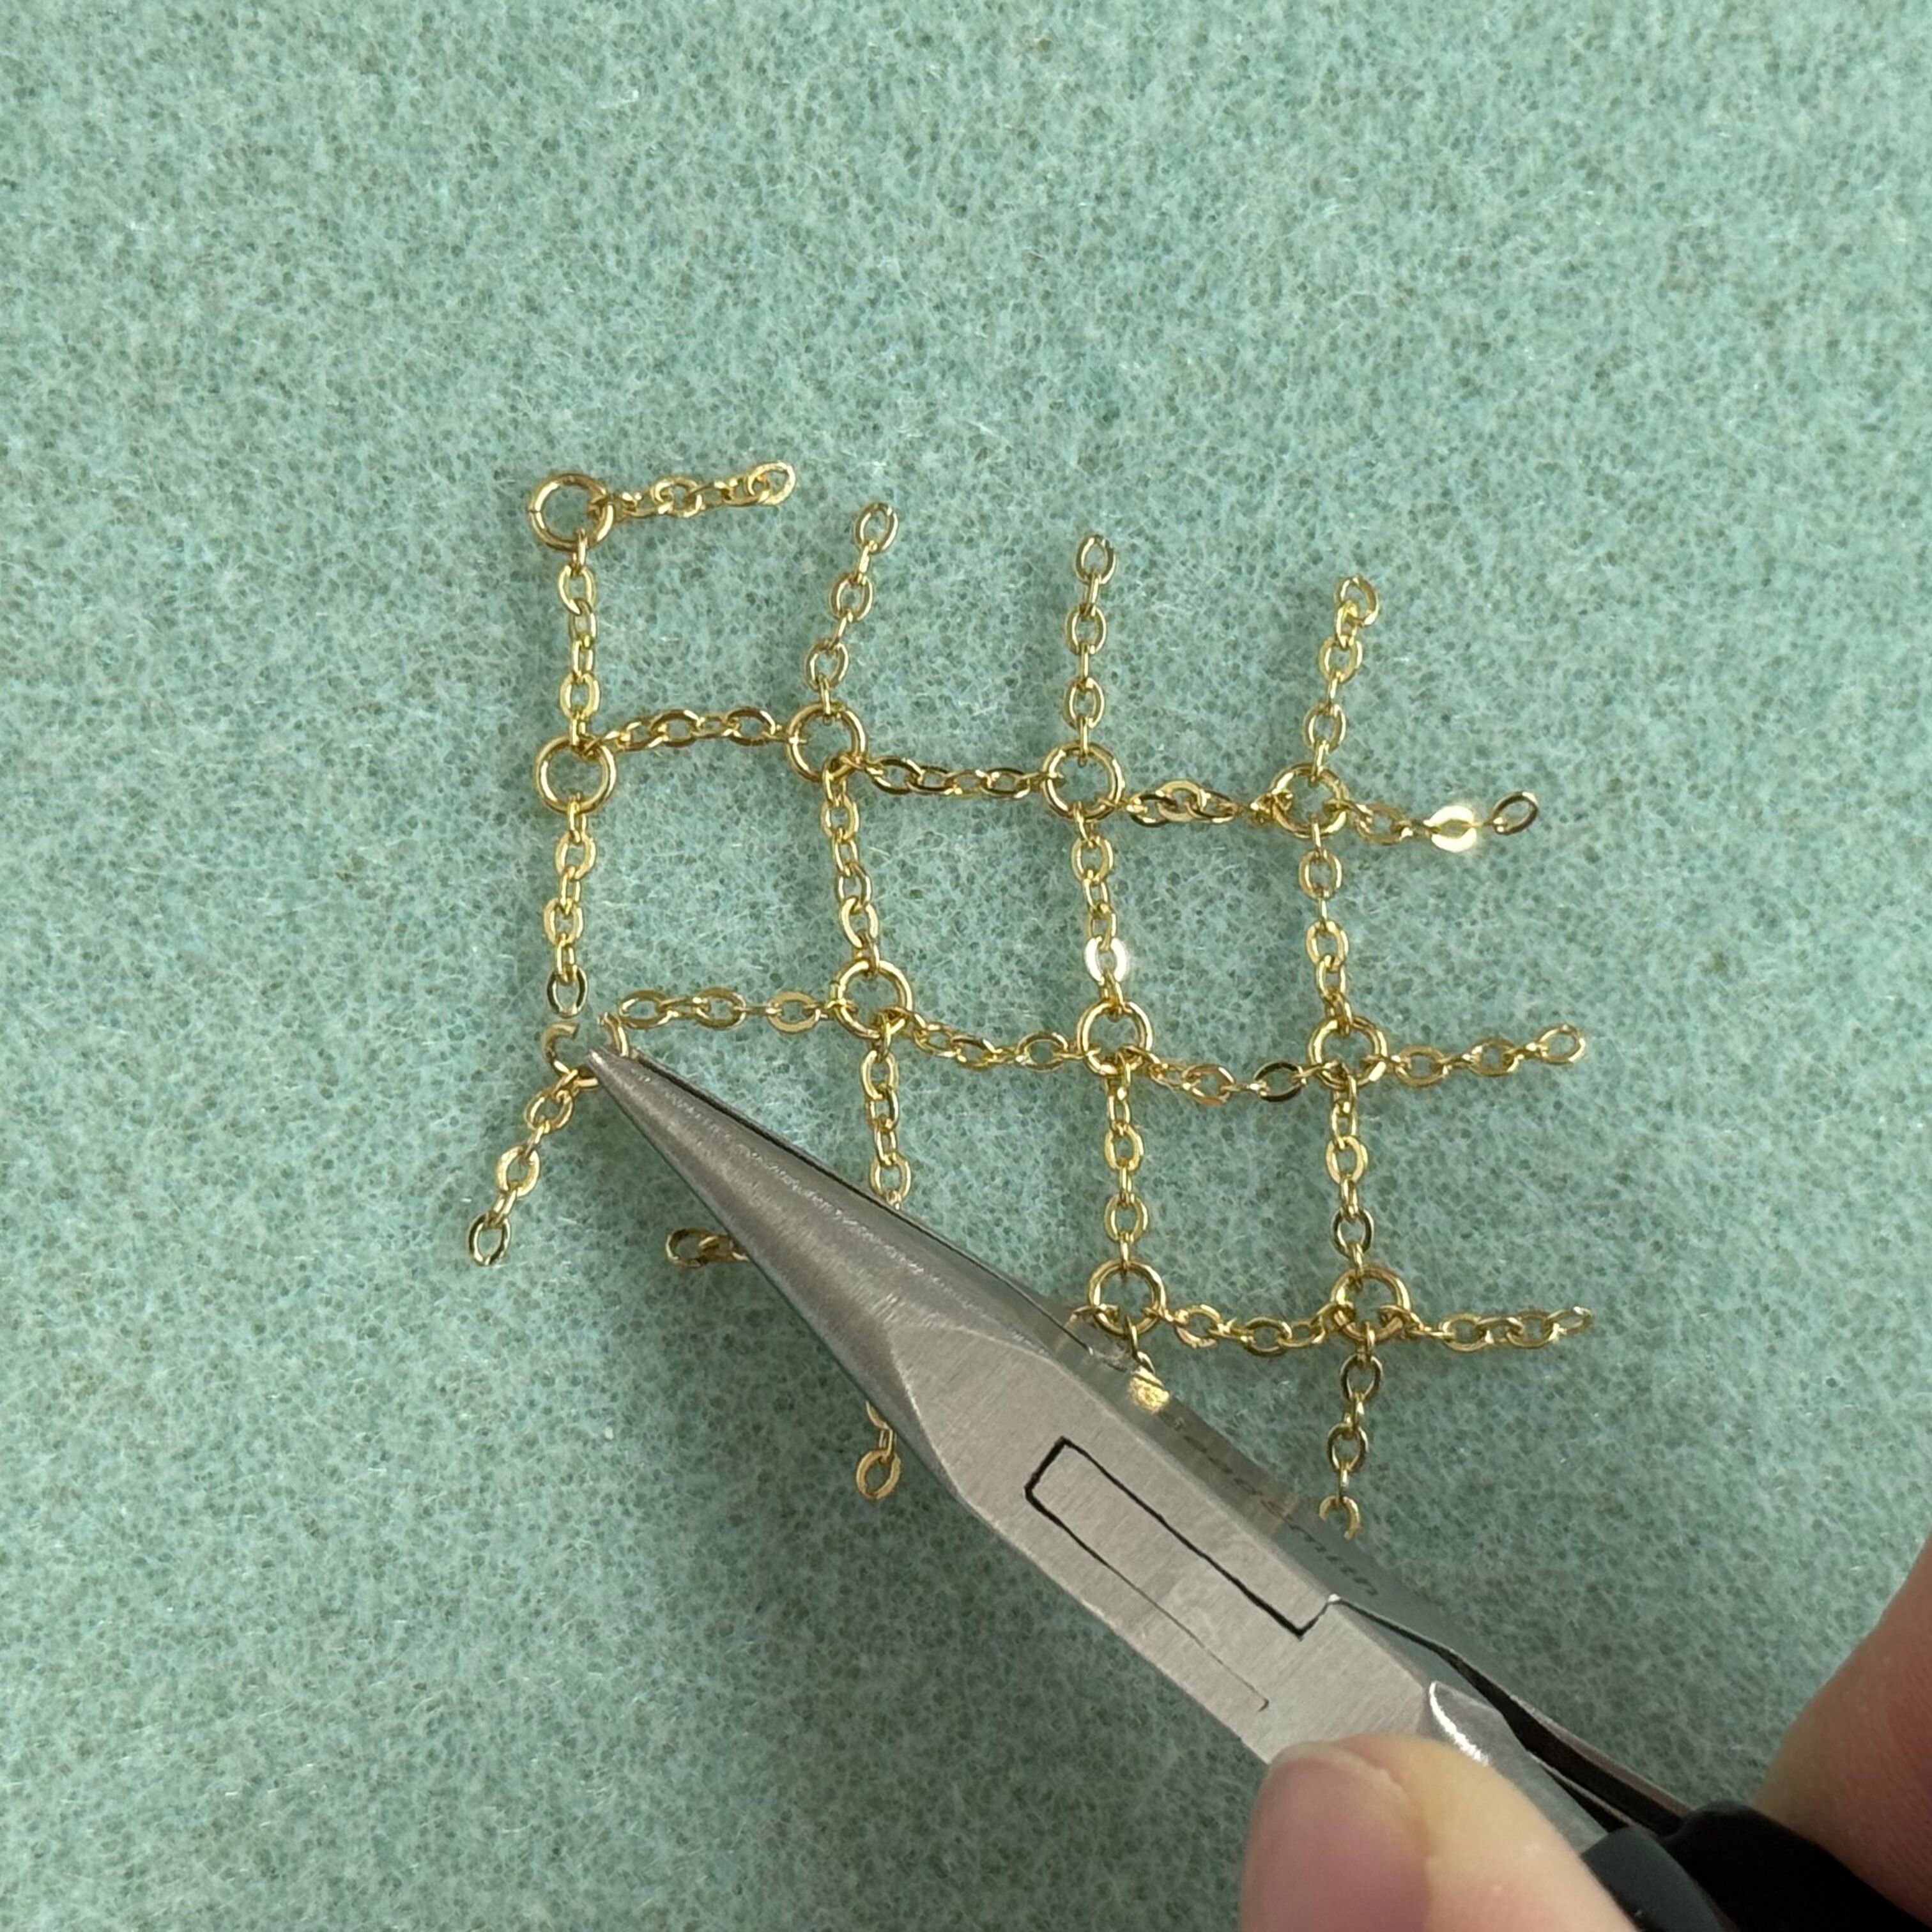
9. Open another jump ring and add 3 sections of chain - connect to the section of chain shown in the photo. Close the jump ring
10. Your project will look like this
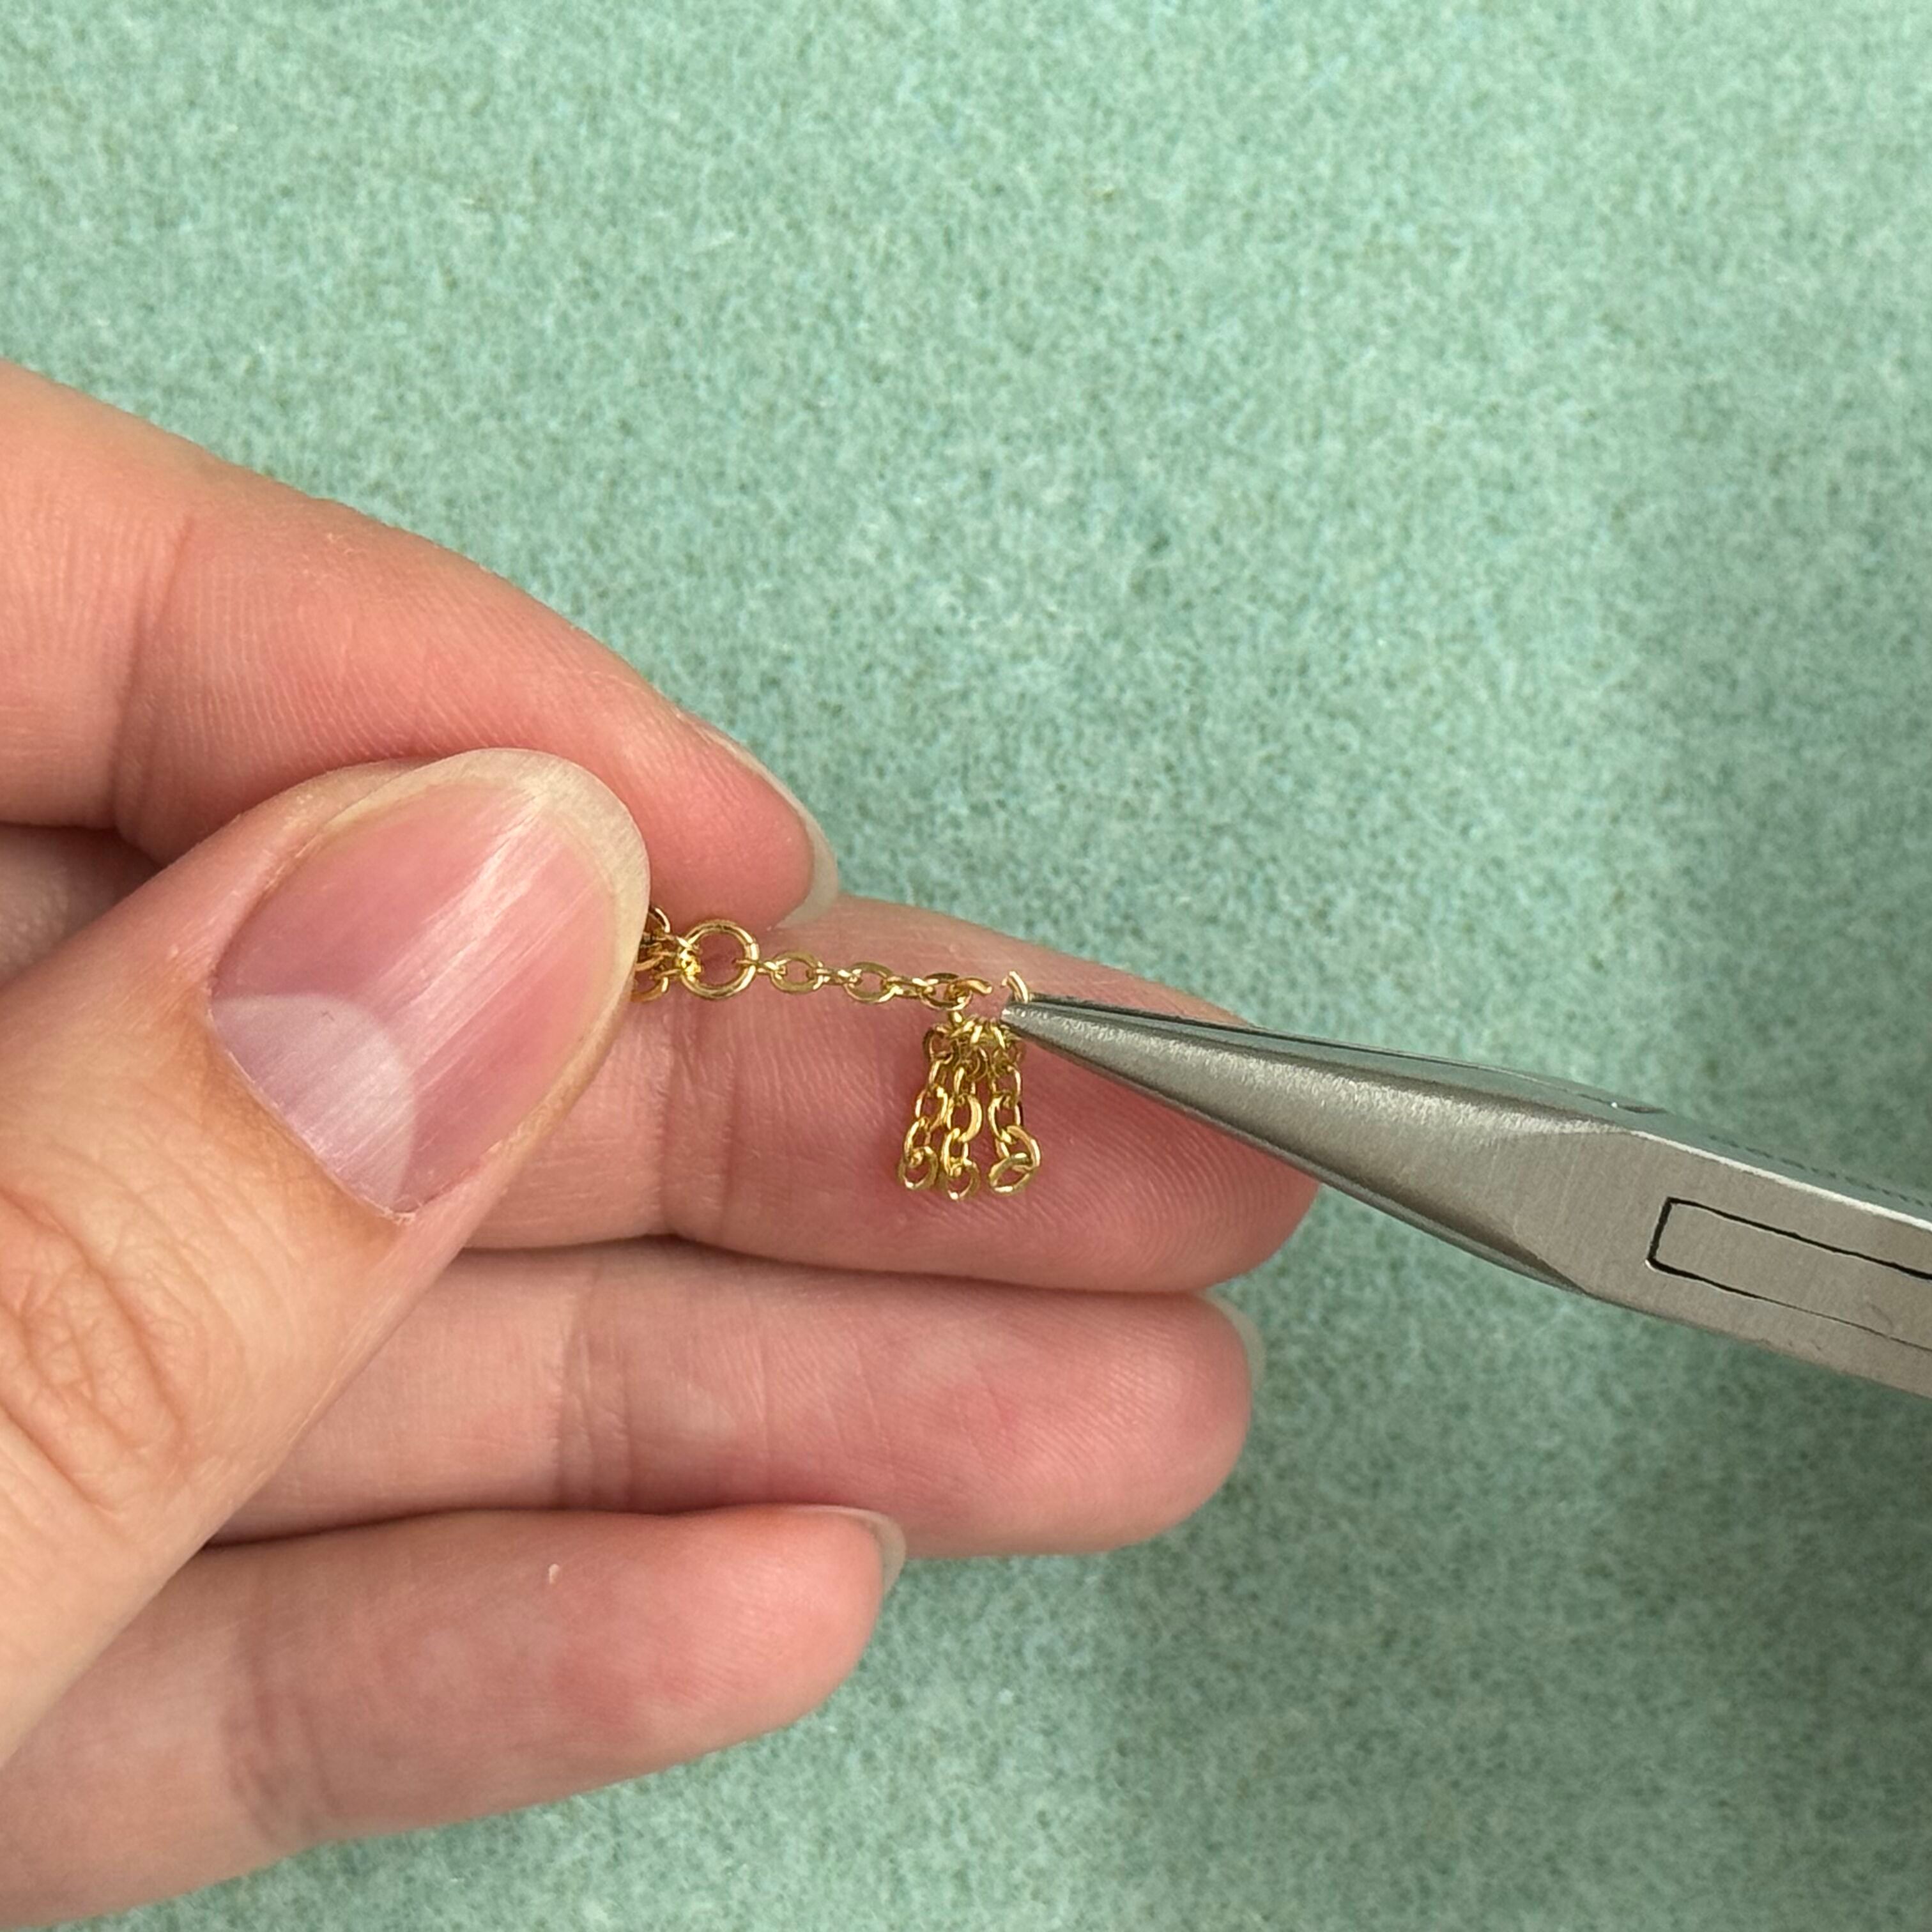
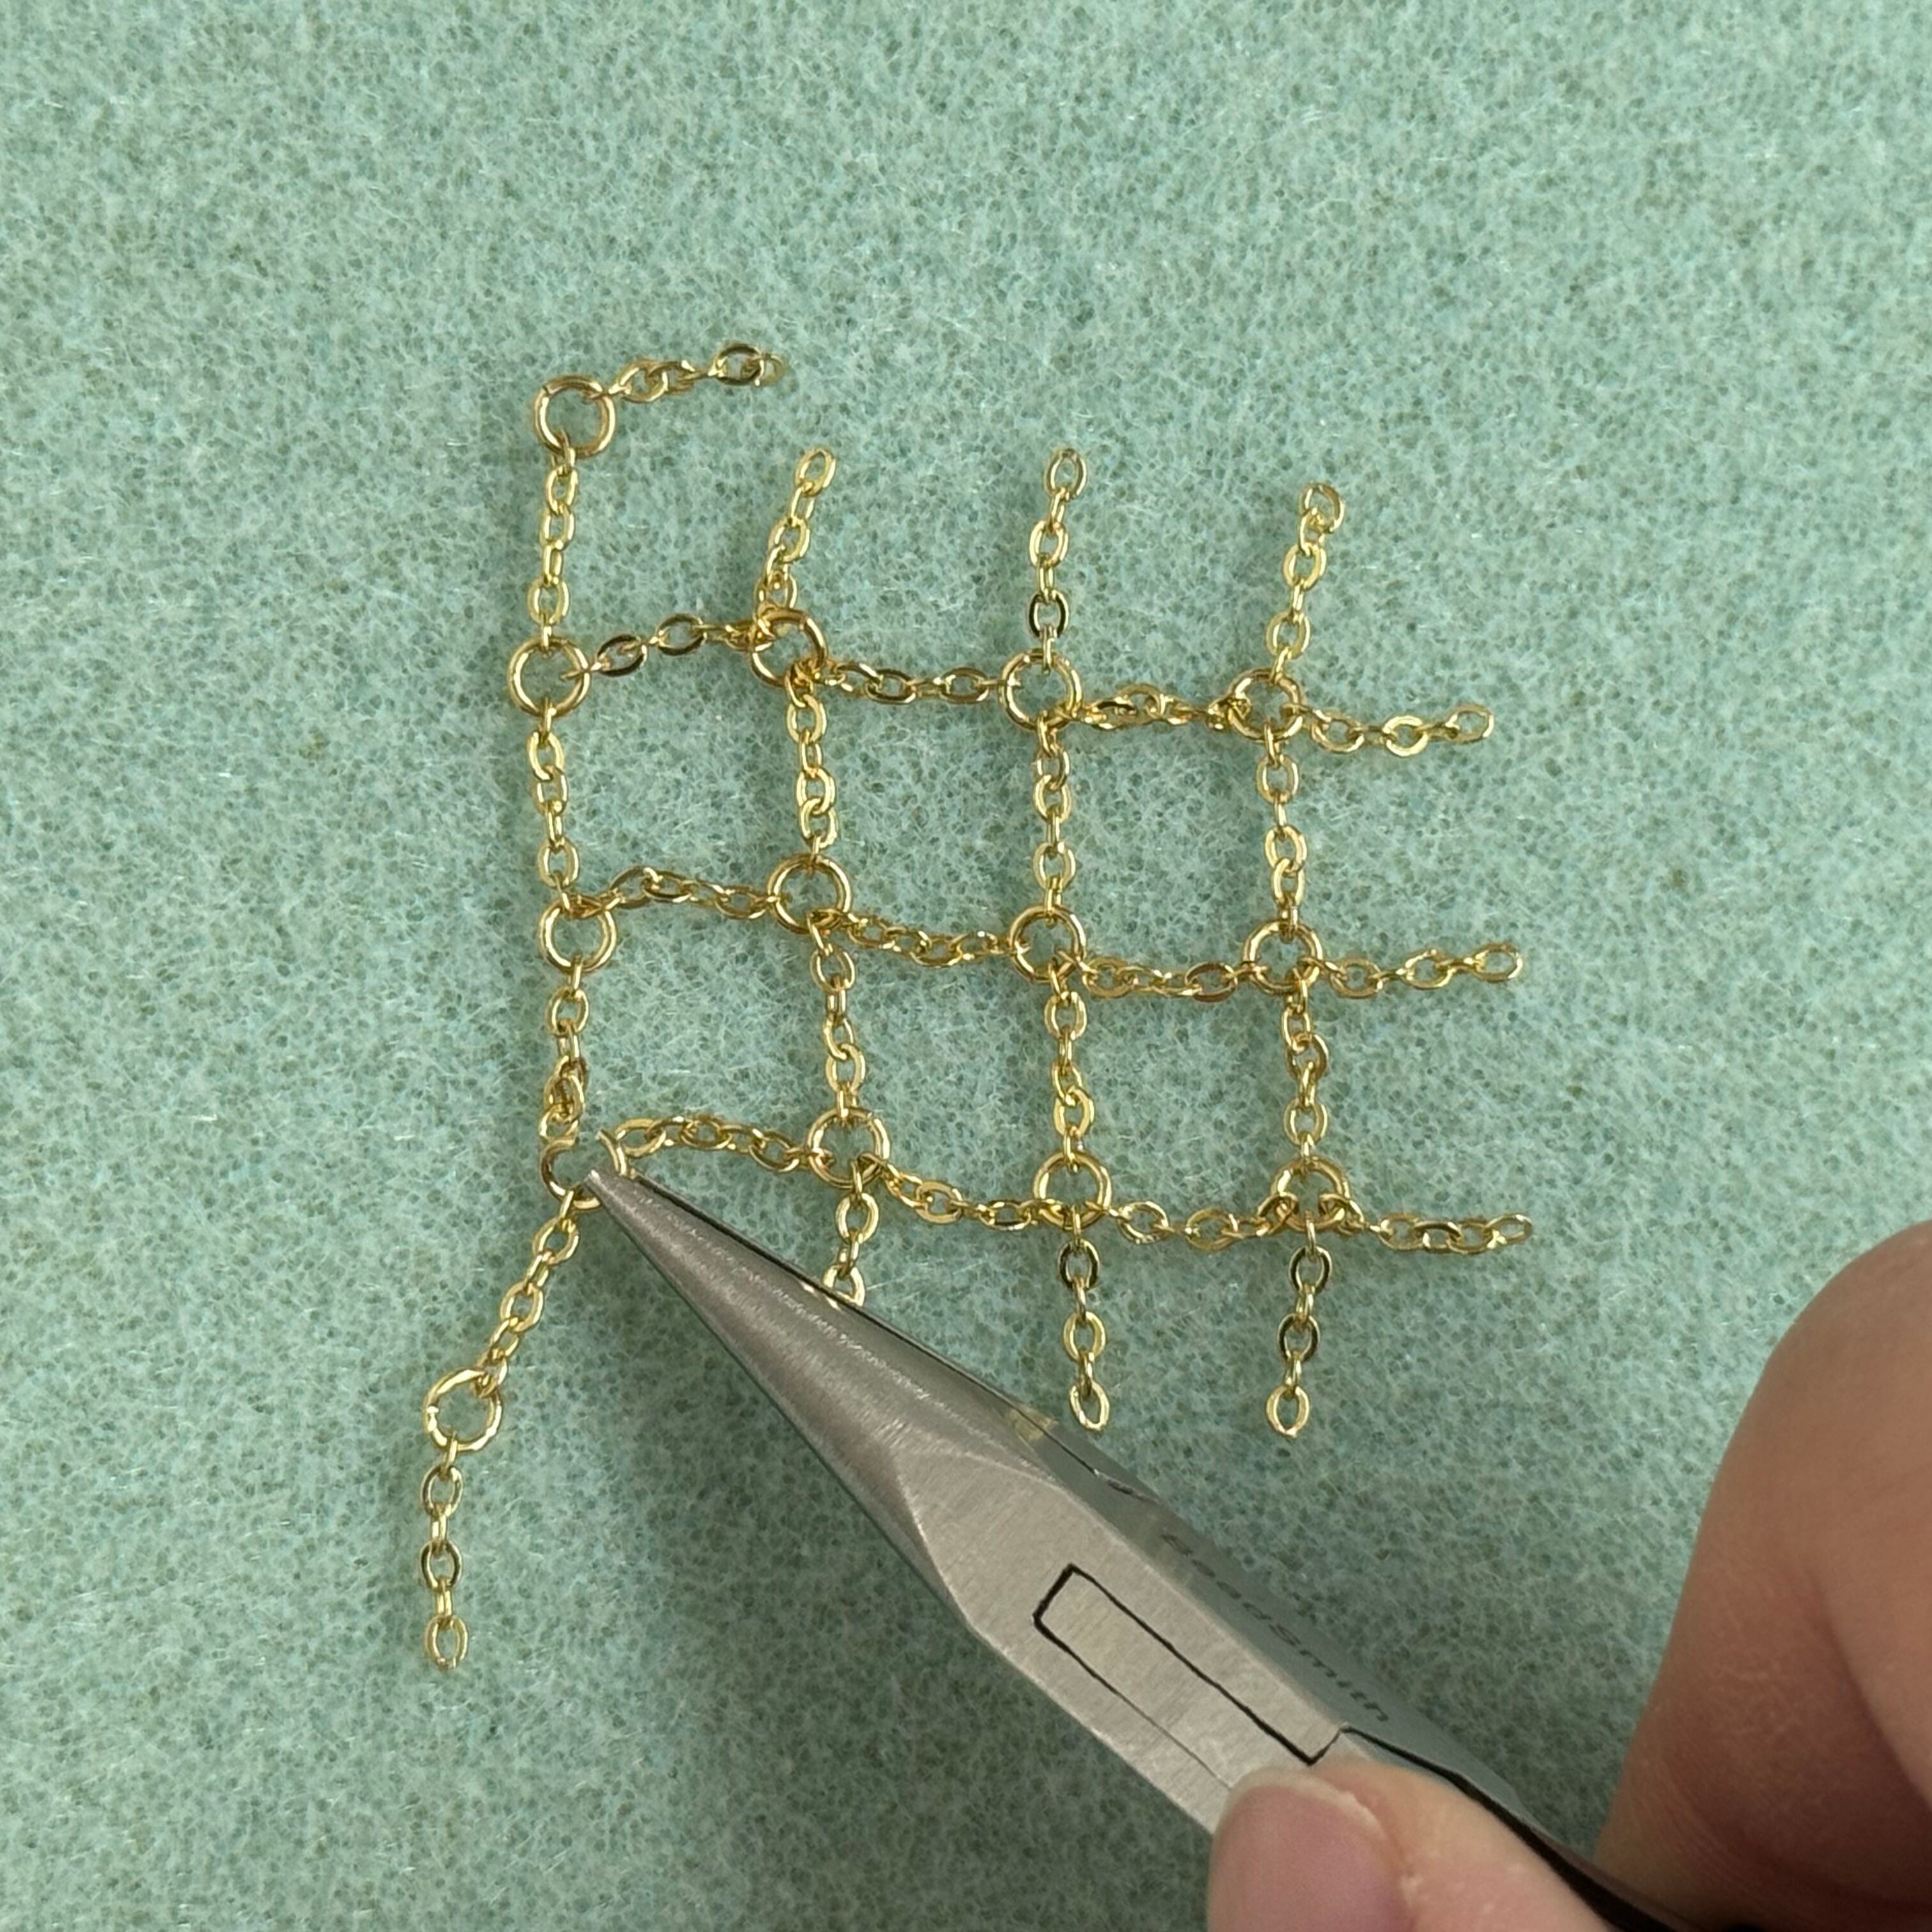
11. Open another jump ring and add 2 sections of chain - connect to the section of chain shown in the photo. Close the jump ring
12. Open another jump ring and add 2 sections of chain - connect to the section of chain shown in the photo. Close the jump ring
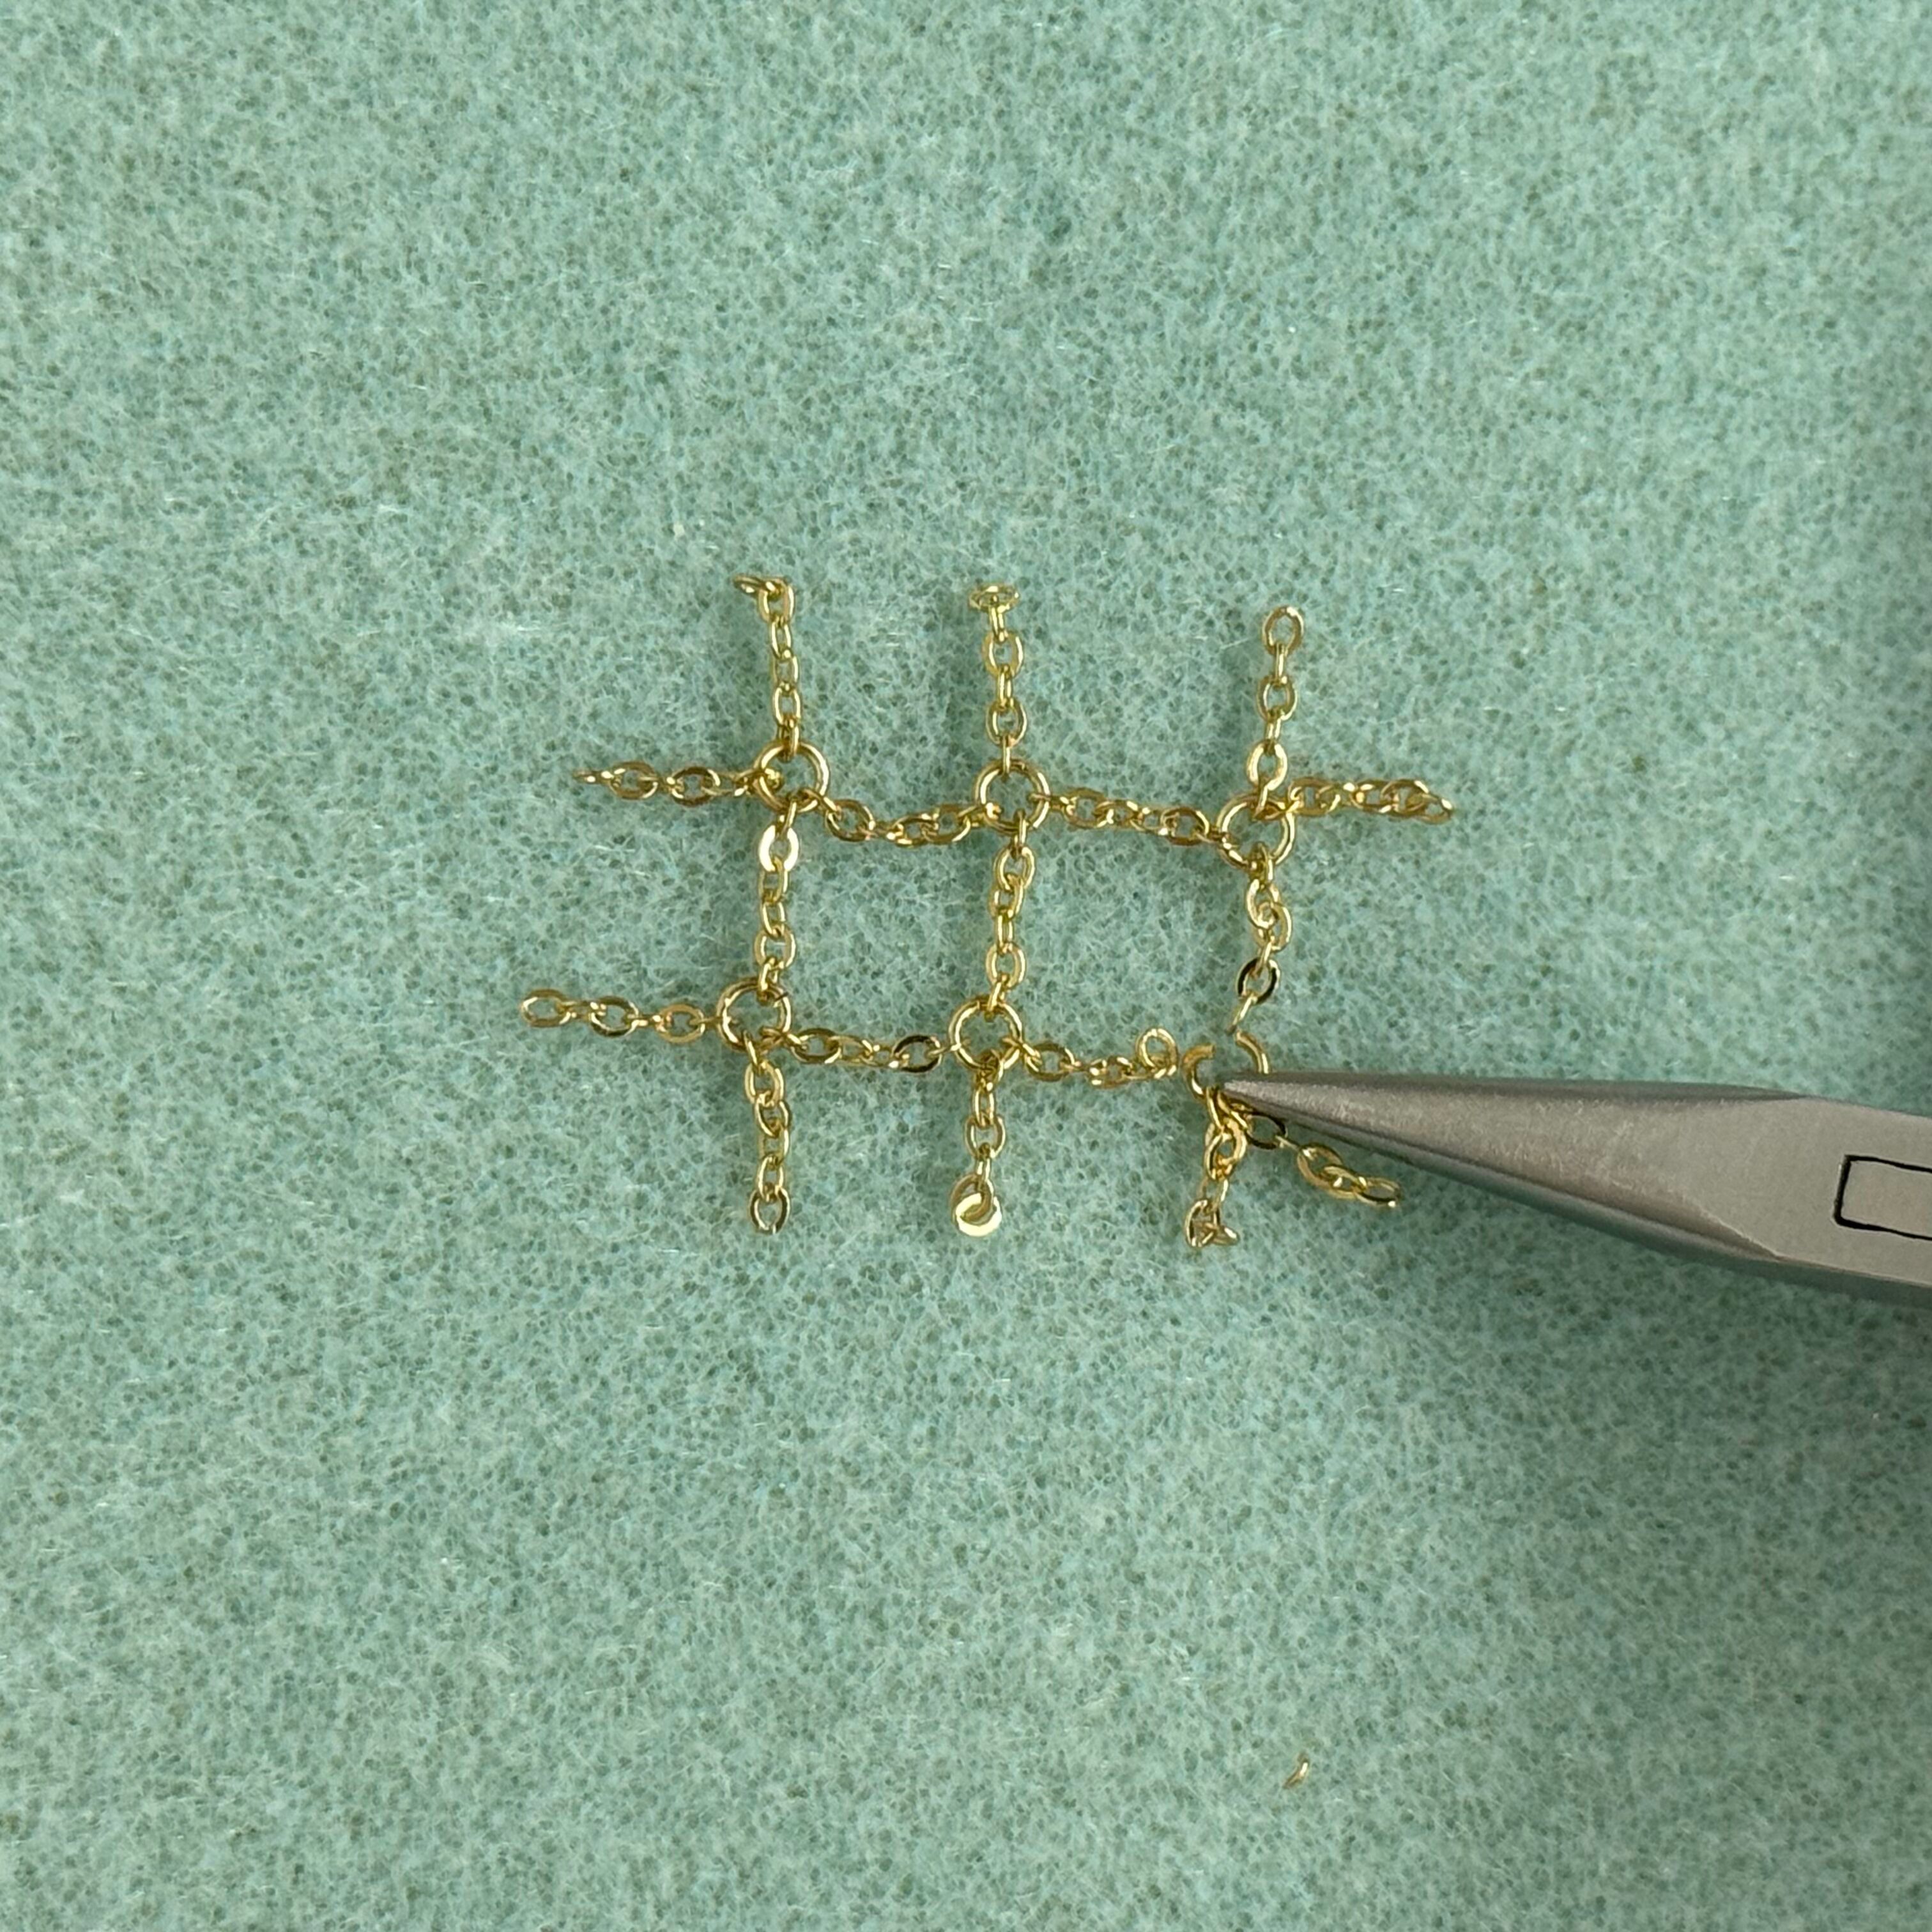
13. Open another jump ring and add 3 sections of chain - connect to the section of chain shown in the photo. Close the jump ring
14. Open another jump ring and add 3 sections of chain - connect to the section of chain shown in the photo. Close the jump ring
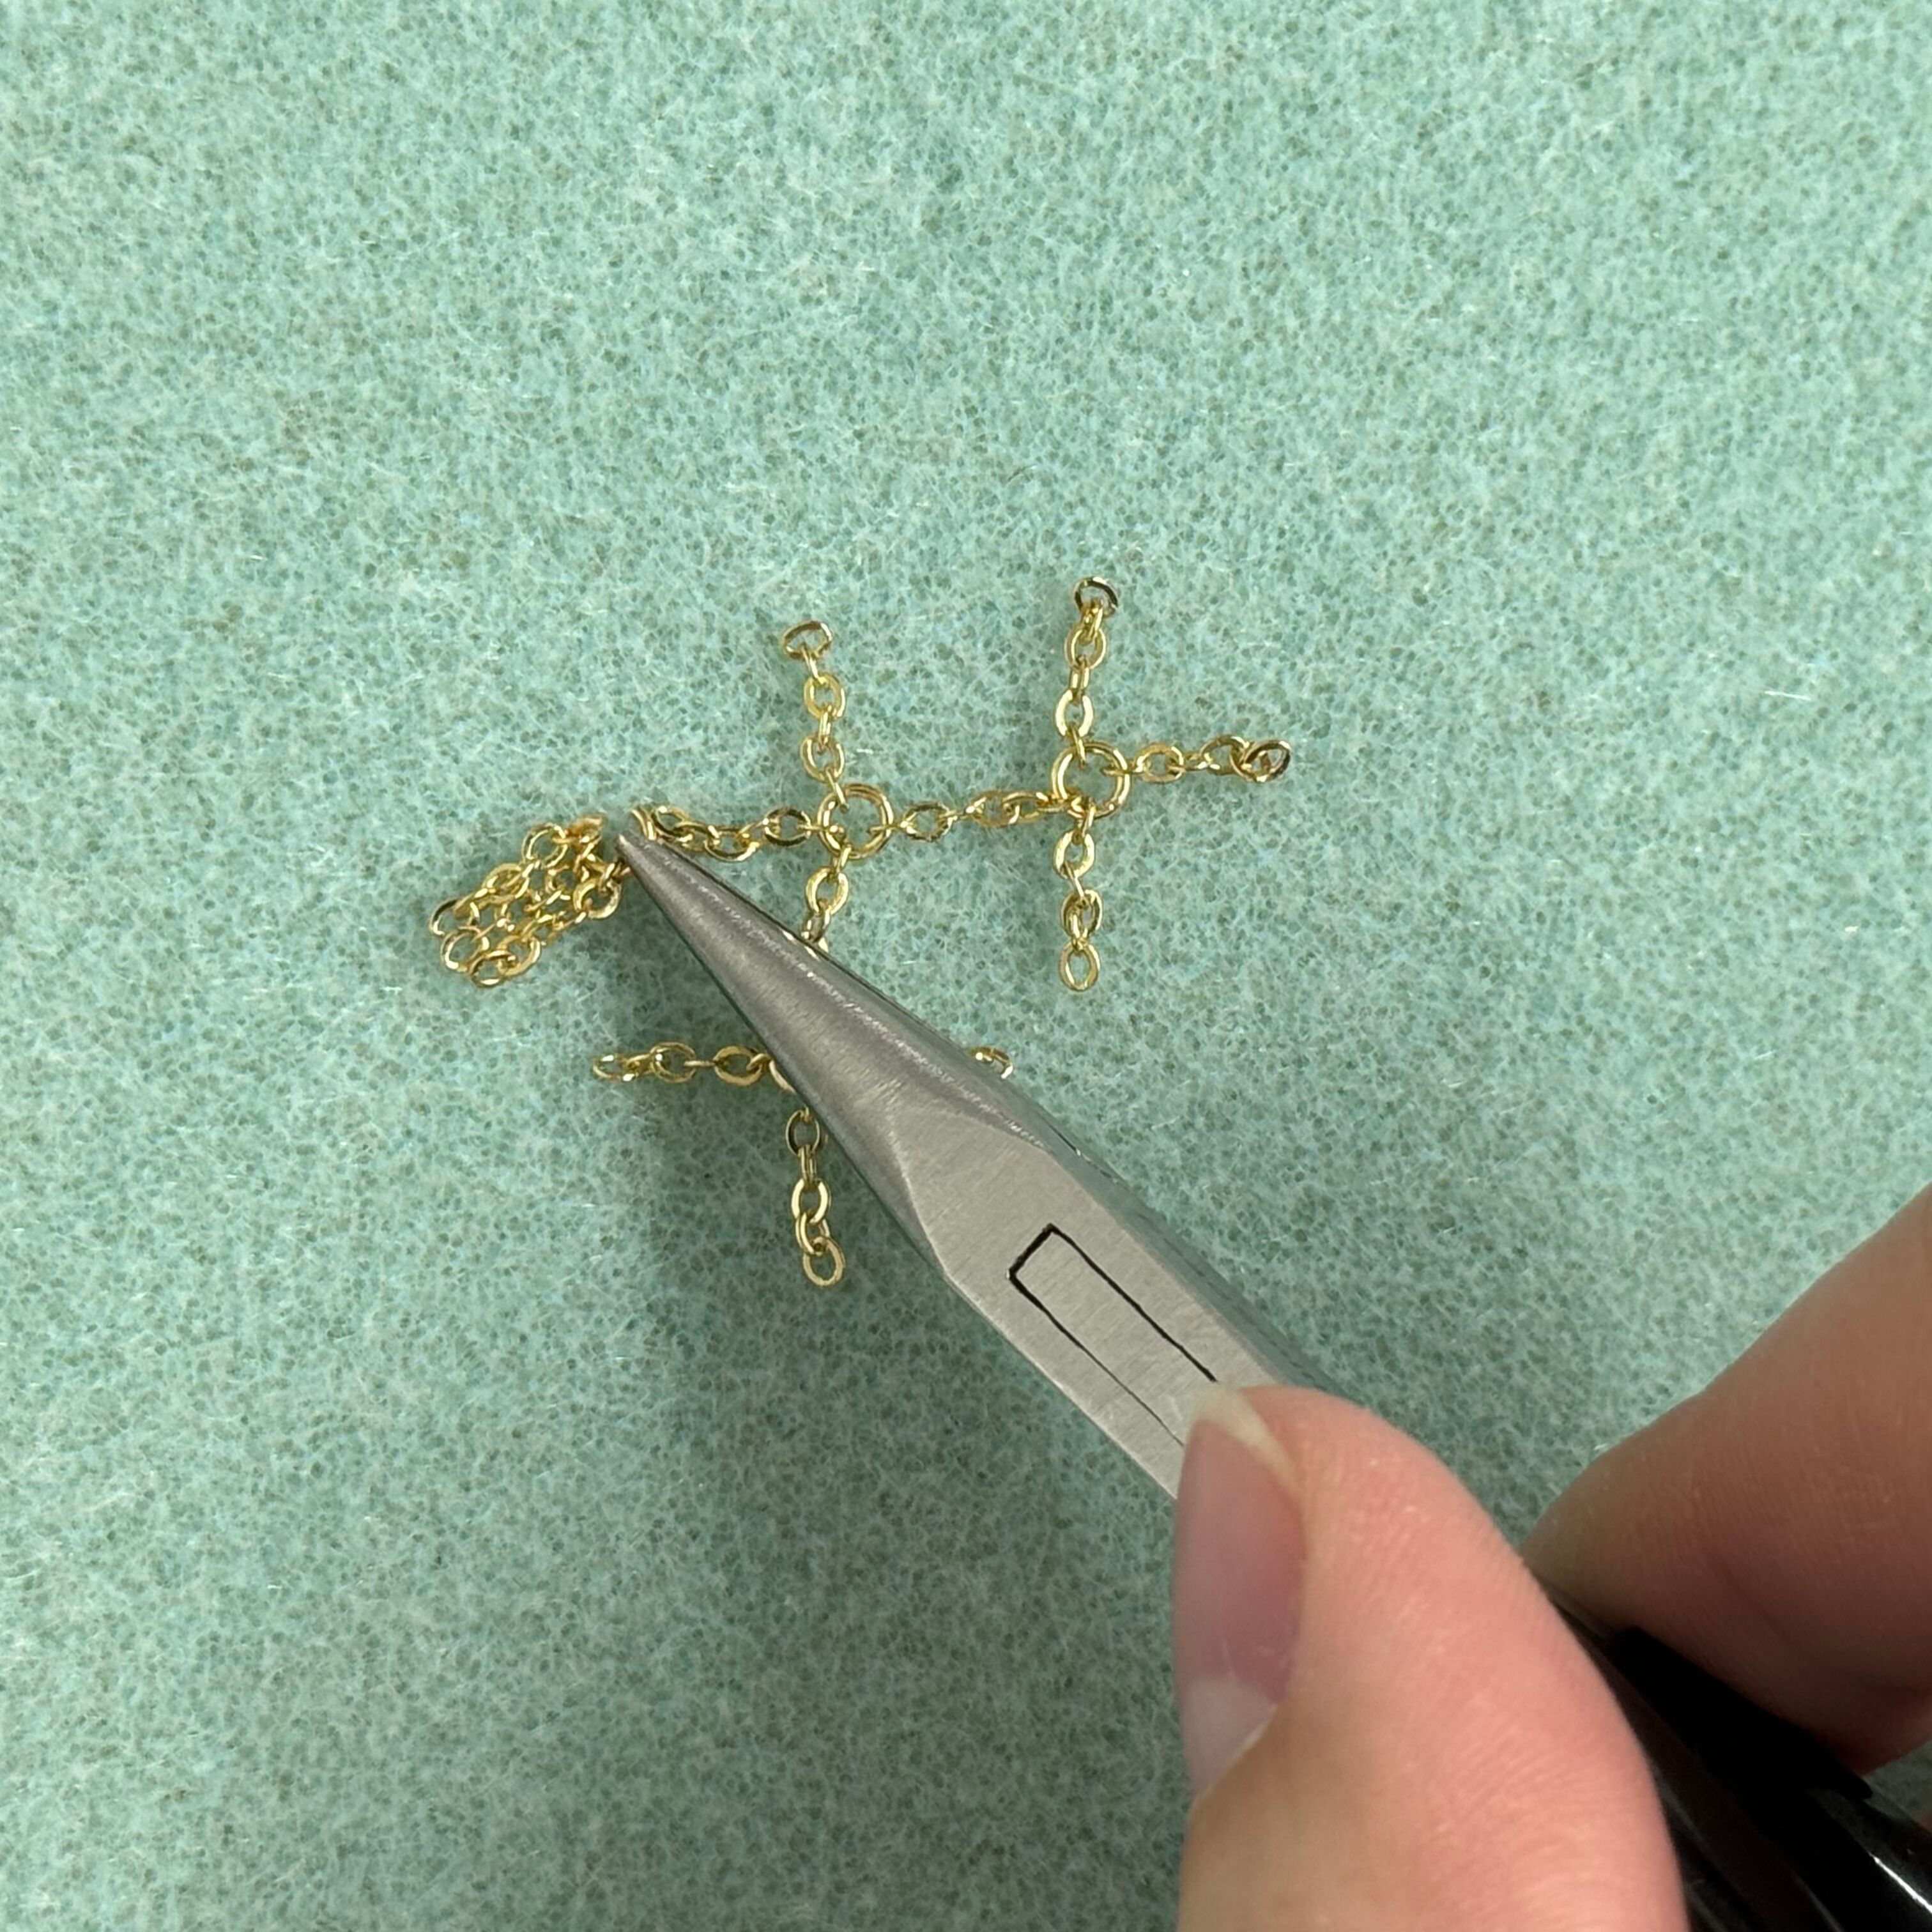
15. Open another jump ring and add 1 section of chain - connect it to the 3 sections of chain shown in the picture. ** Keep the chain sections in the same positions or they will get tangled
16. Add 2 sections of chain onto a jump ring and close
17. Position the sections of chain from step 16 like this, then open another jump ring, add 1 section of chain and connect it to the 2 sections shown in the picture
18. Open another jump ring, add 1 section of chain and connect it to the 2 sections shown in the picture
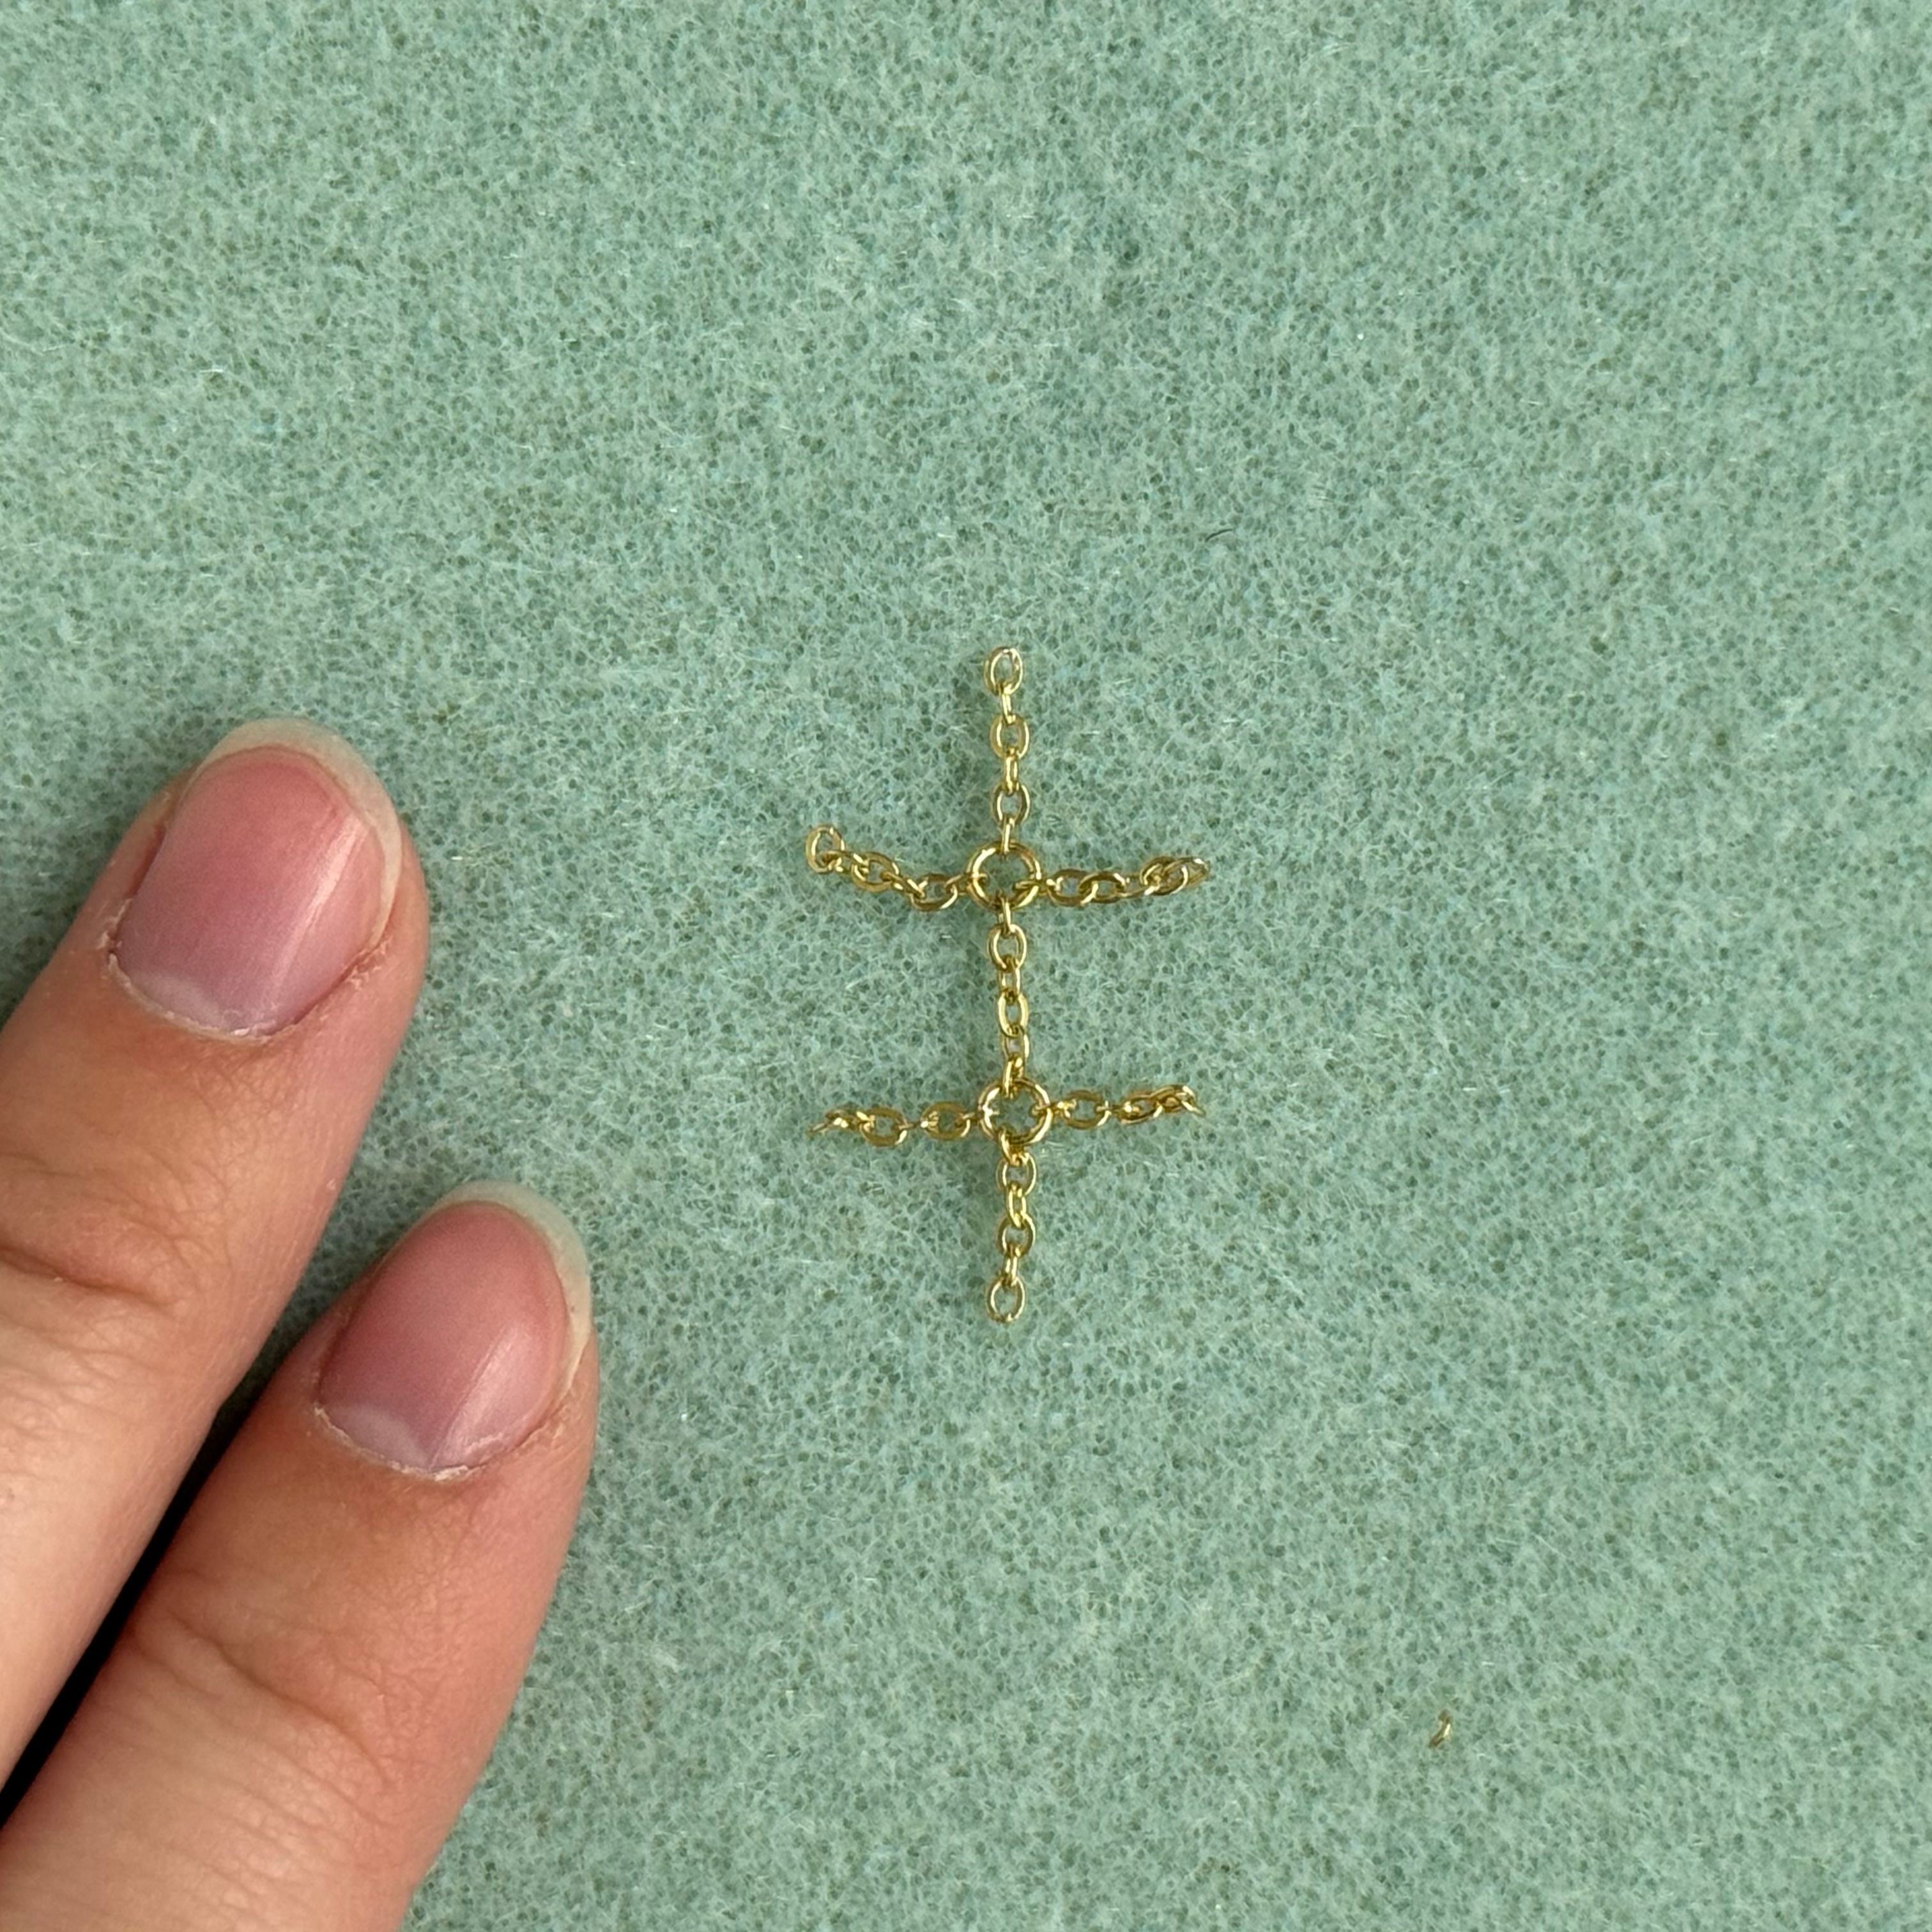
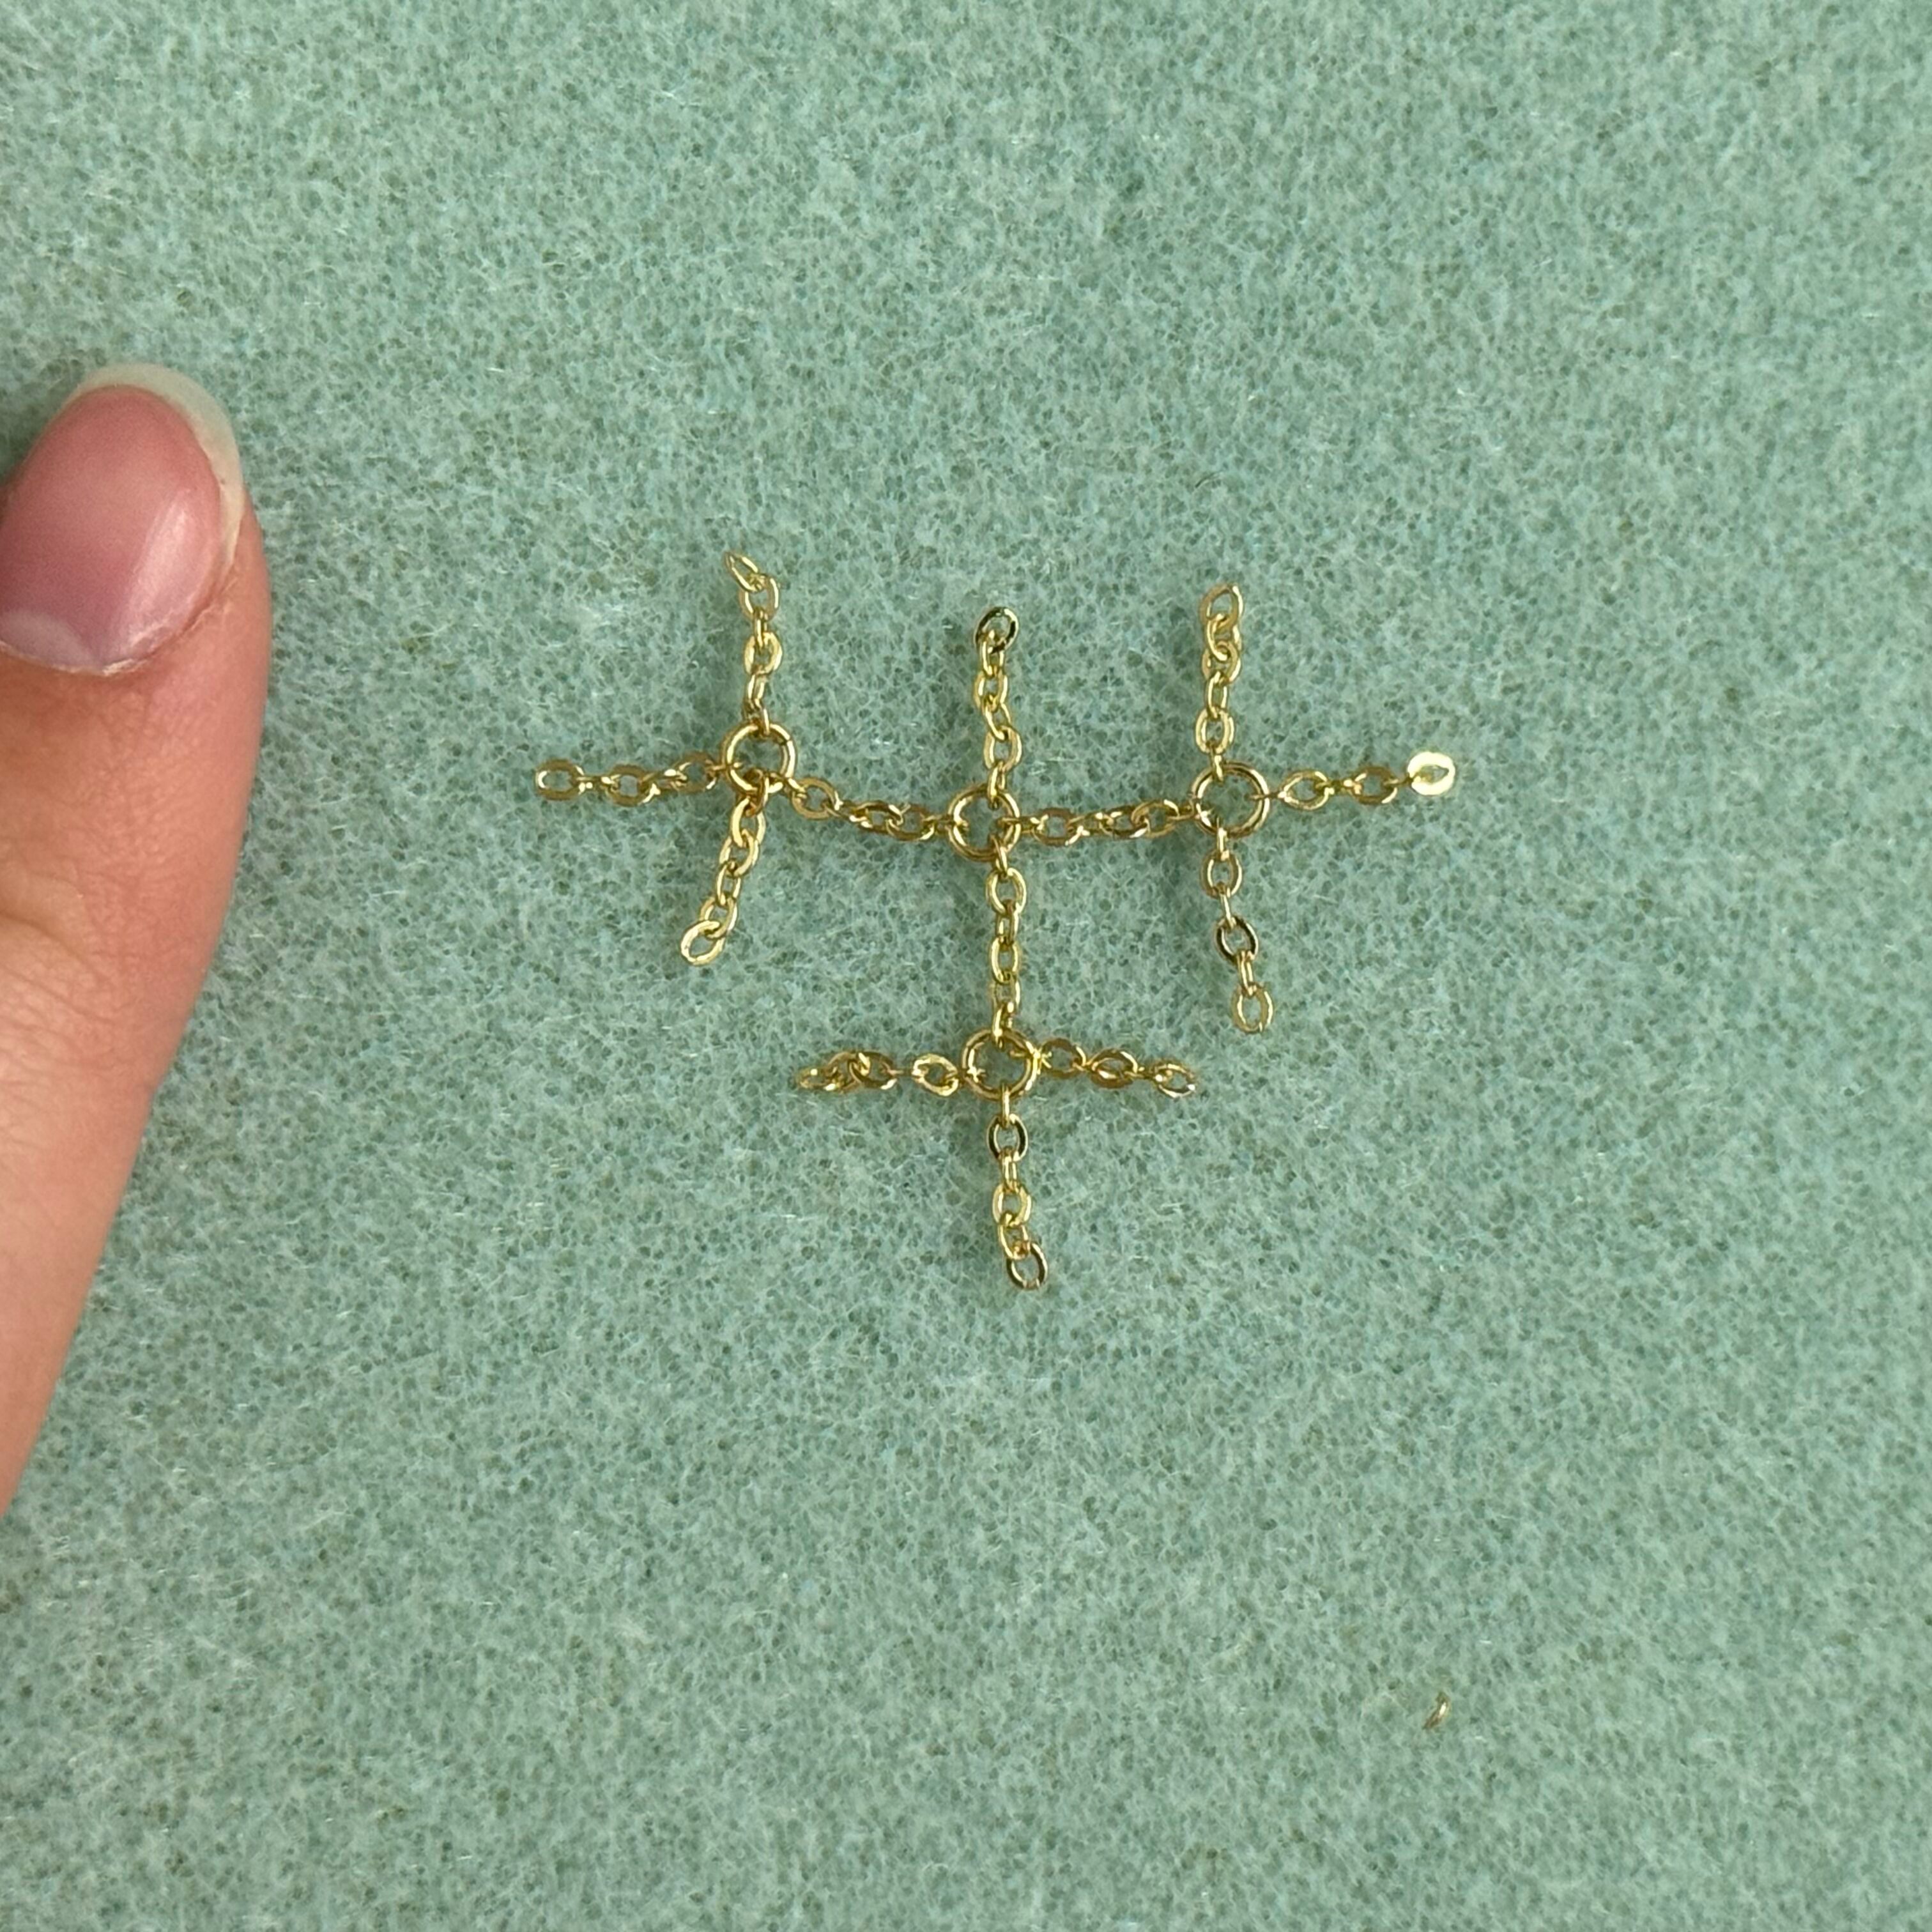
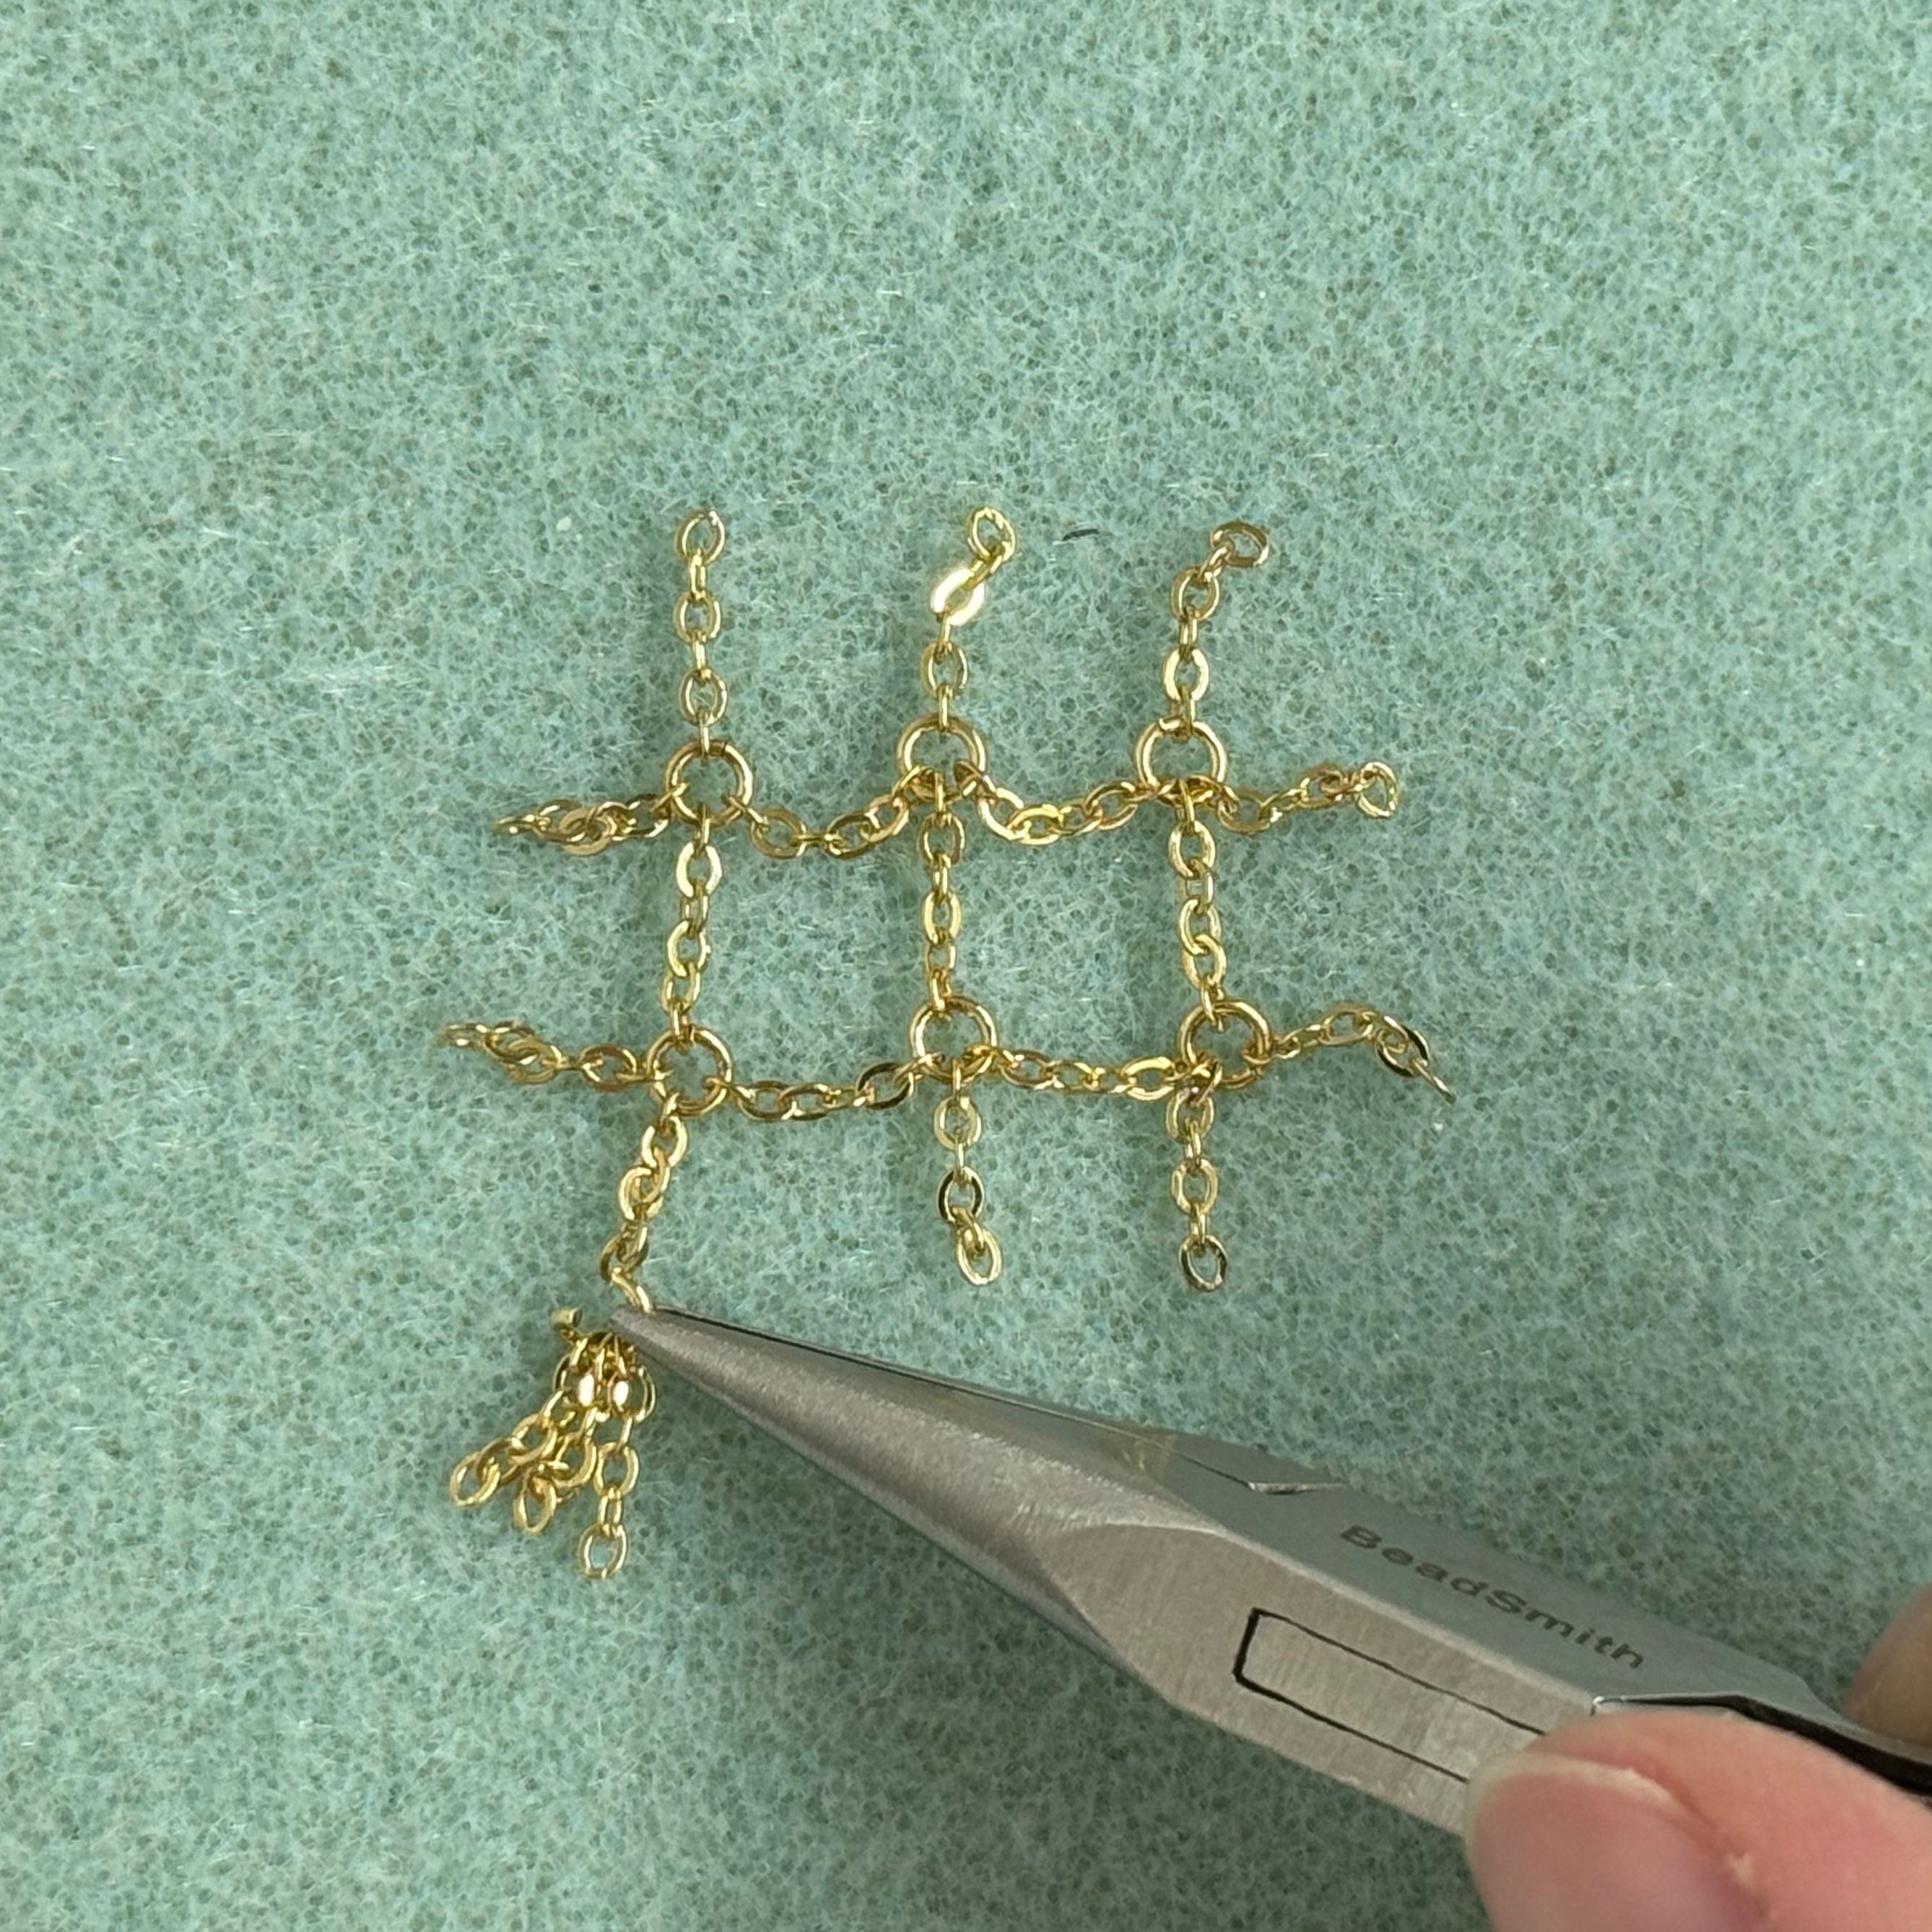
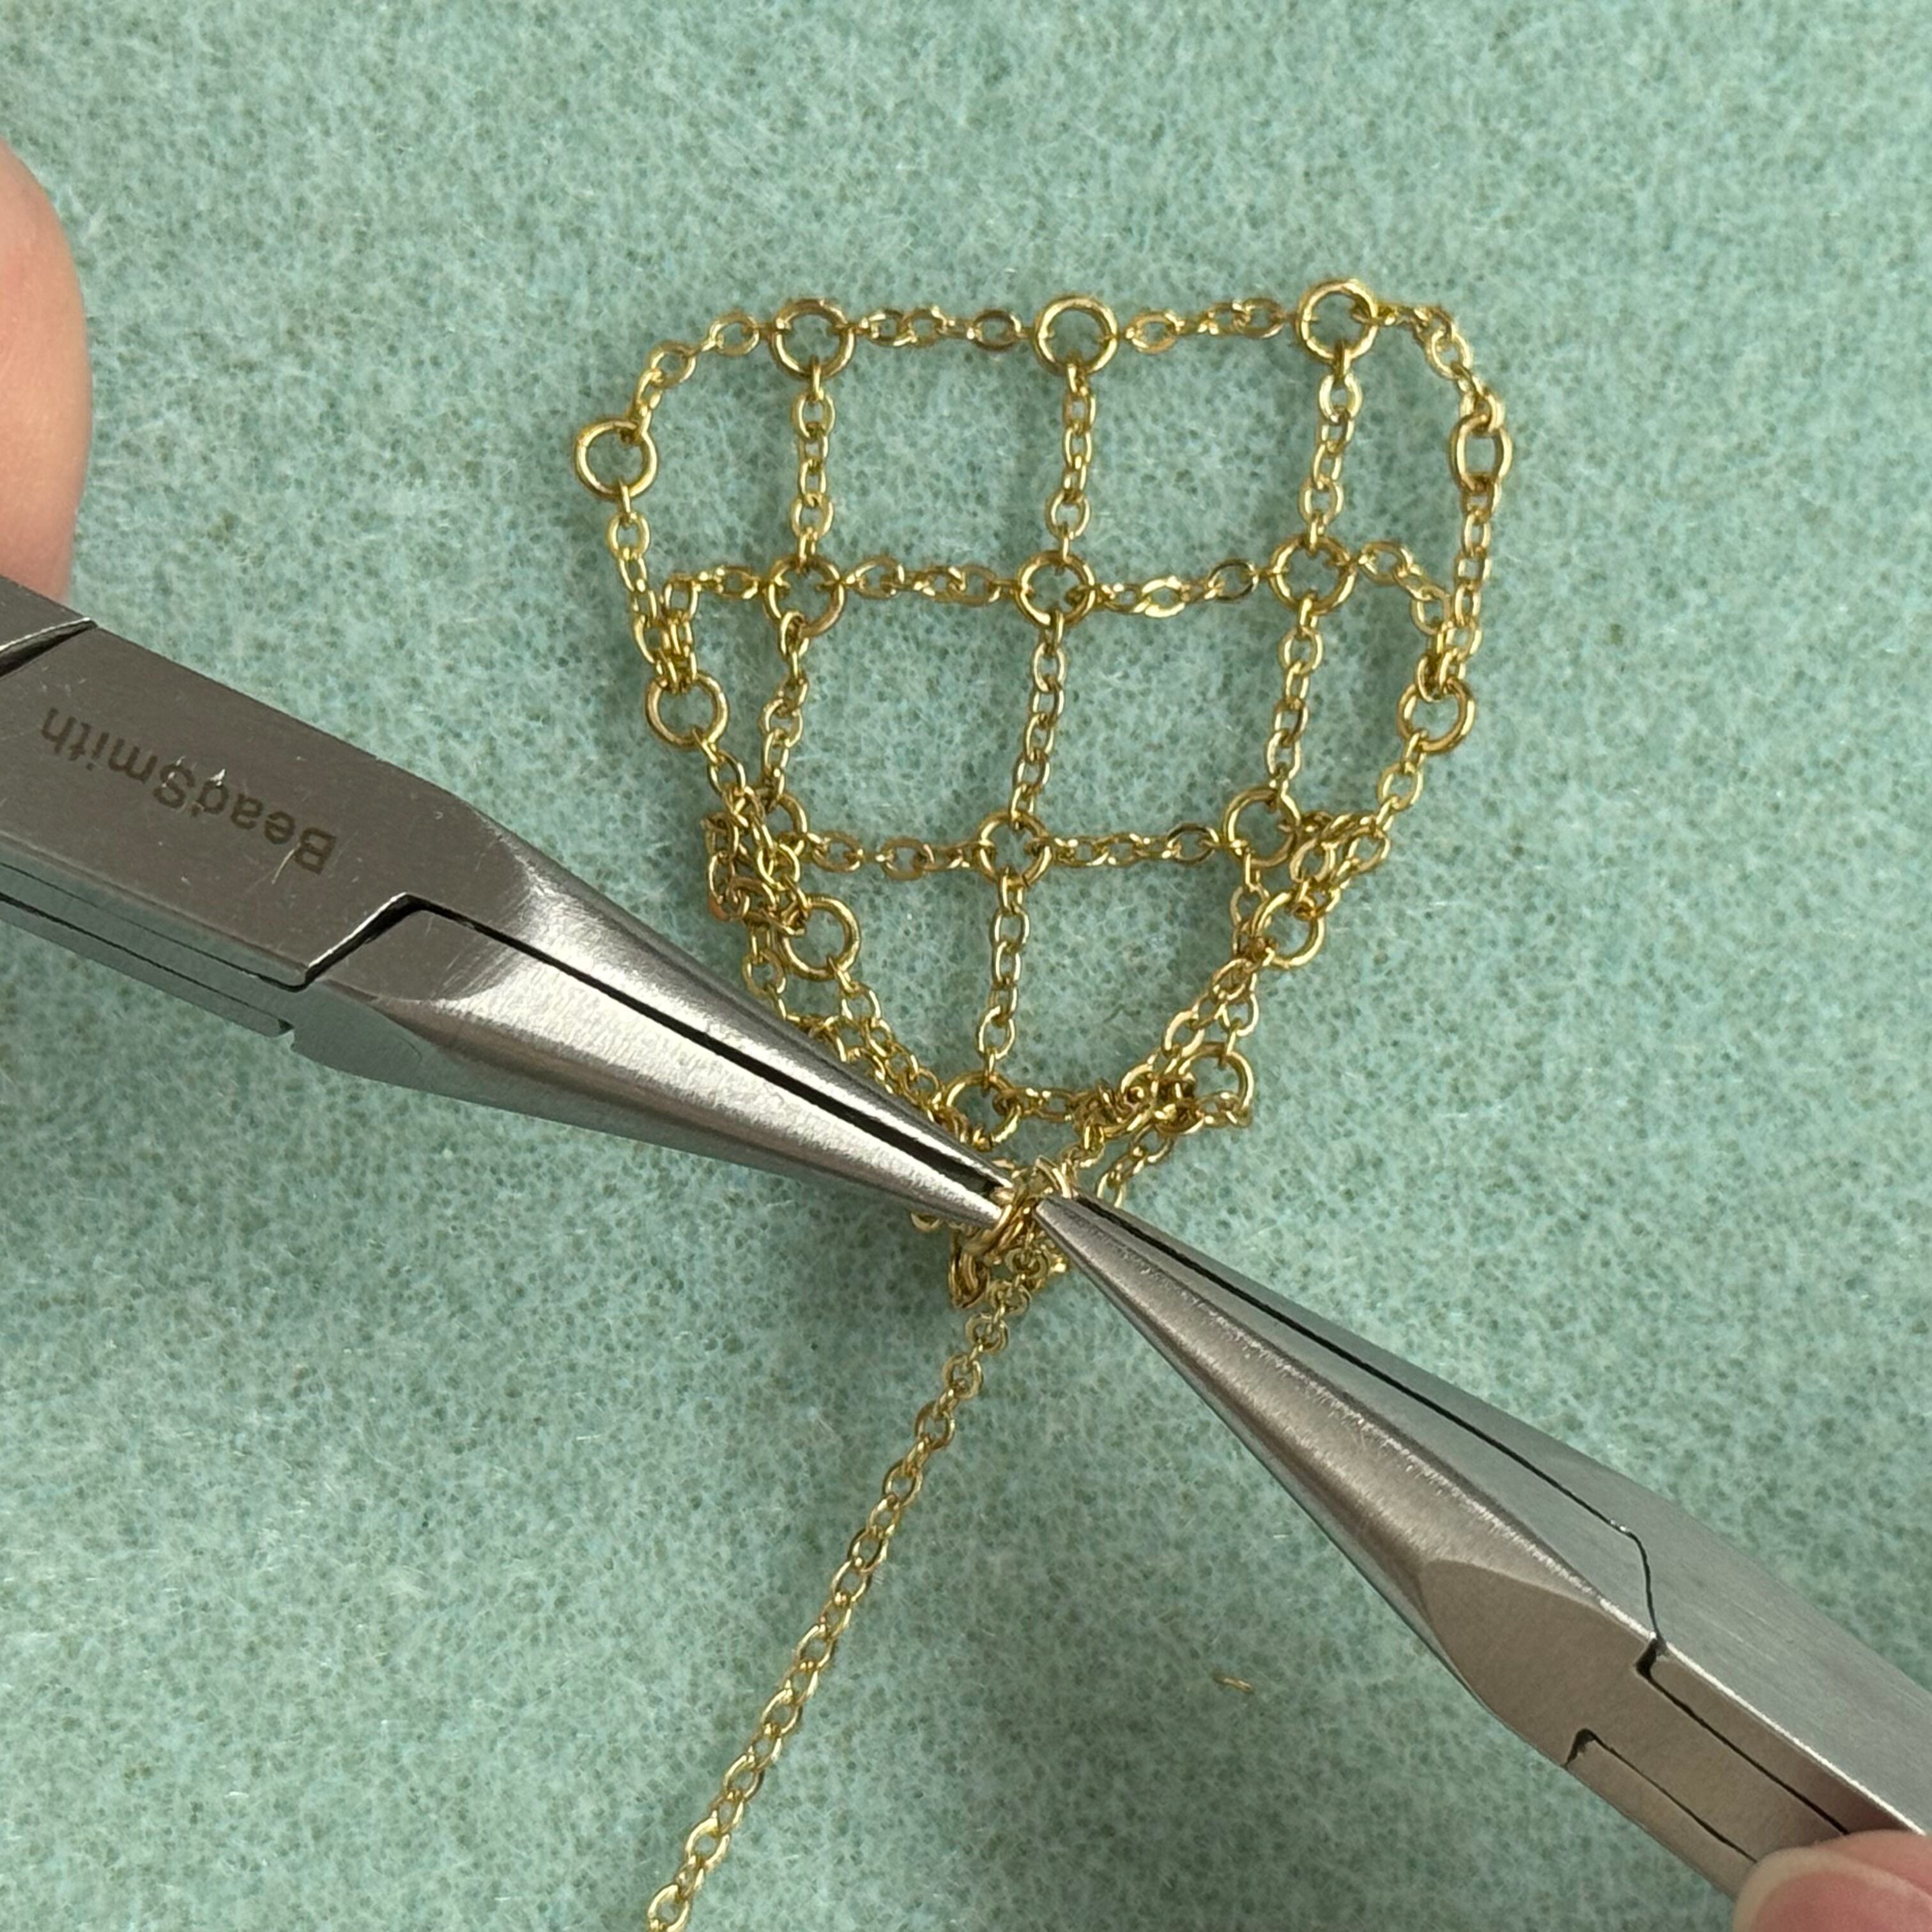
19. Add 2 sections of chain to a jump ring, close it, then add a jump ring to one of the two sections and connect this jump ring to the two sections shown in the picture
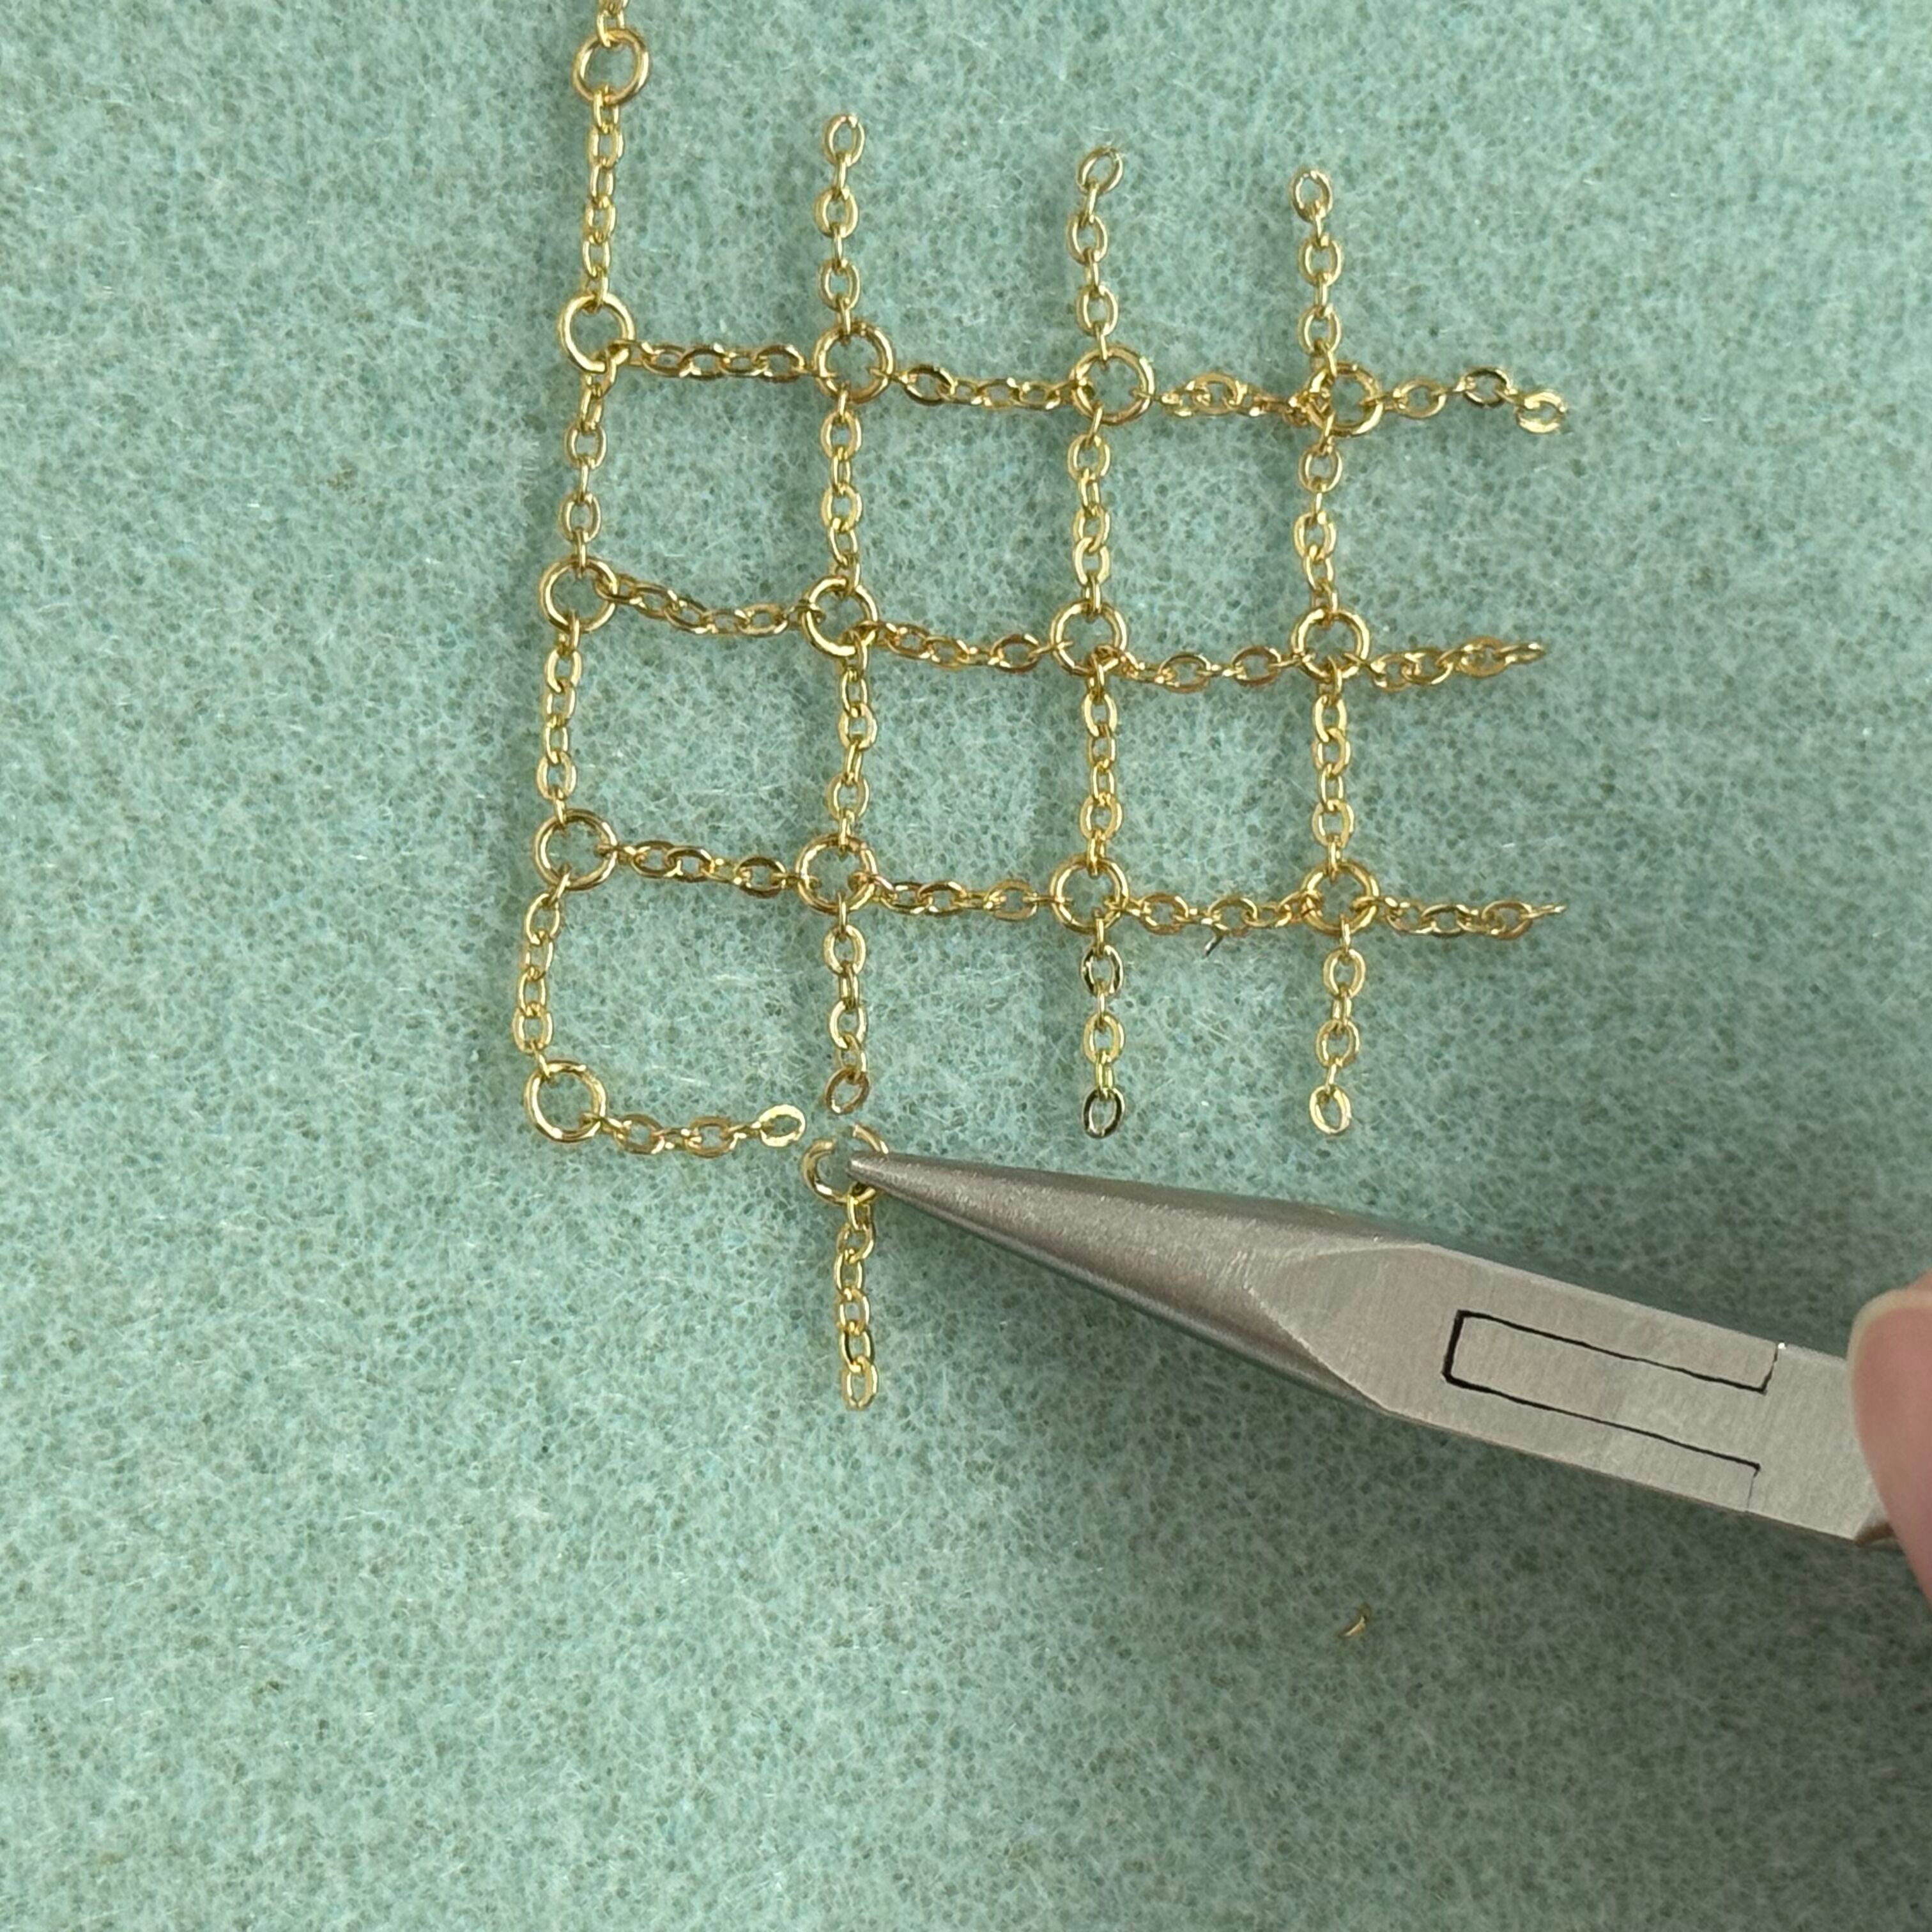
20. Open another jump ring, add 1 section of chain and connect it to the 2 sections shown in the picture
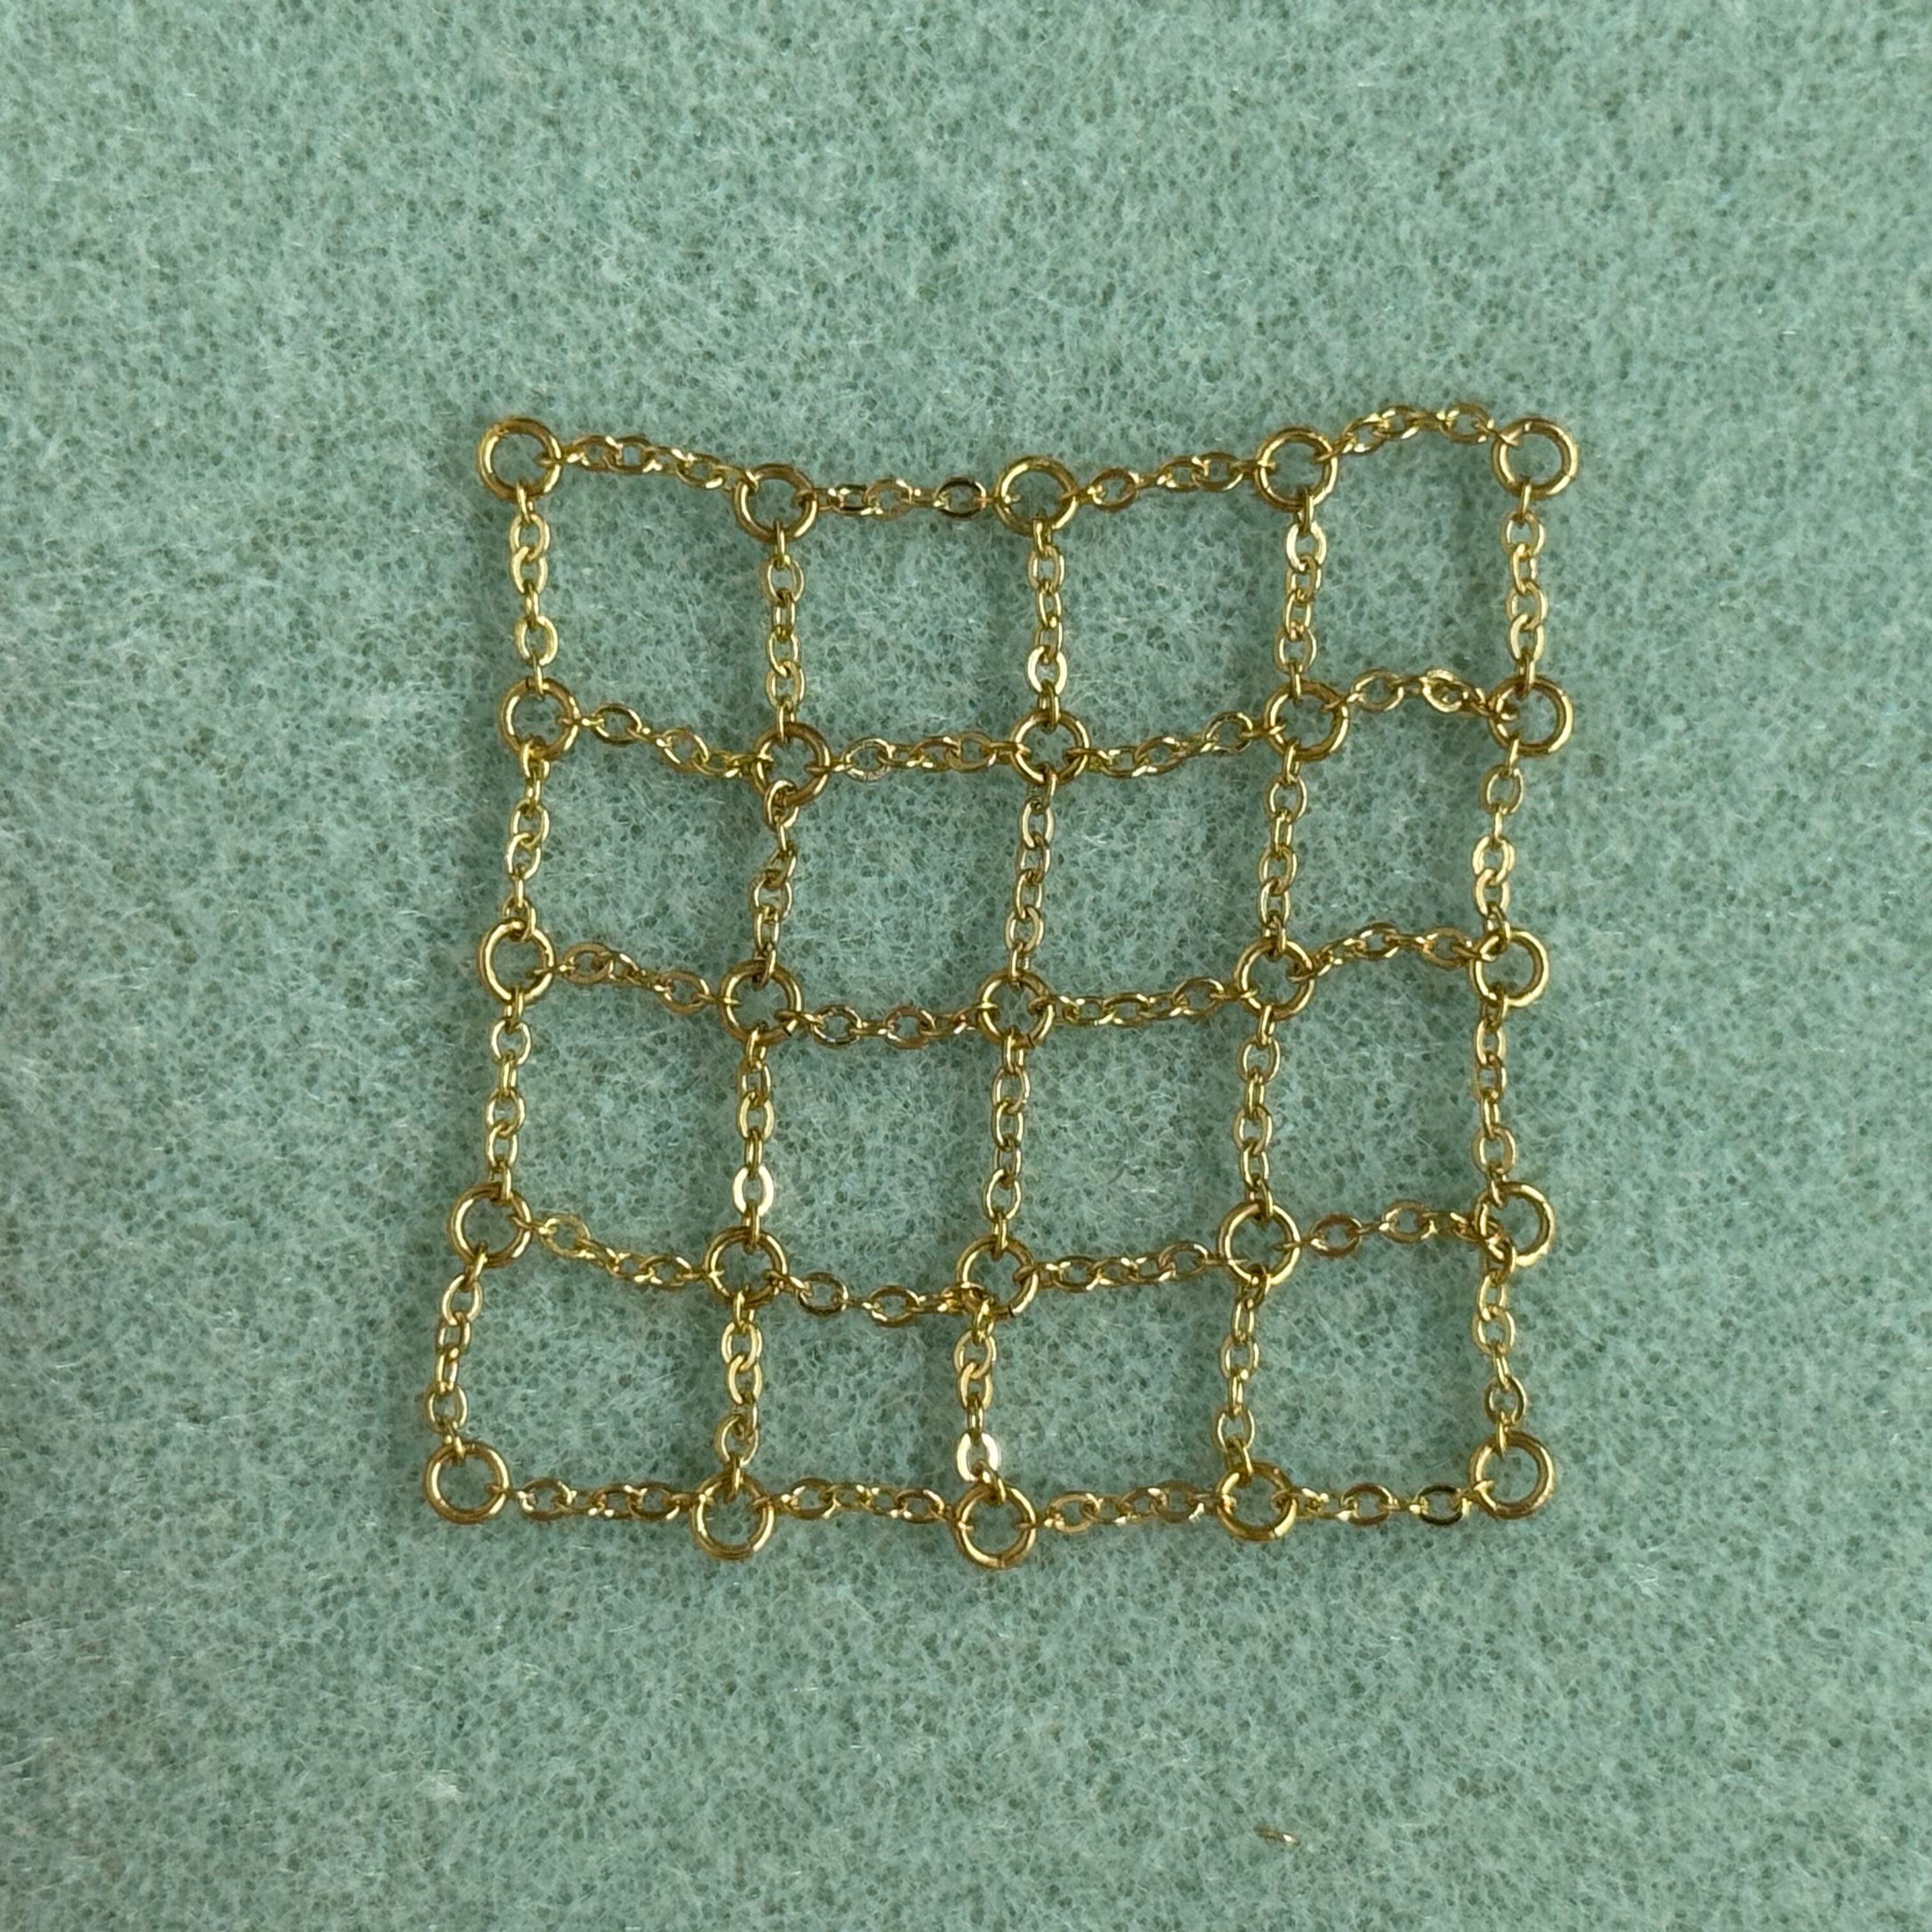
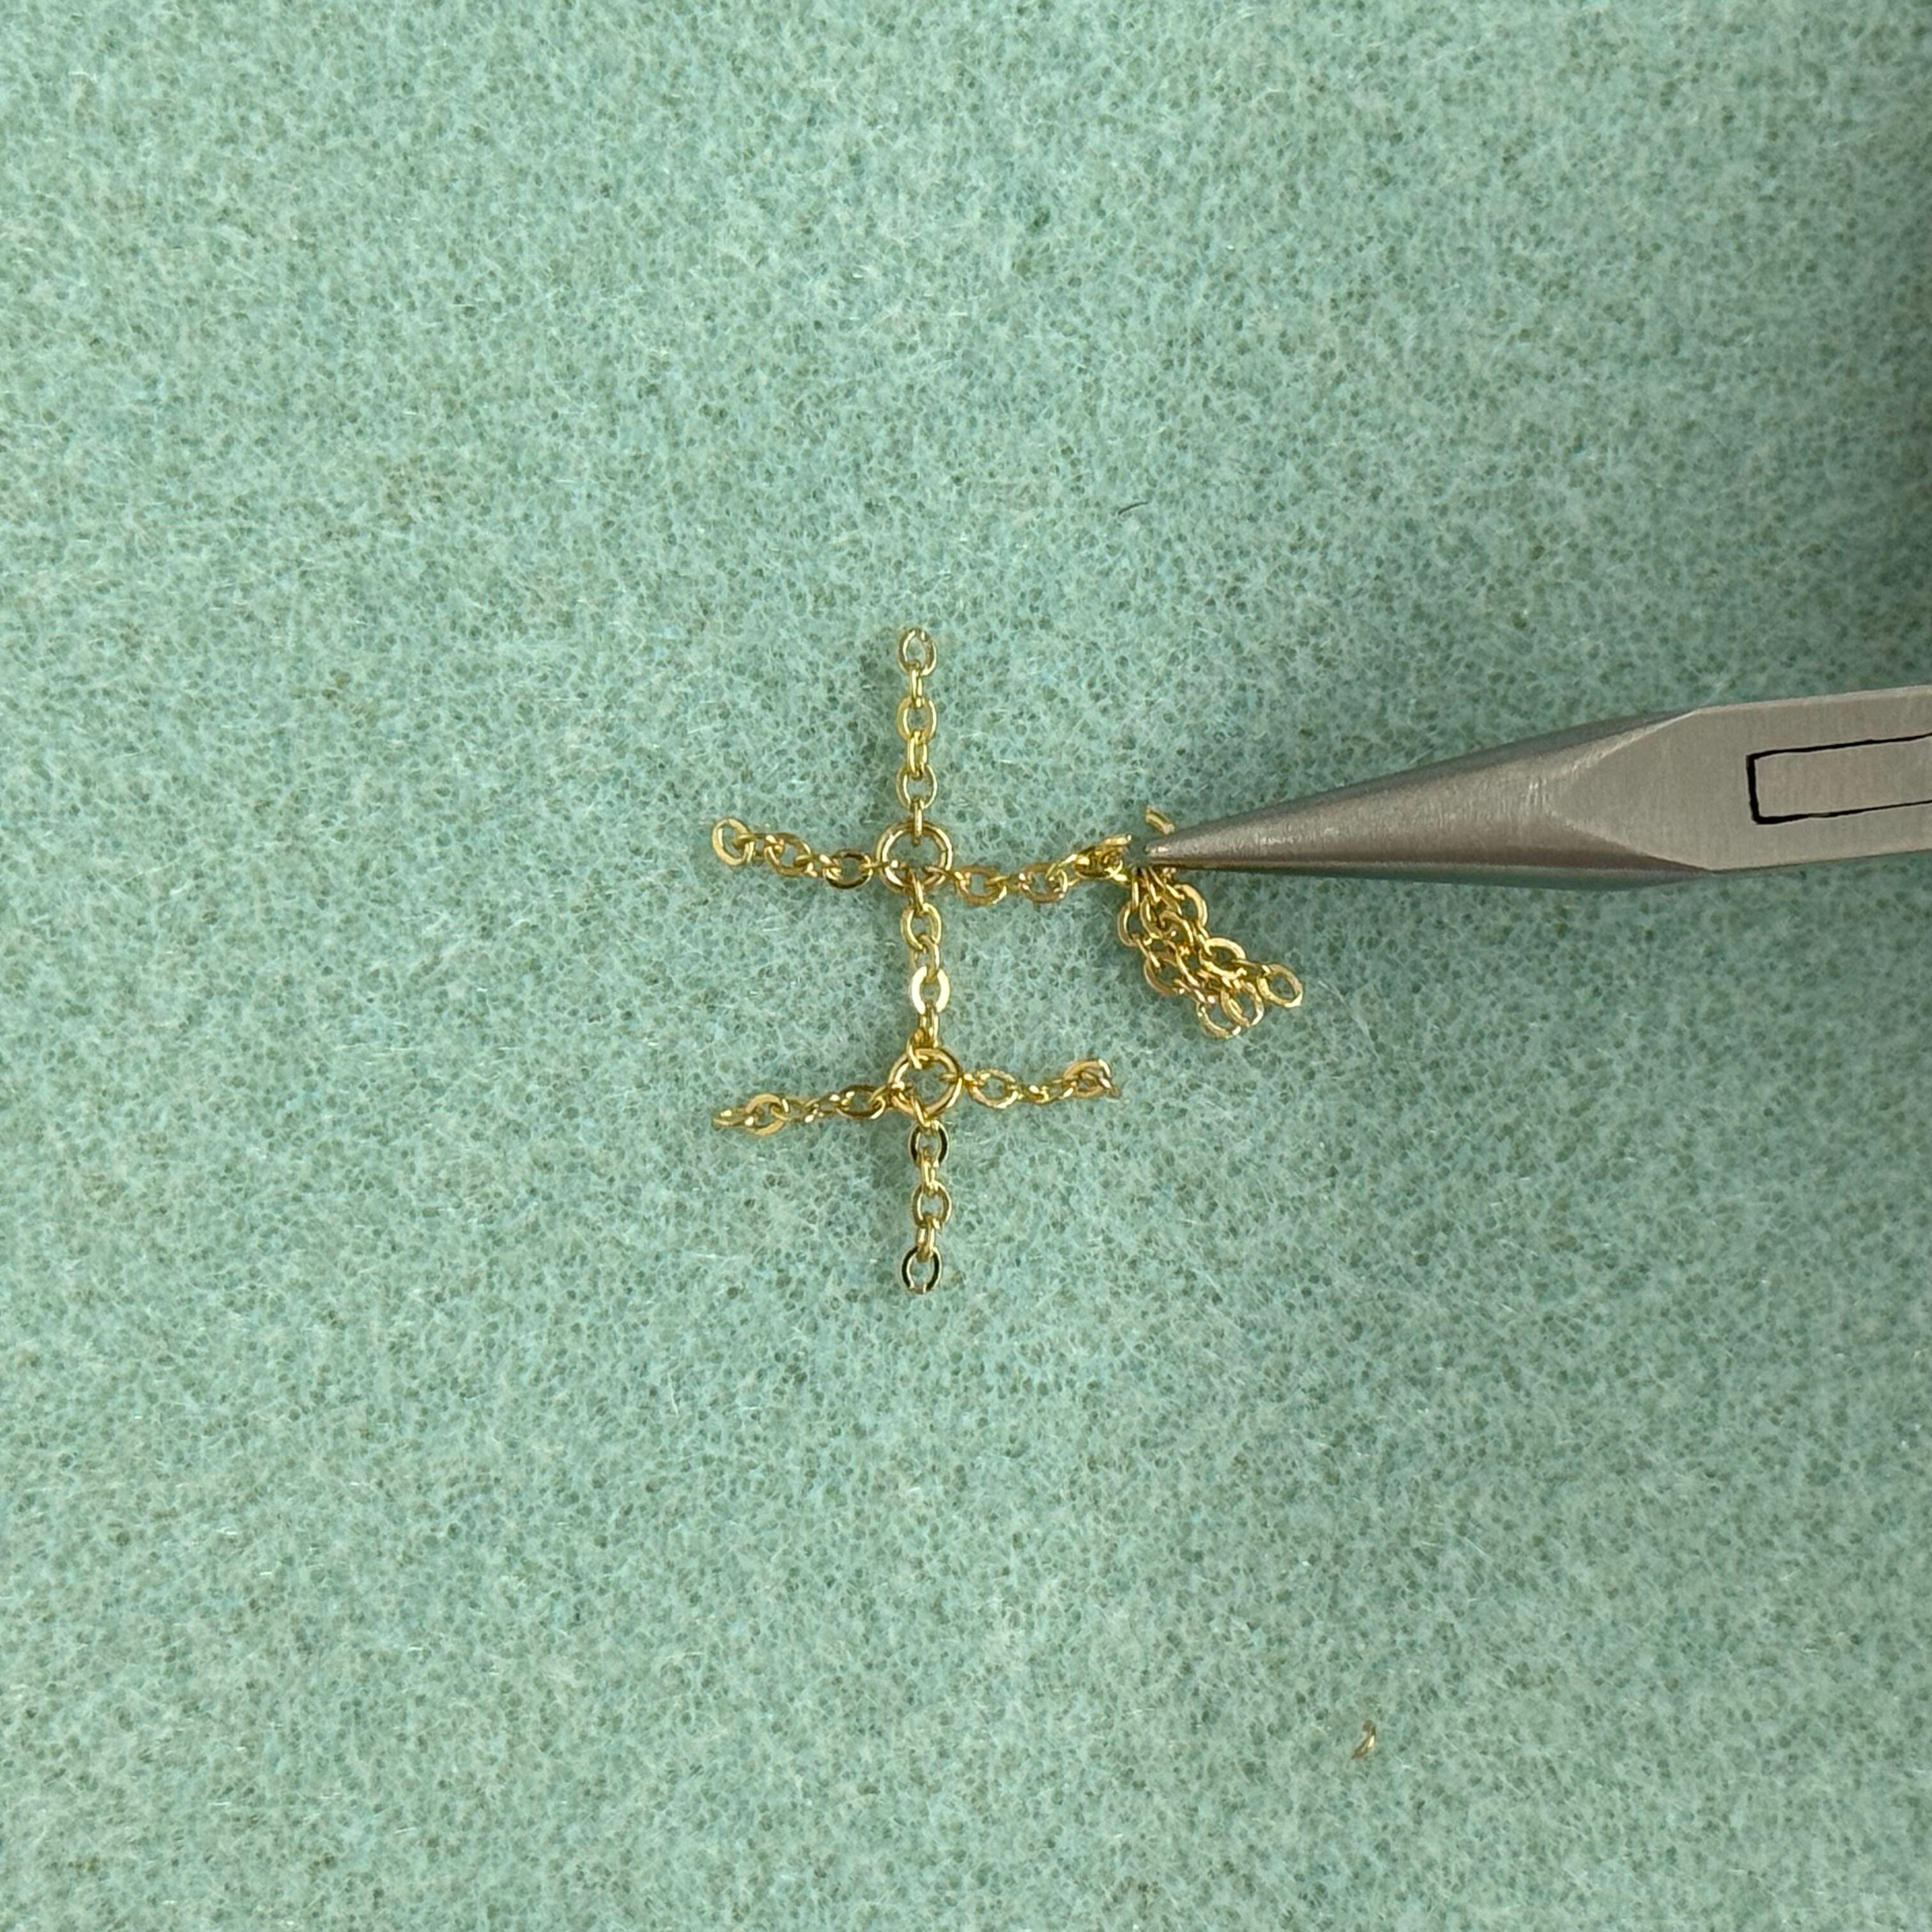
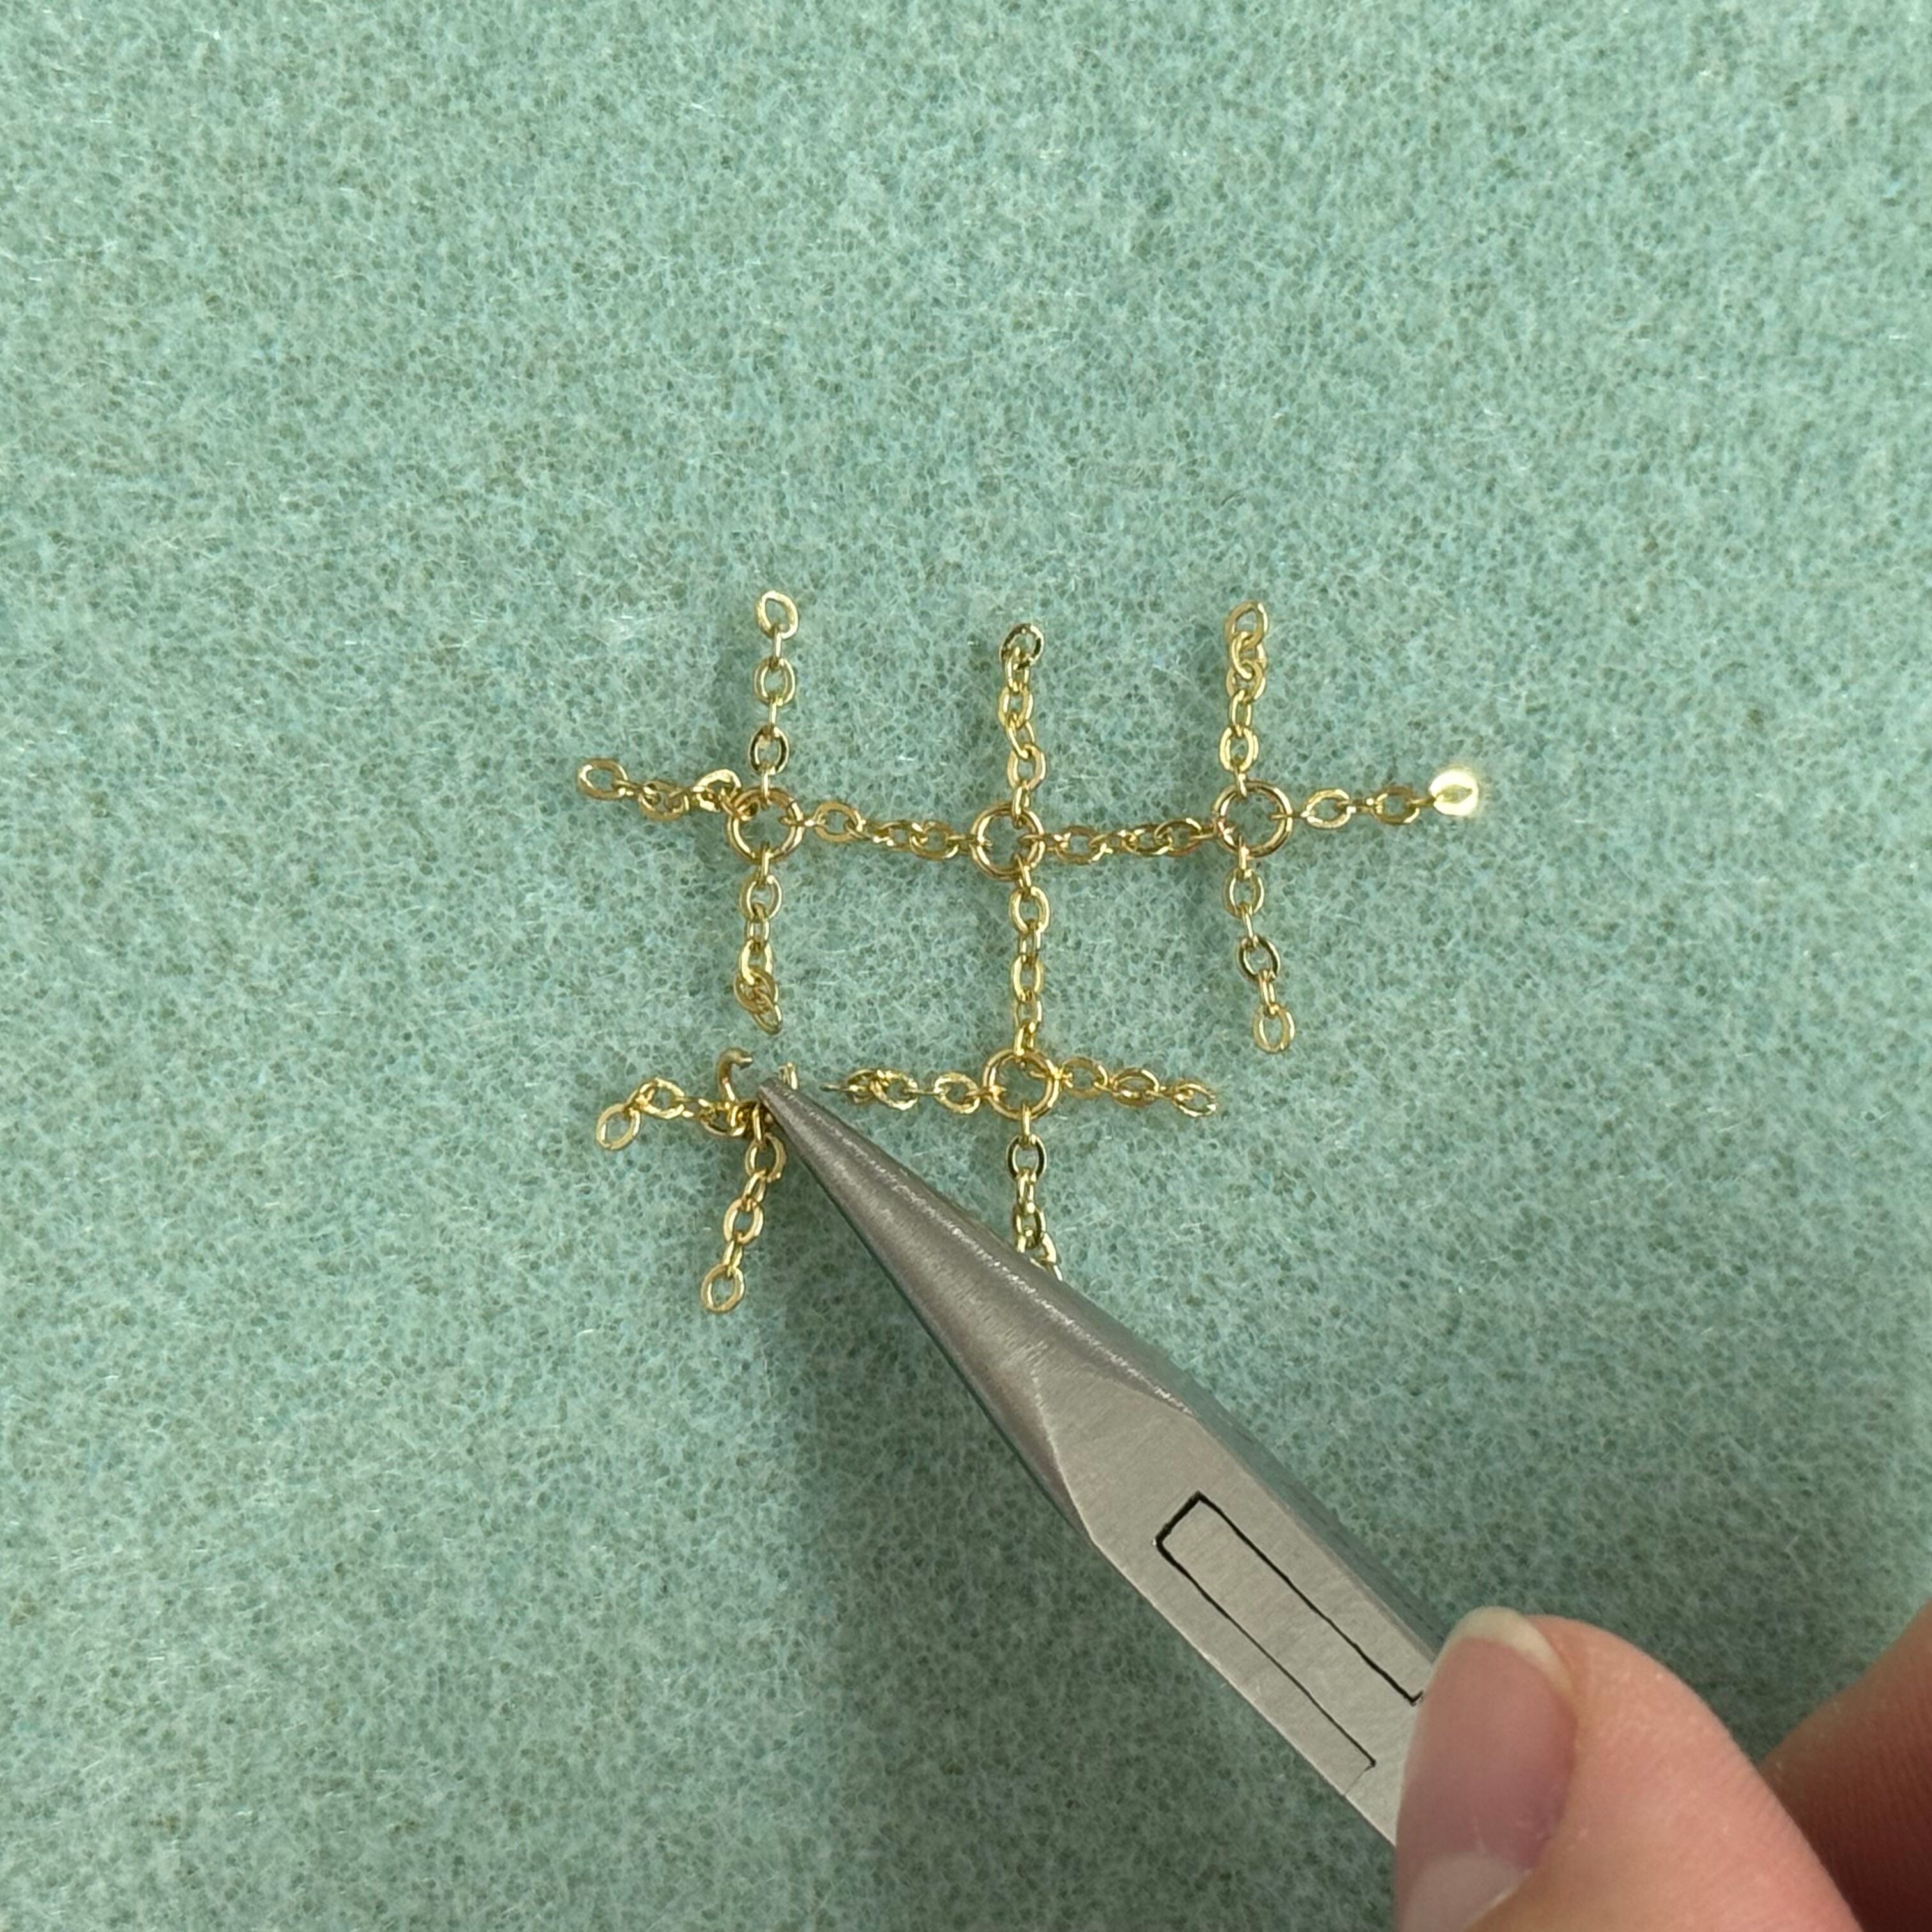
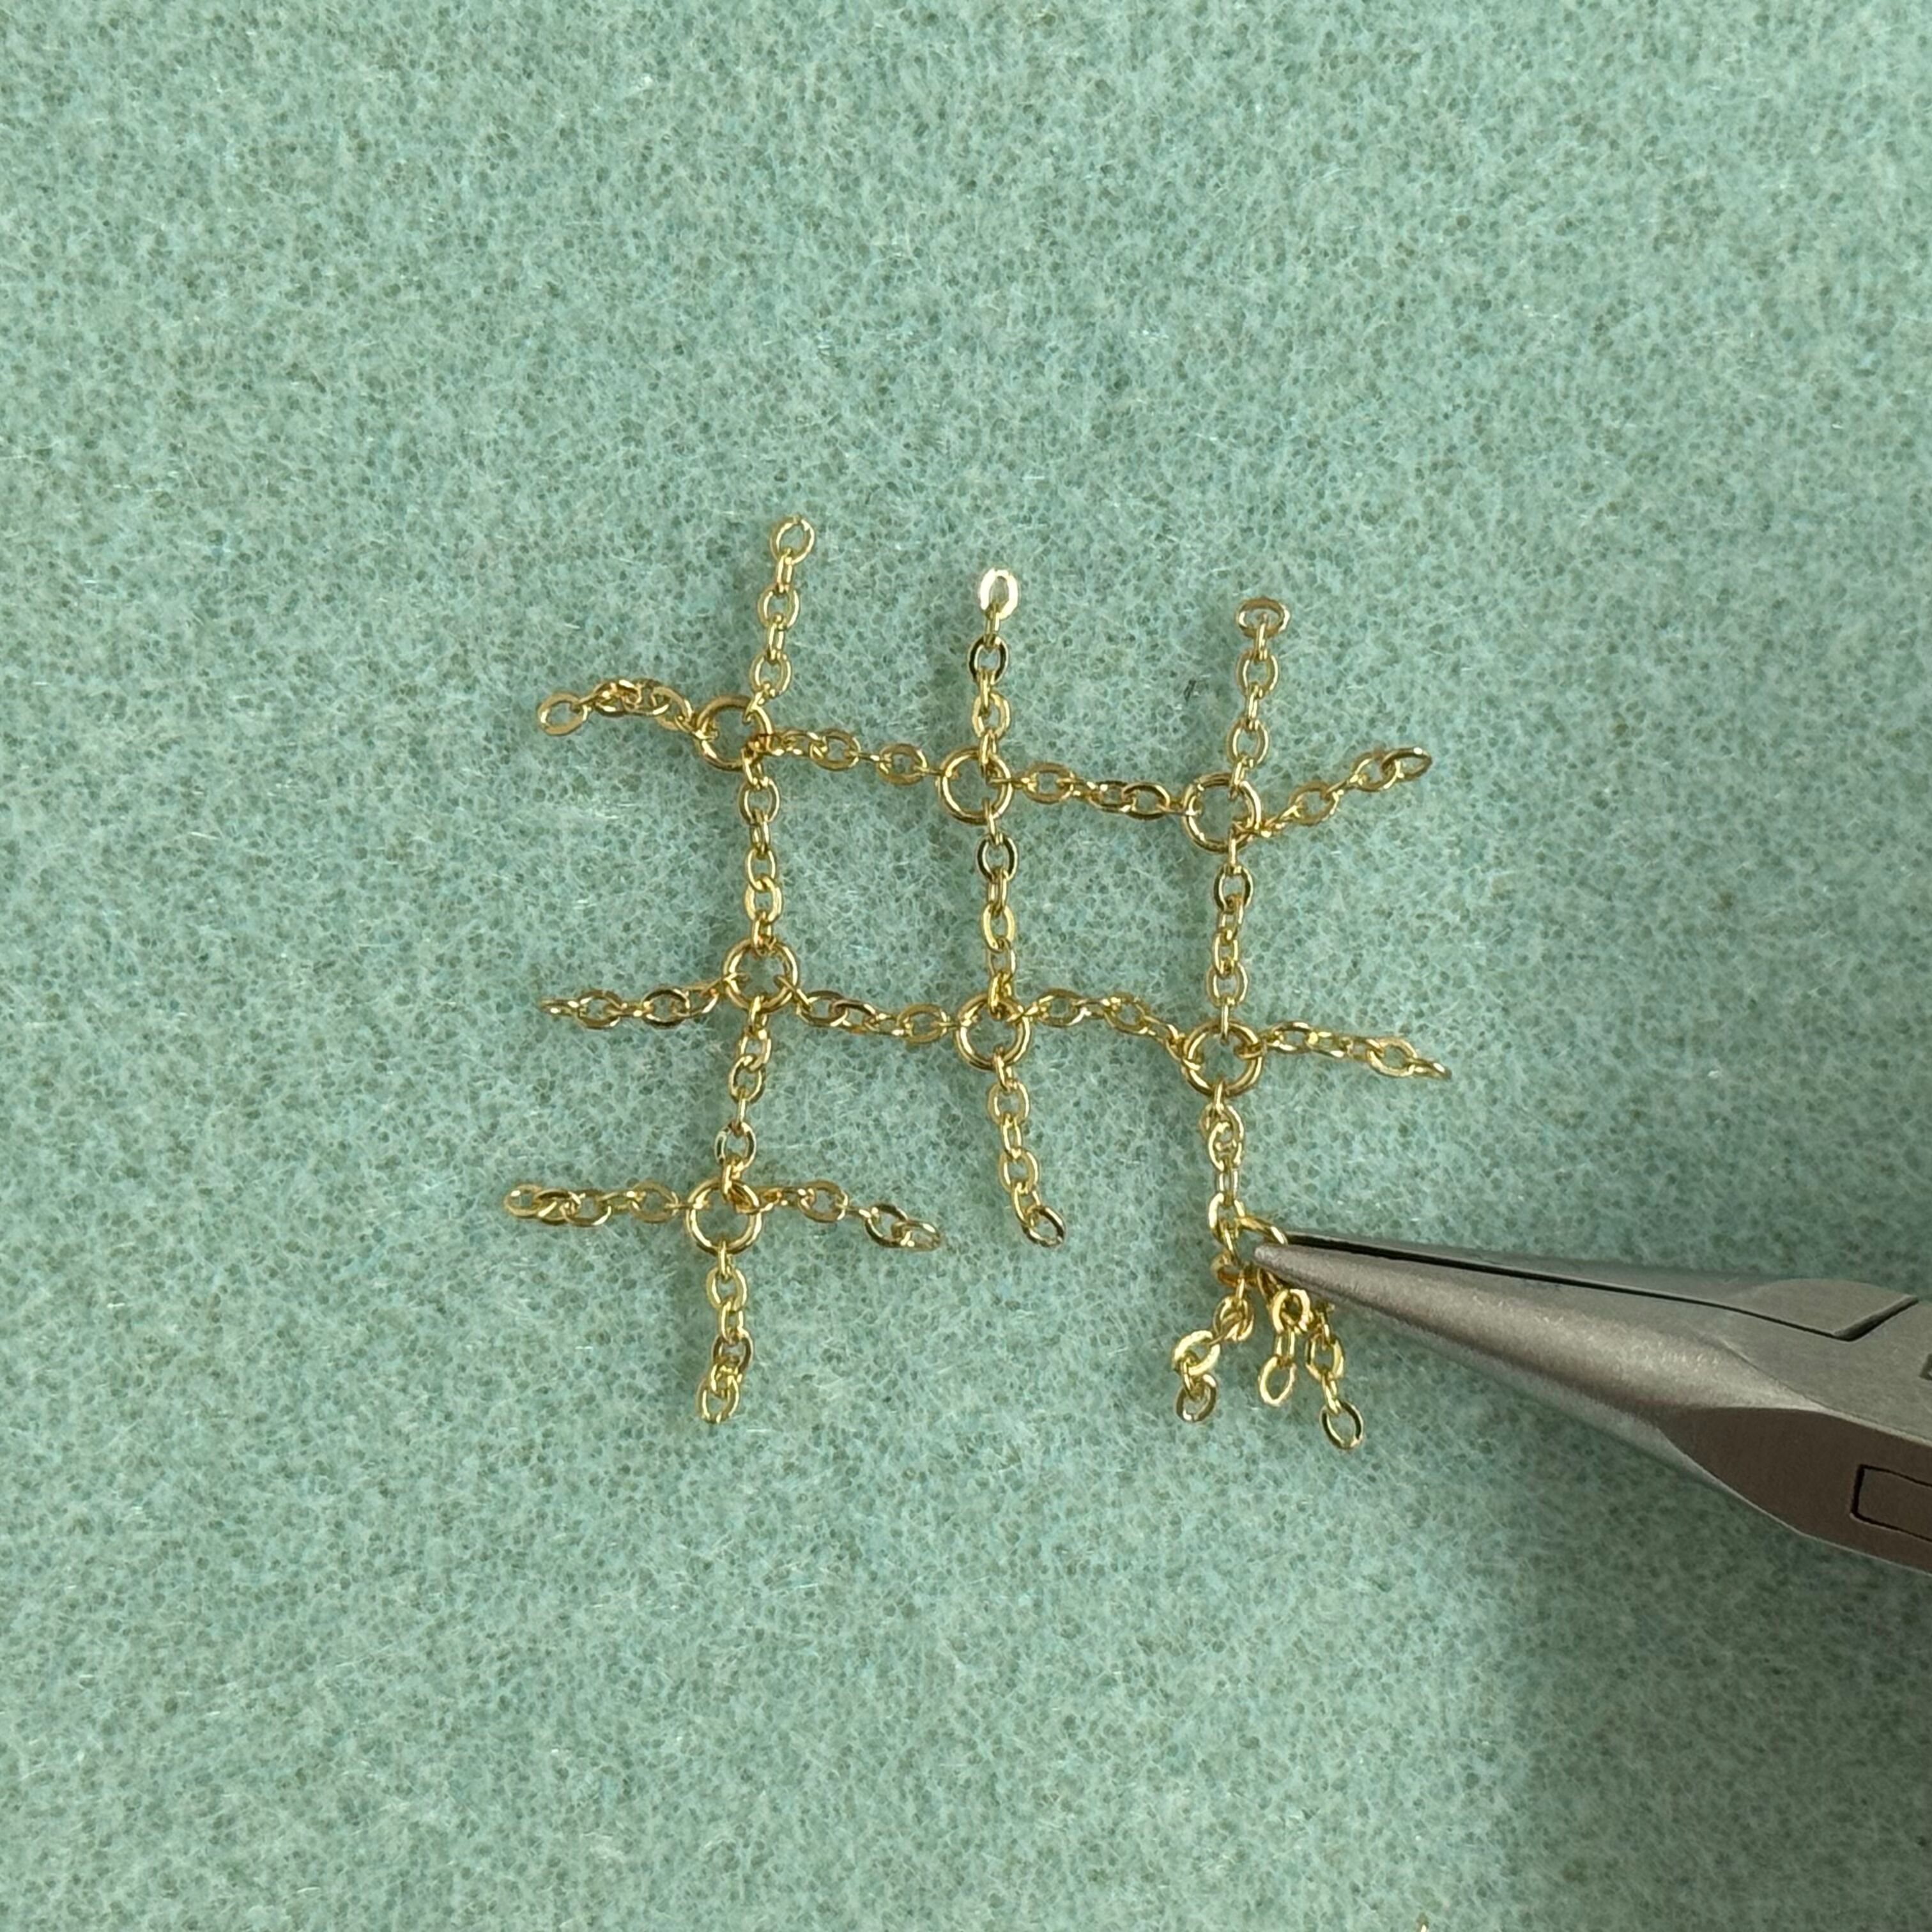
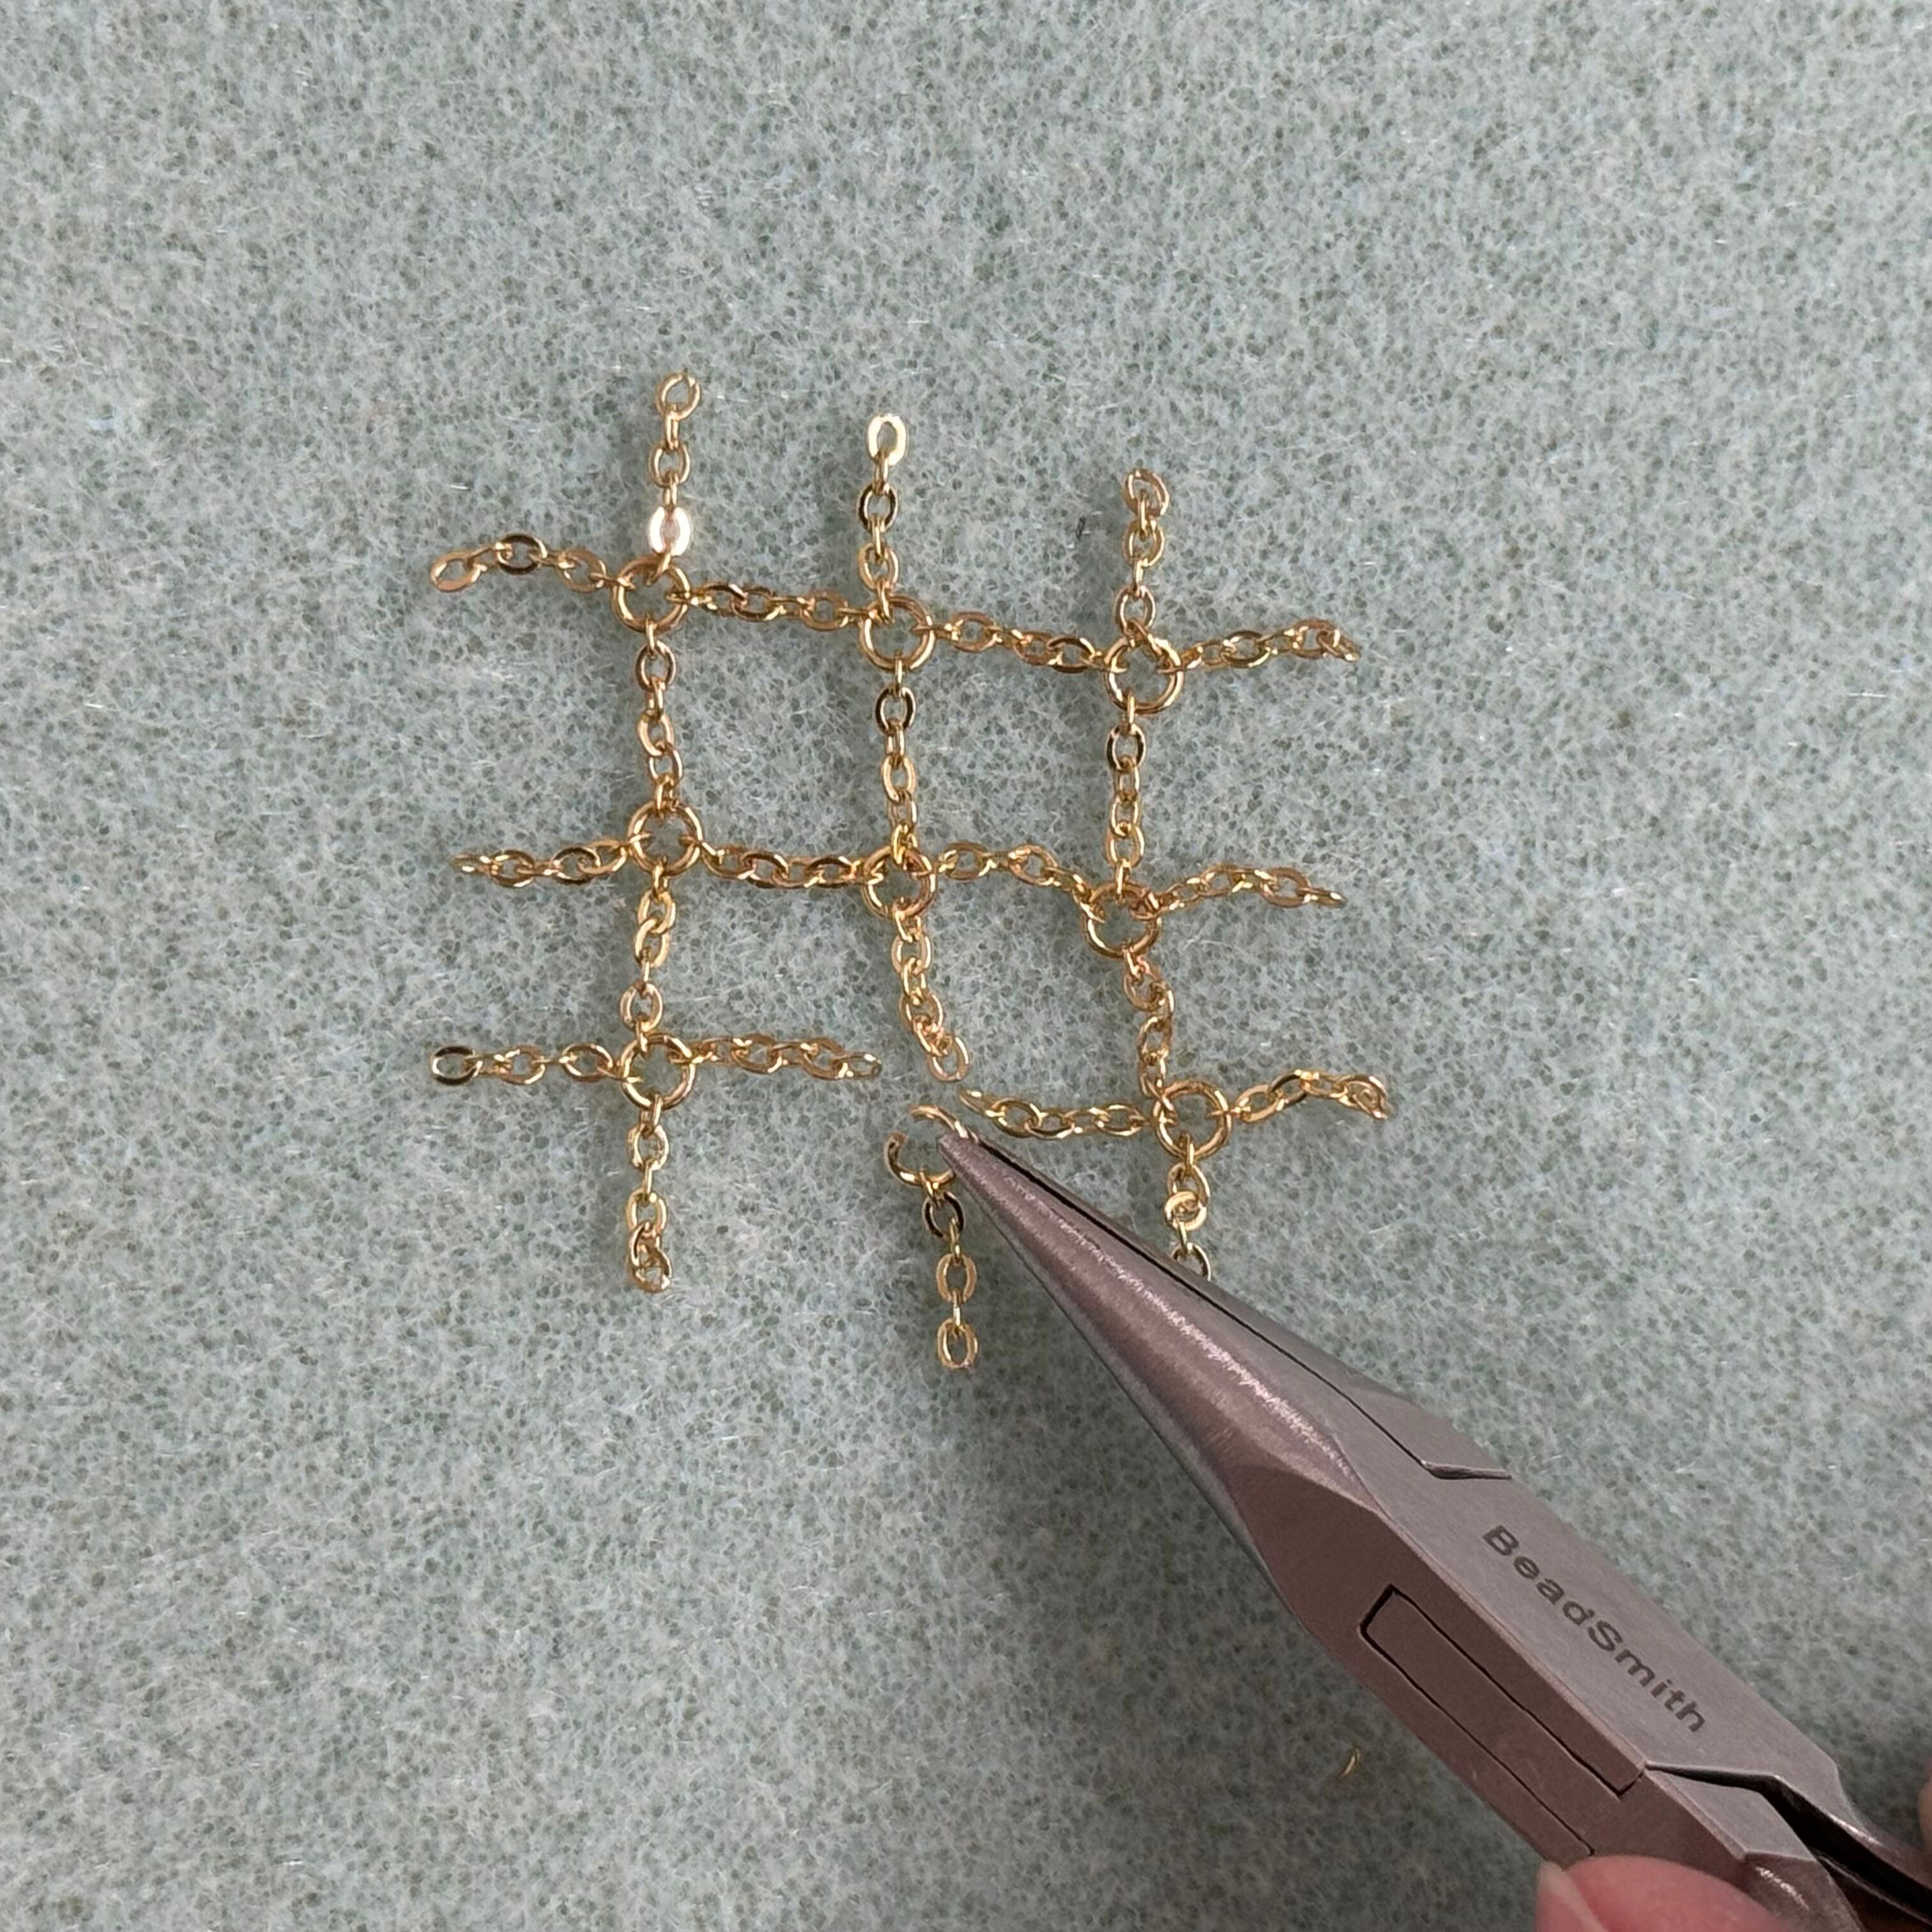
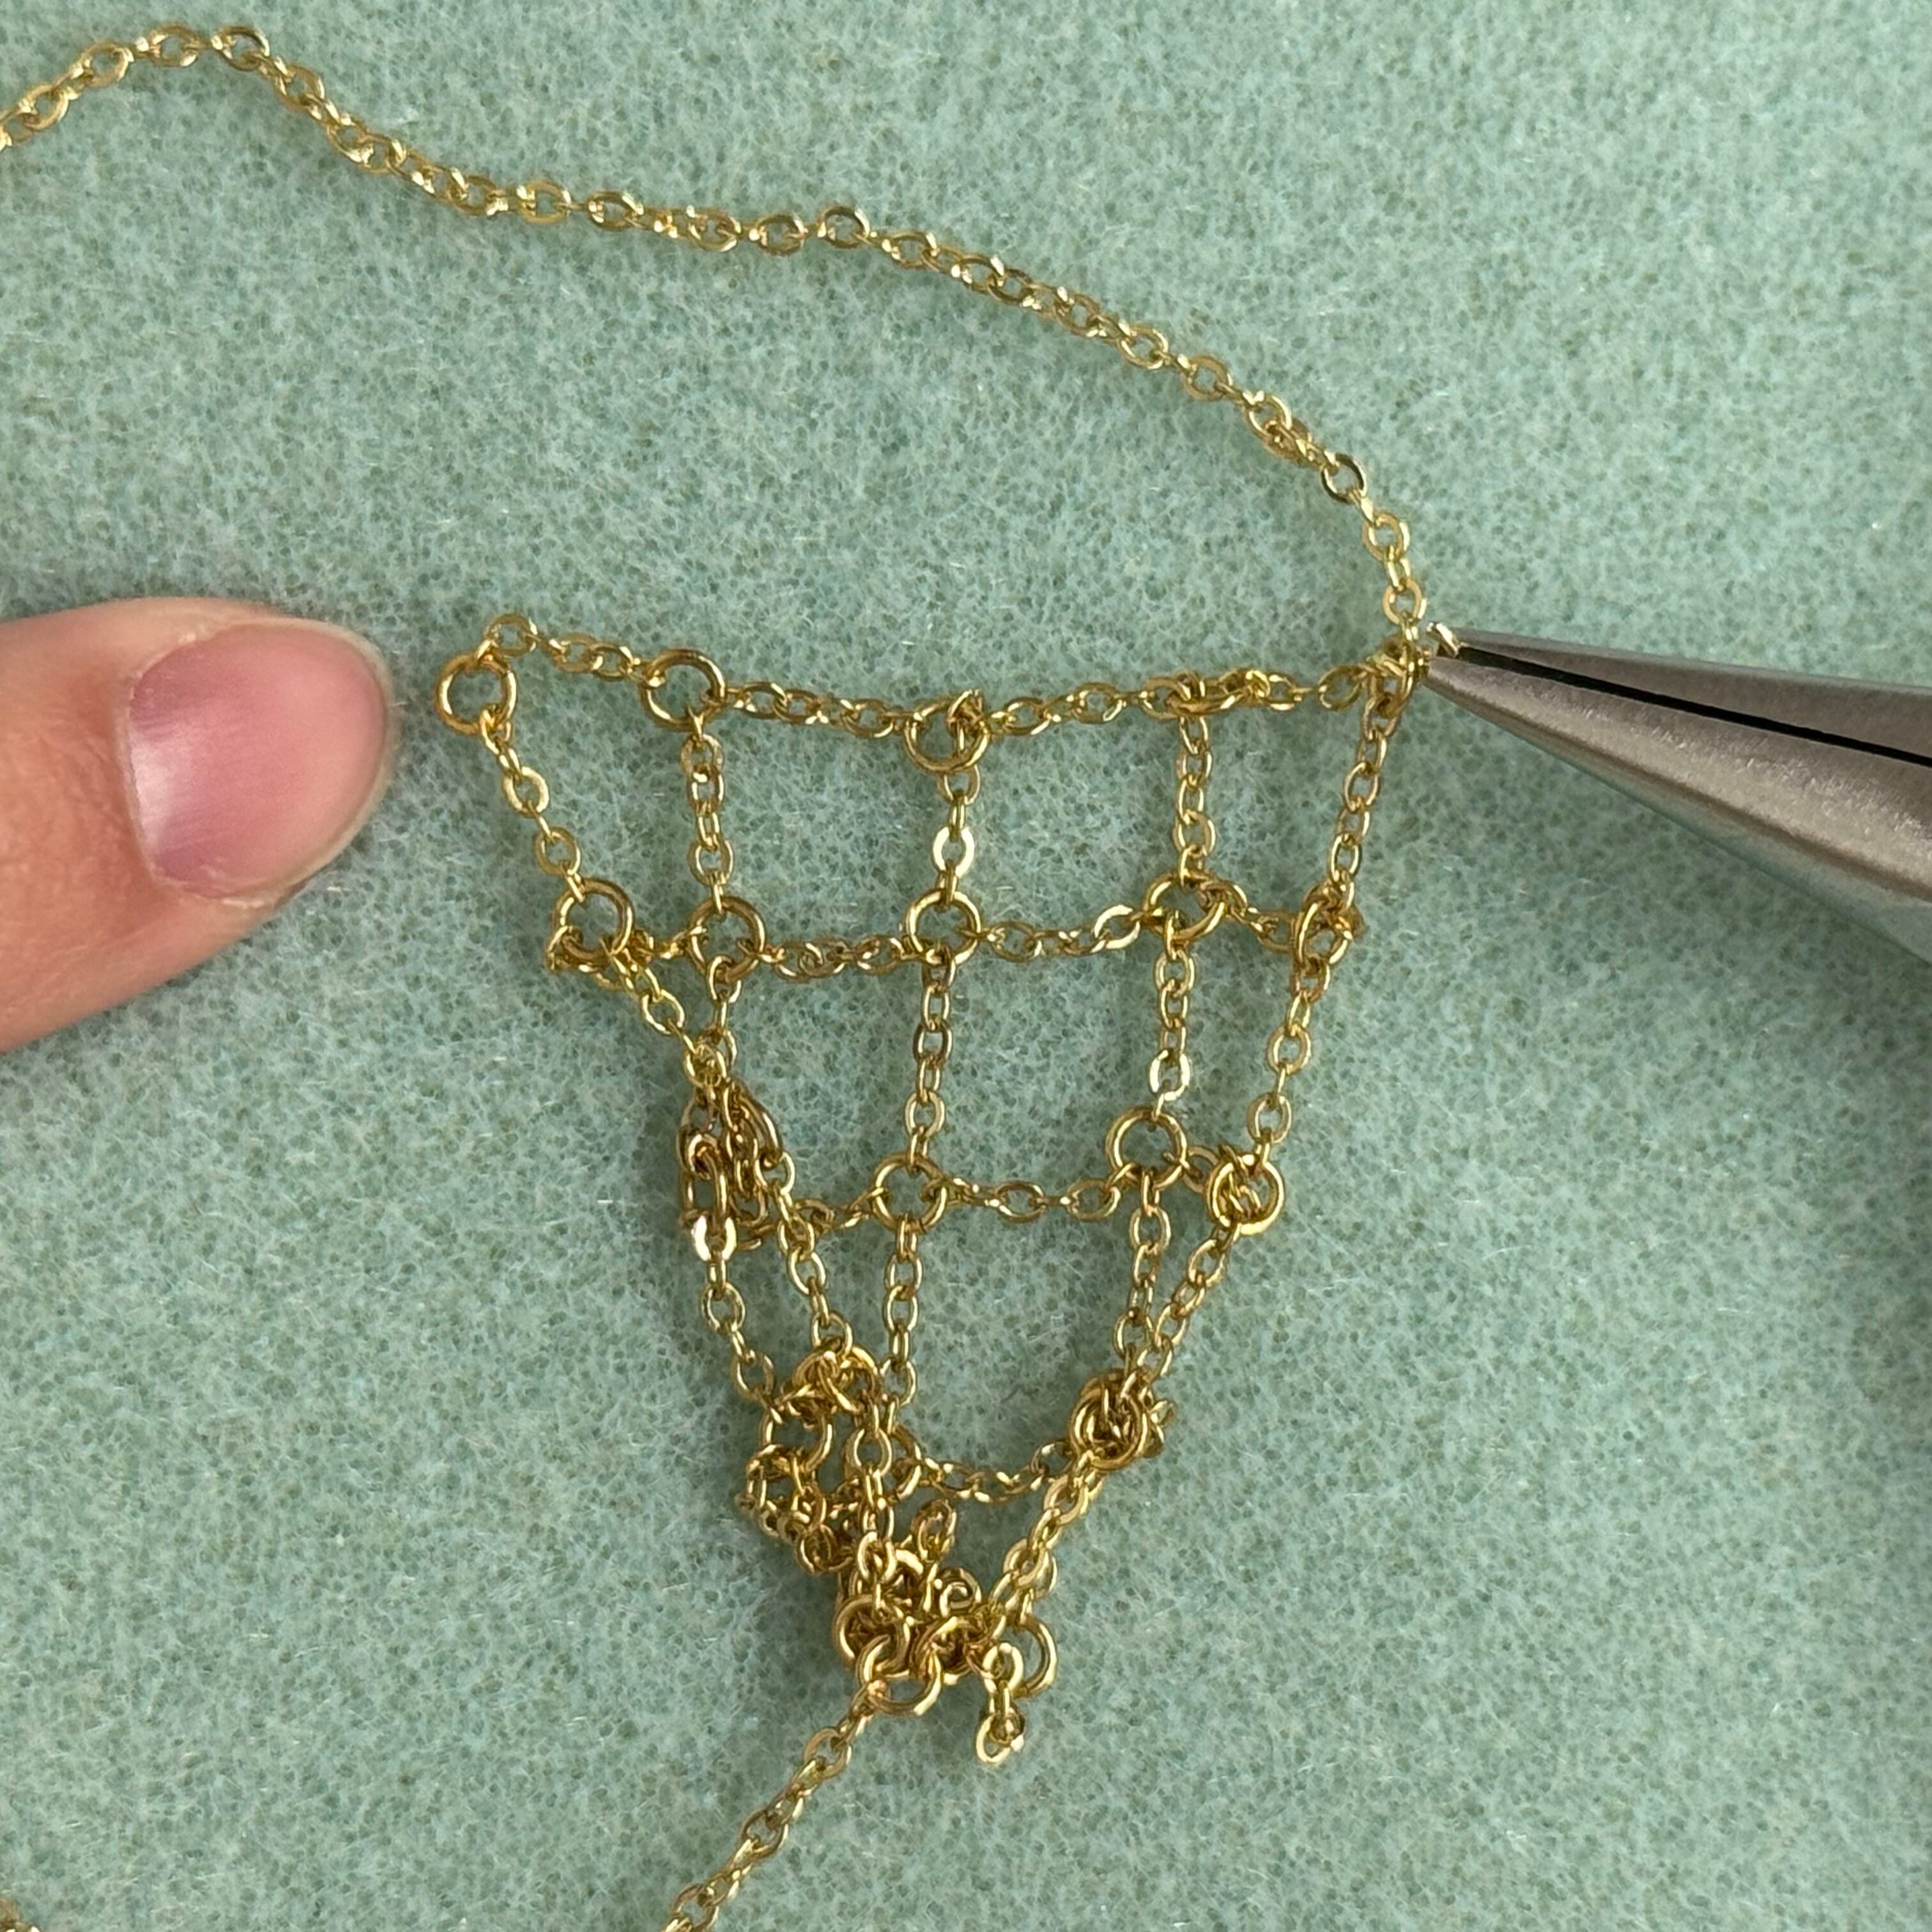
21. Keep going around the border adding chain and jump rings until you have a 4x4 of squared chain
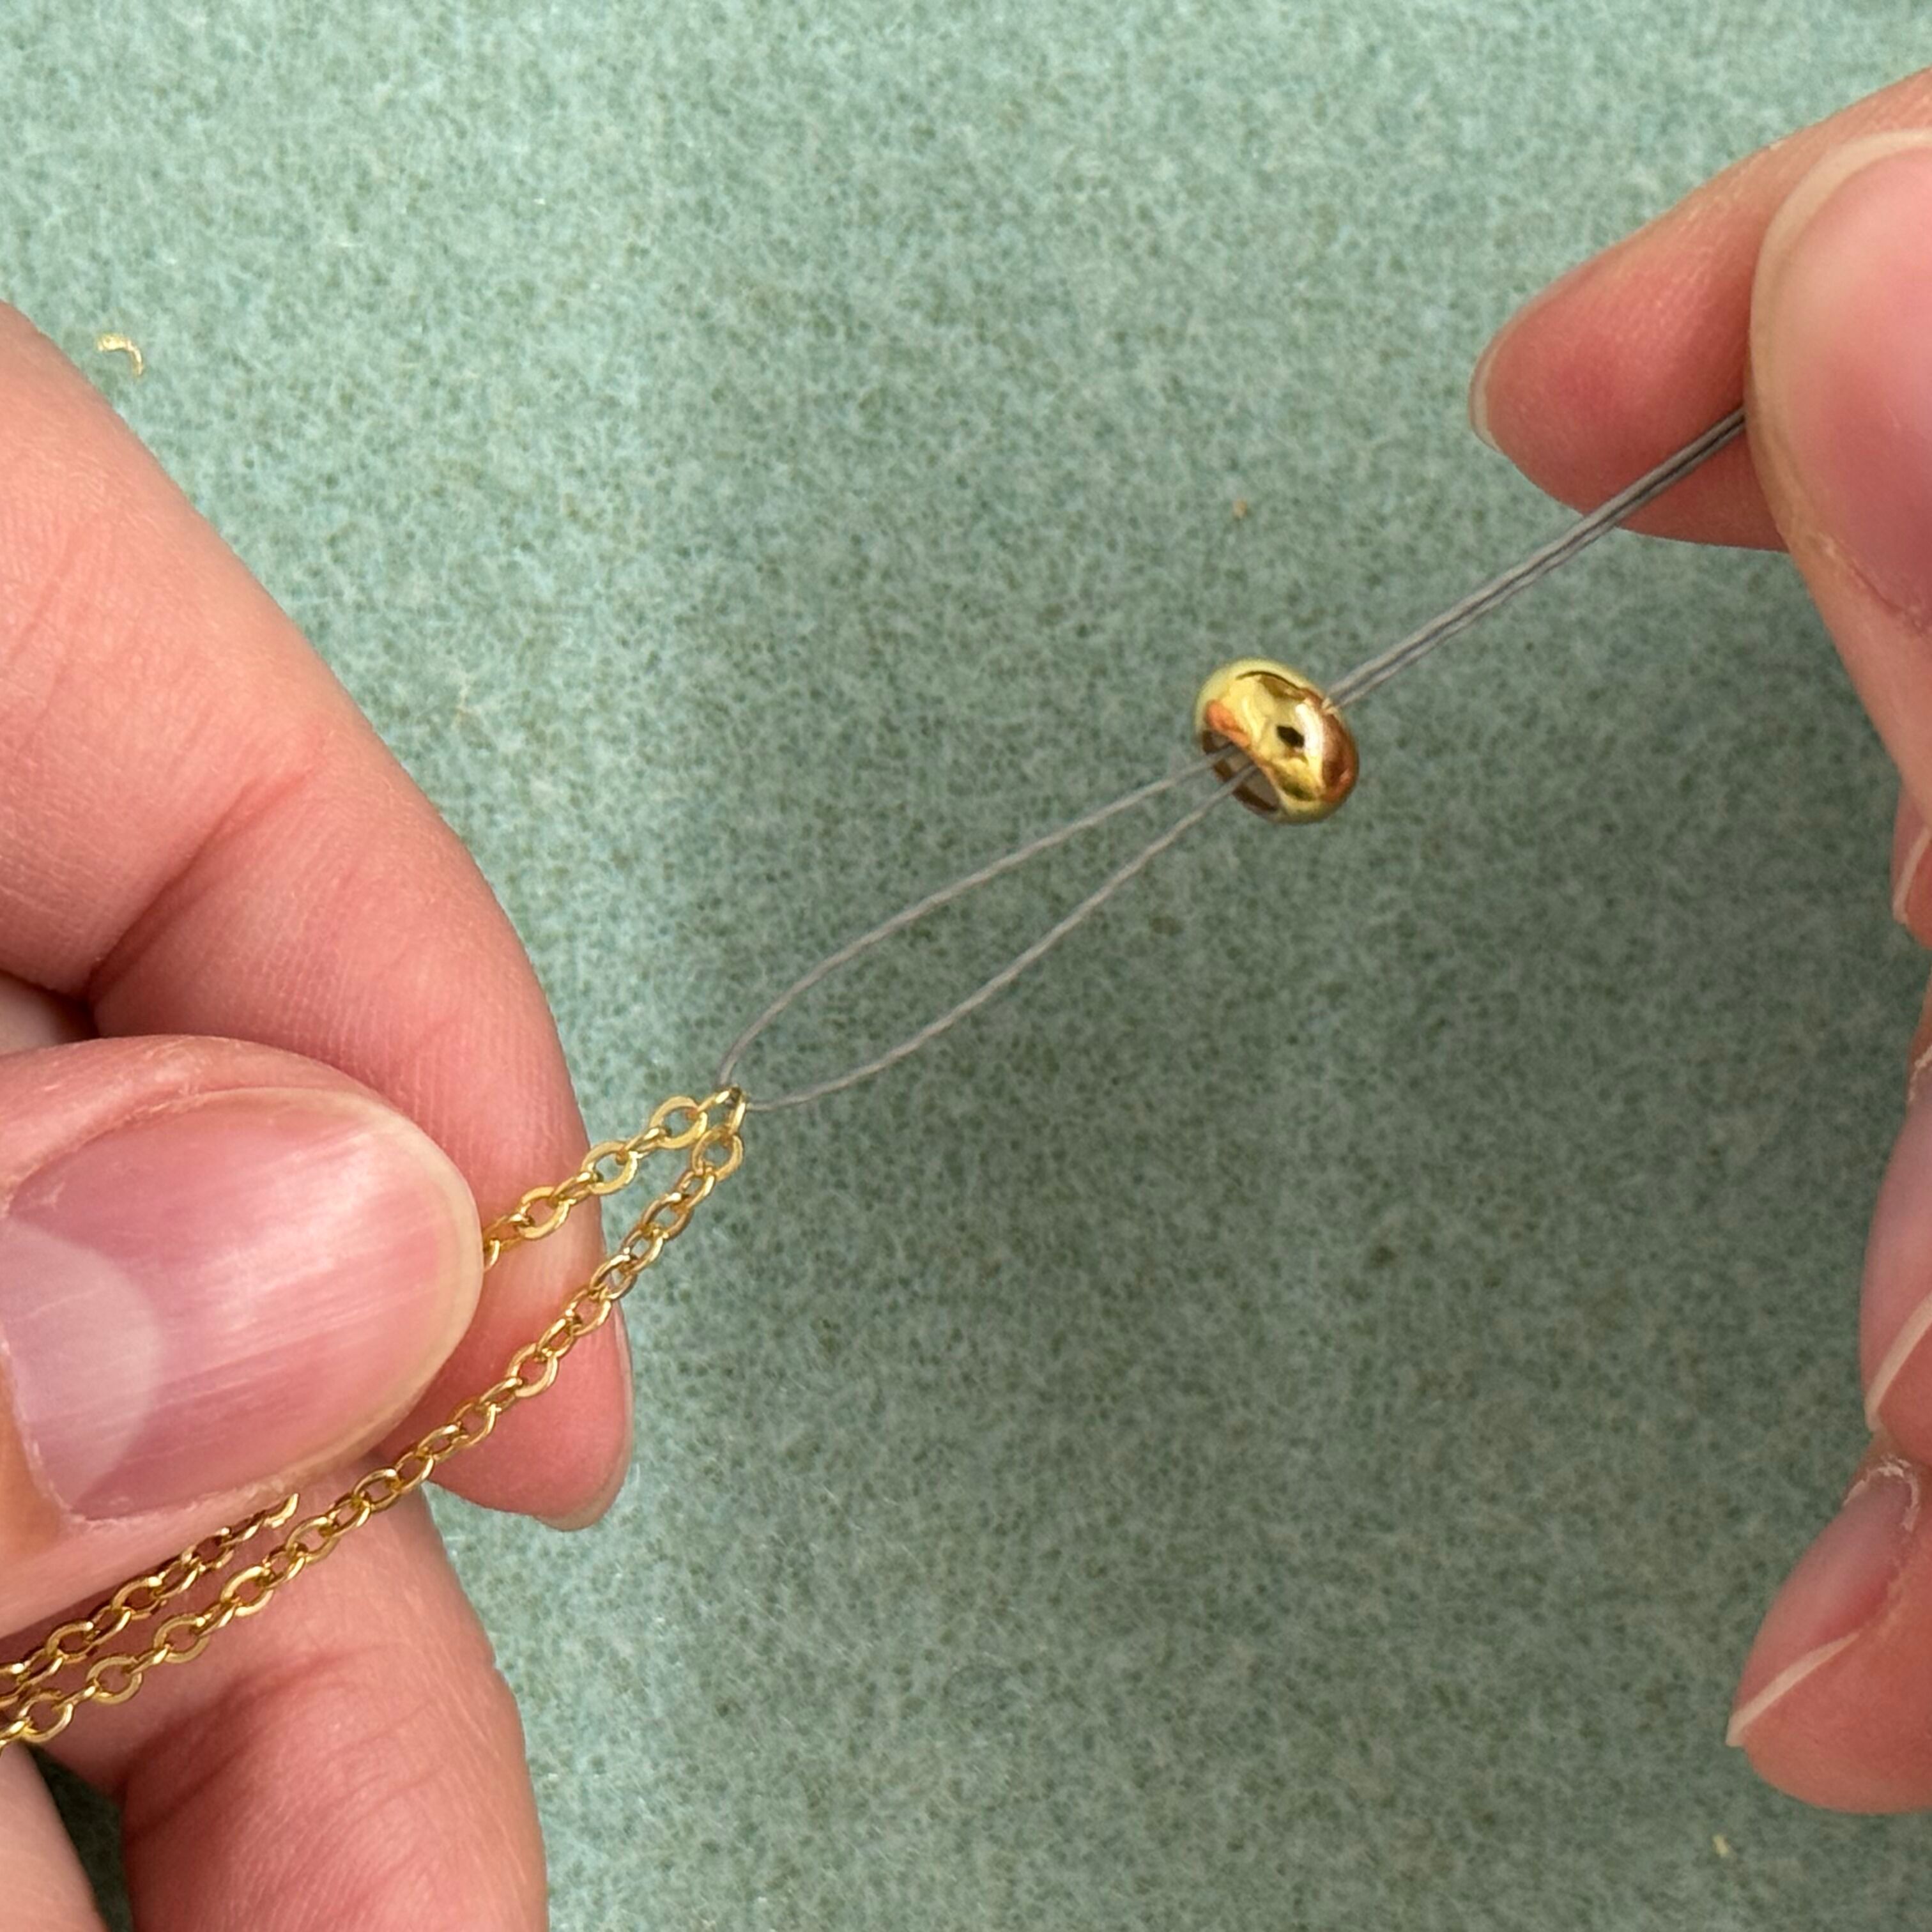
22. Cut 2 sections of chain 11 inches long each, thread some scrap wire or soft flex (anything slightly stiff) through each of the chain's ends then through the silicone bead - the scrap wire or soft flex is used as a makeshift needle. Pull the silicone bead onto the chain.
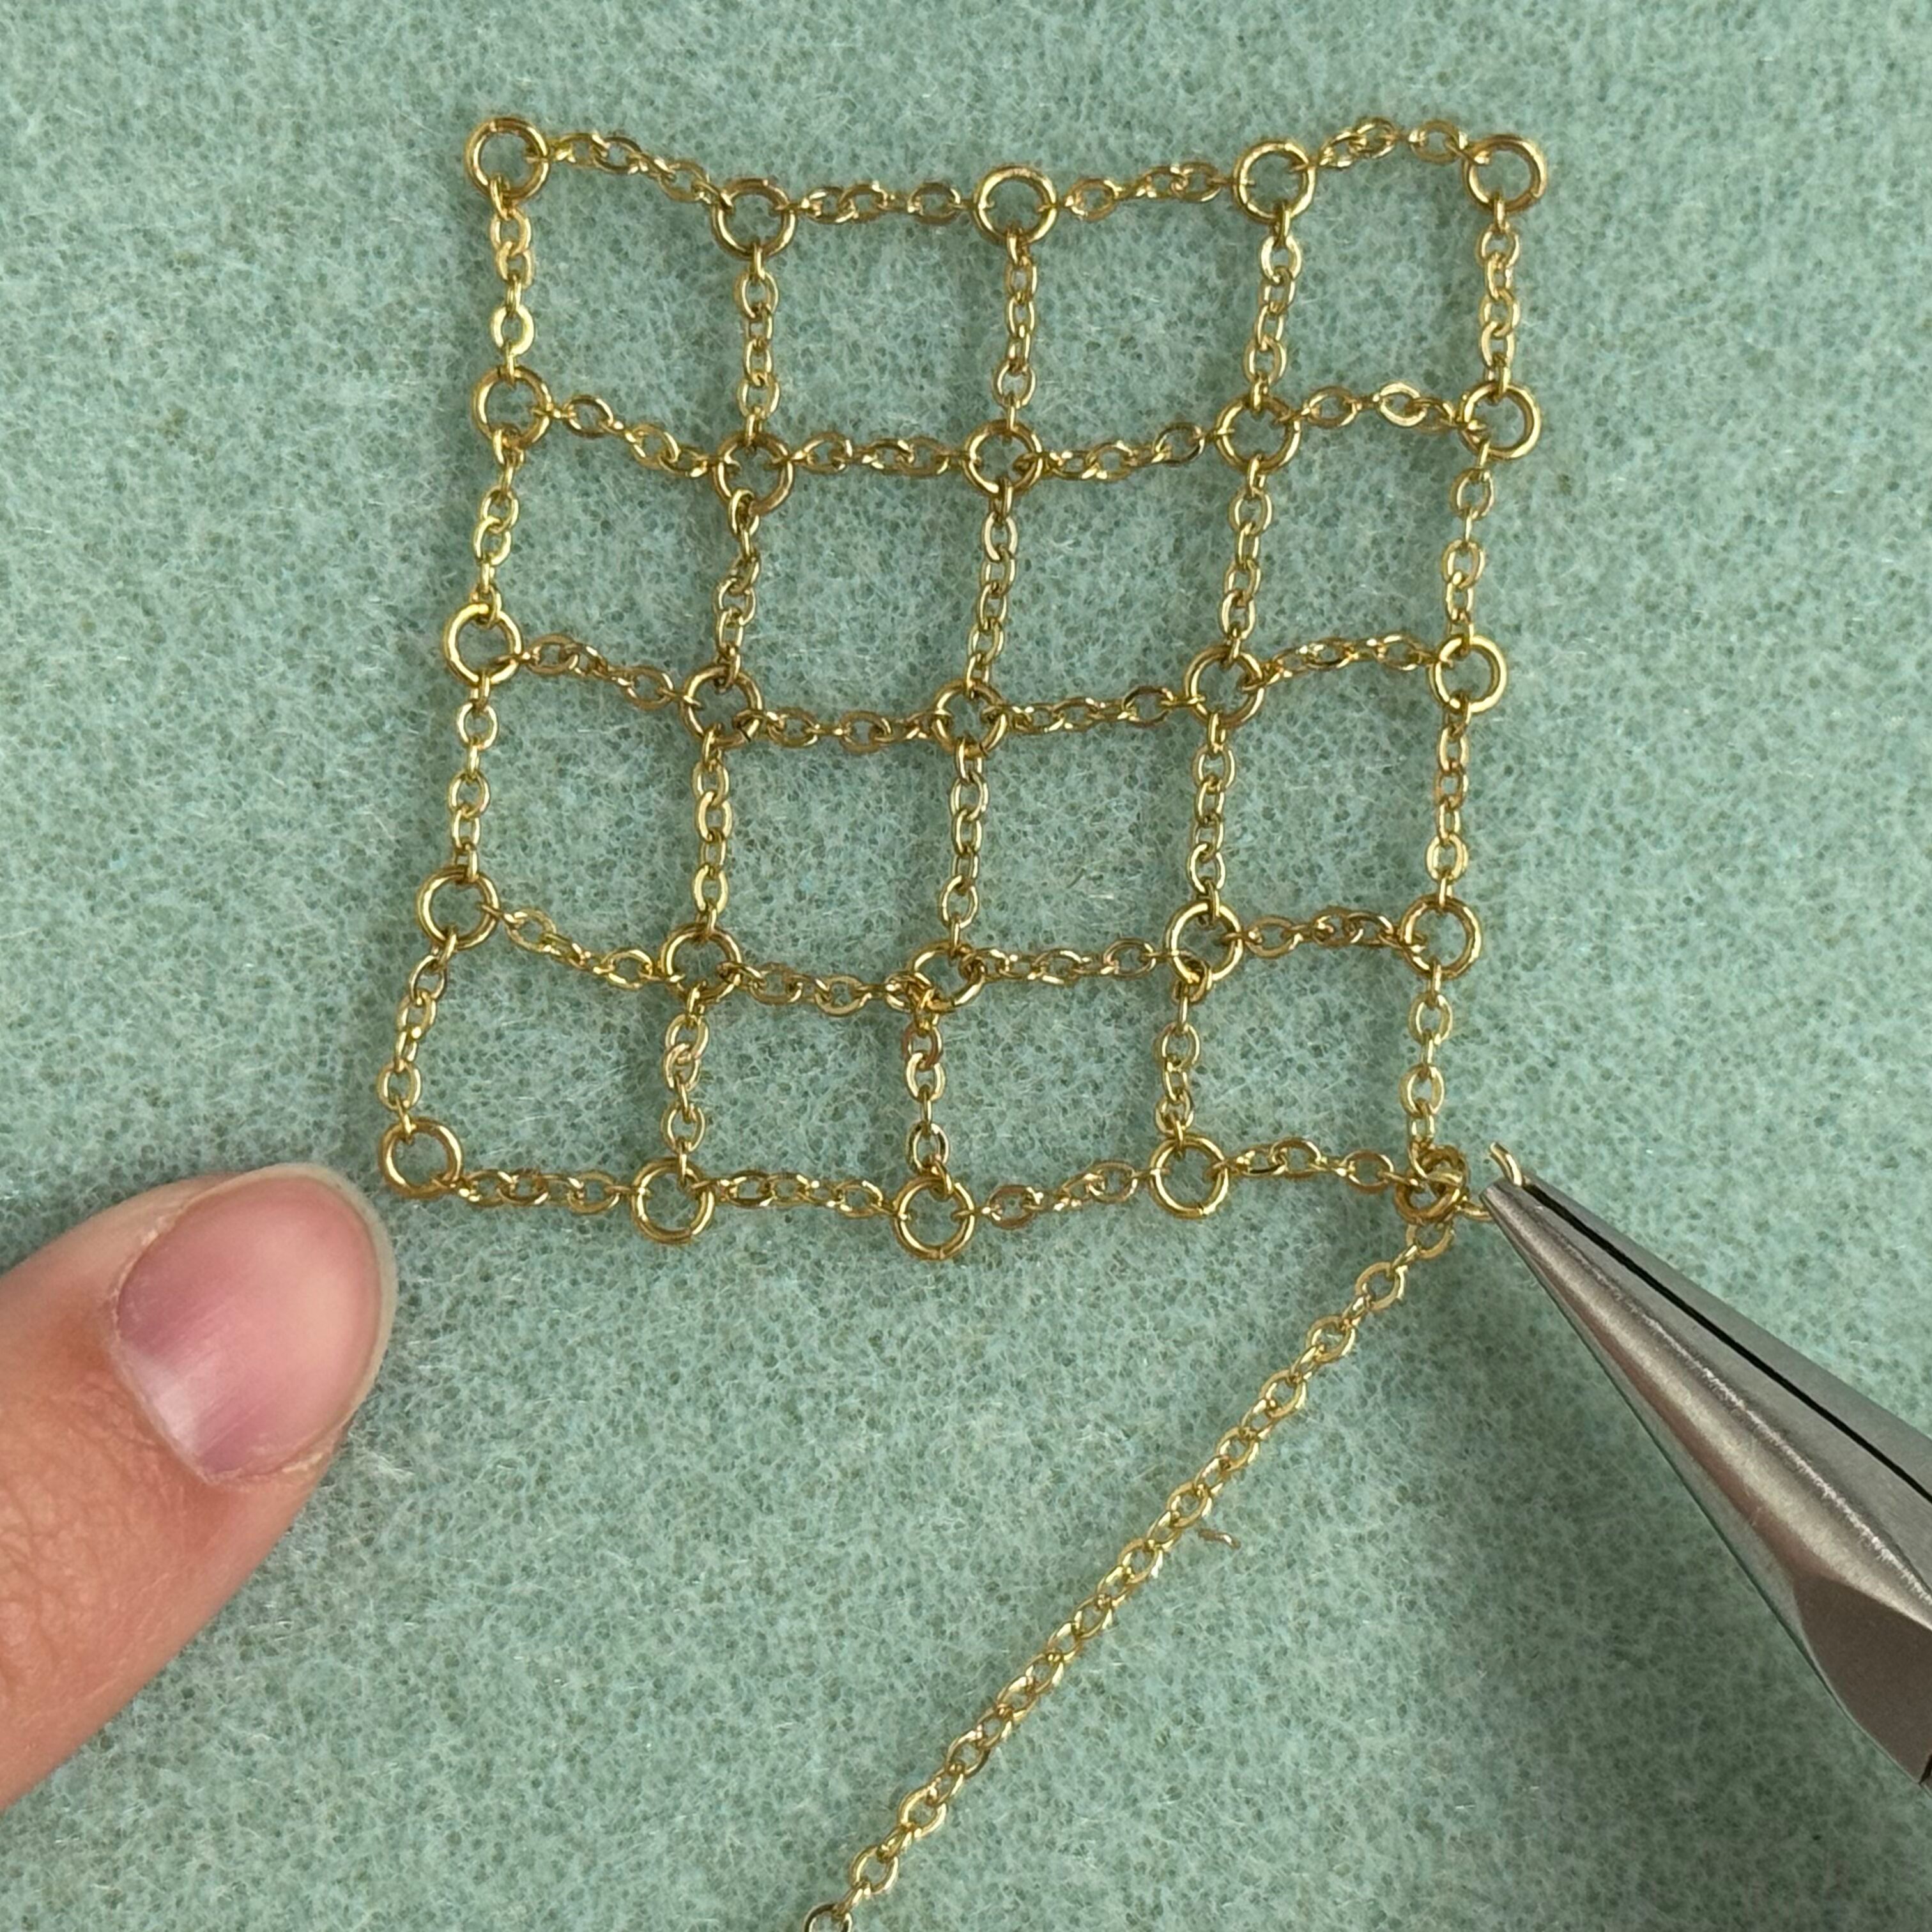
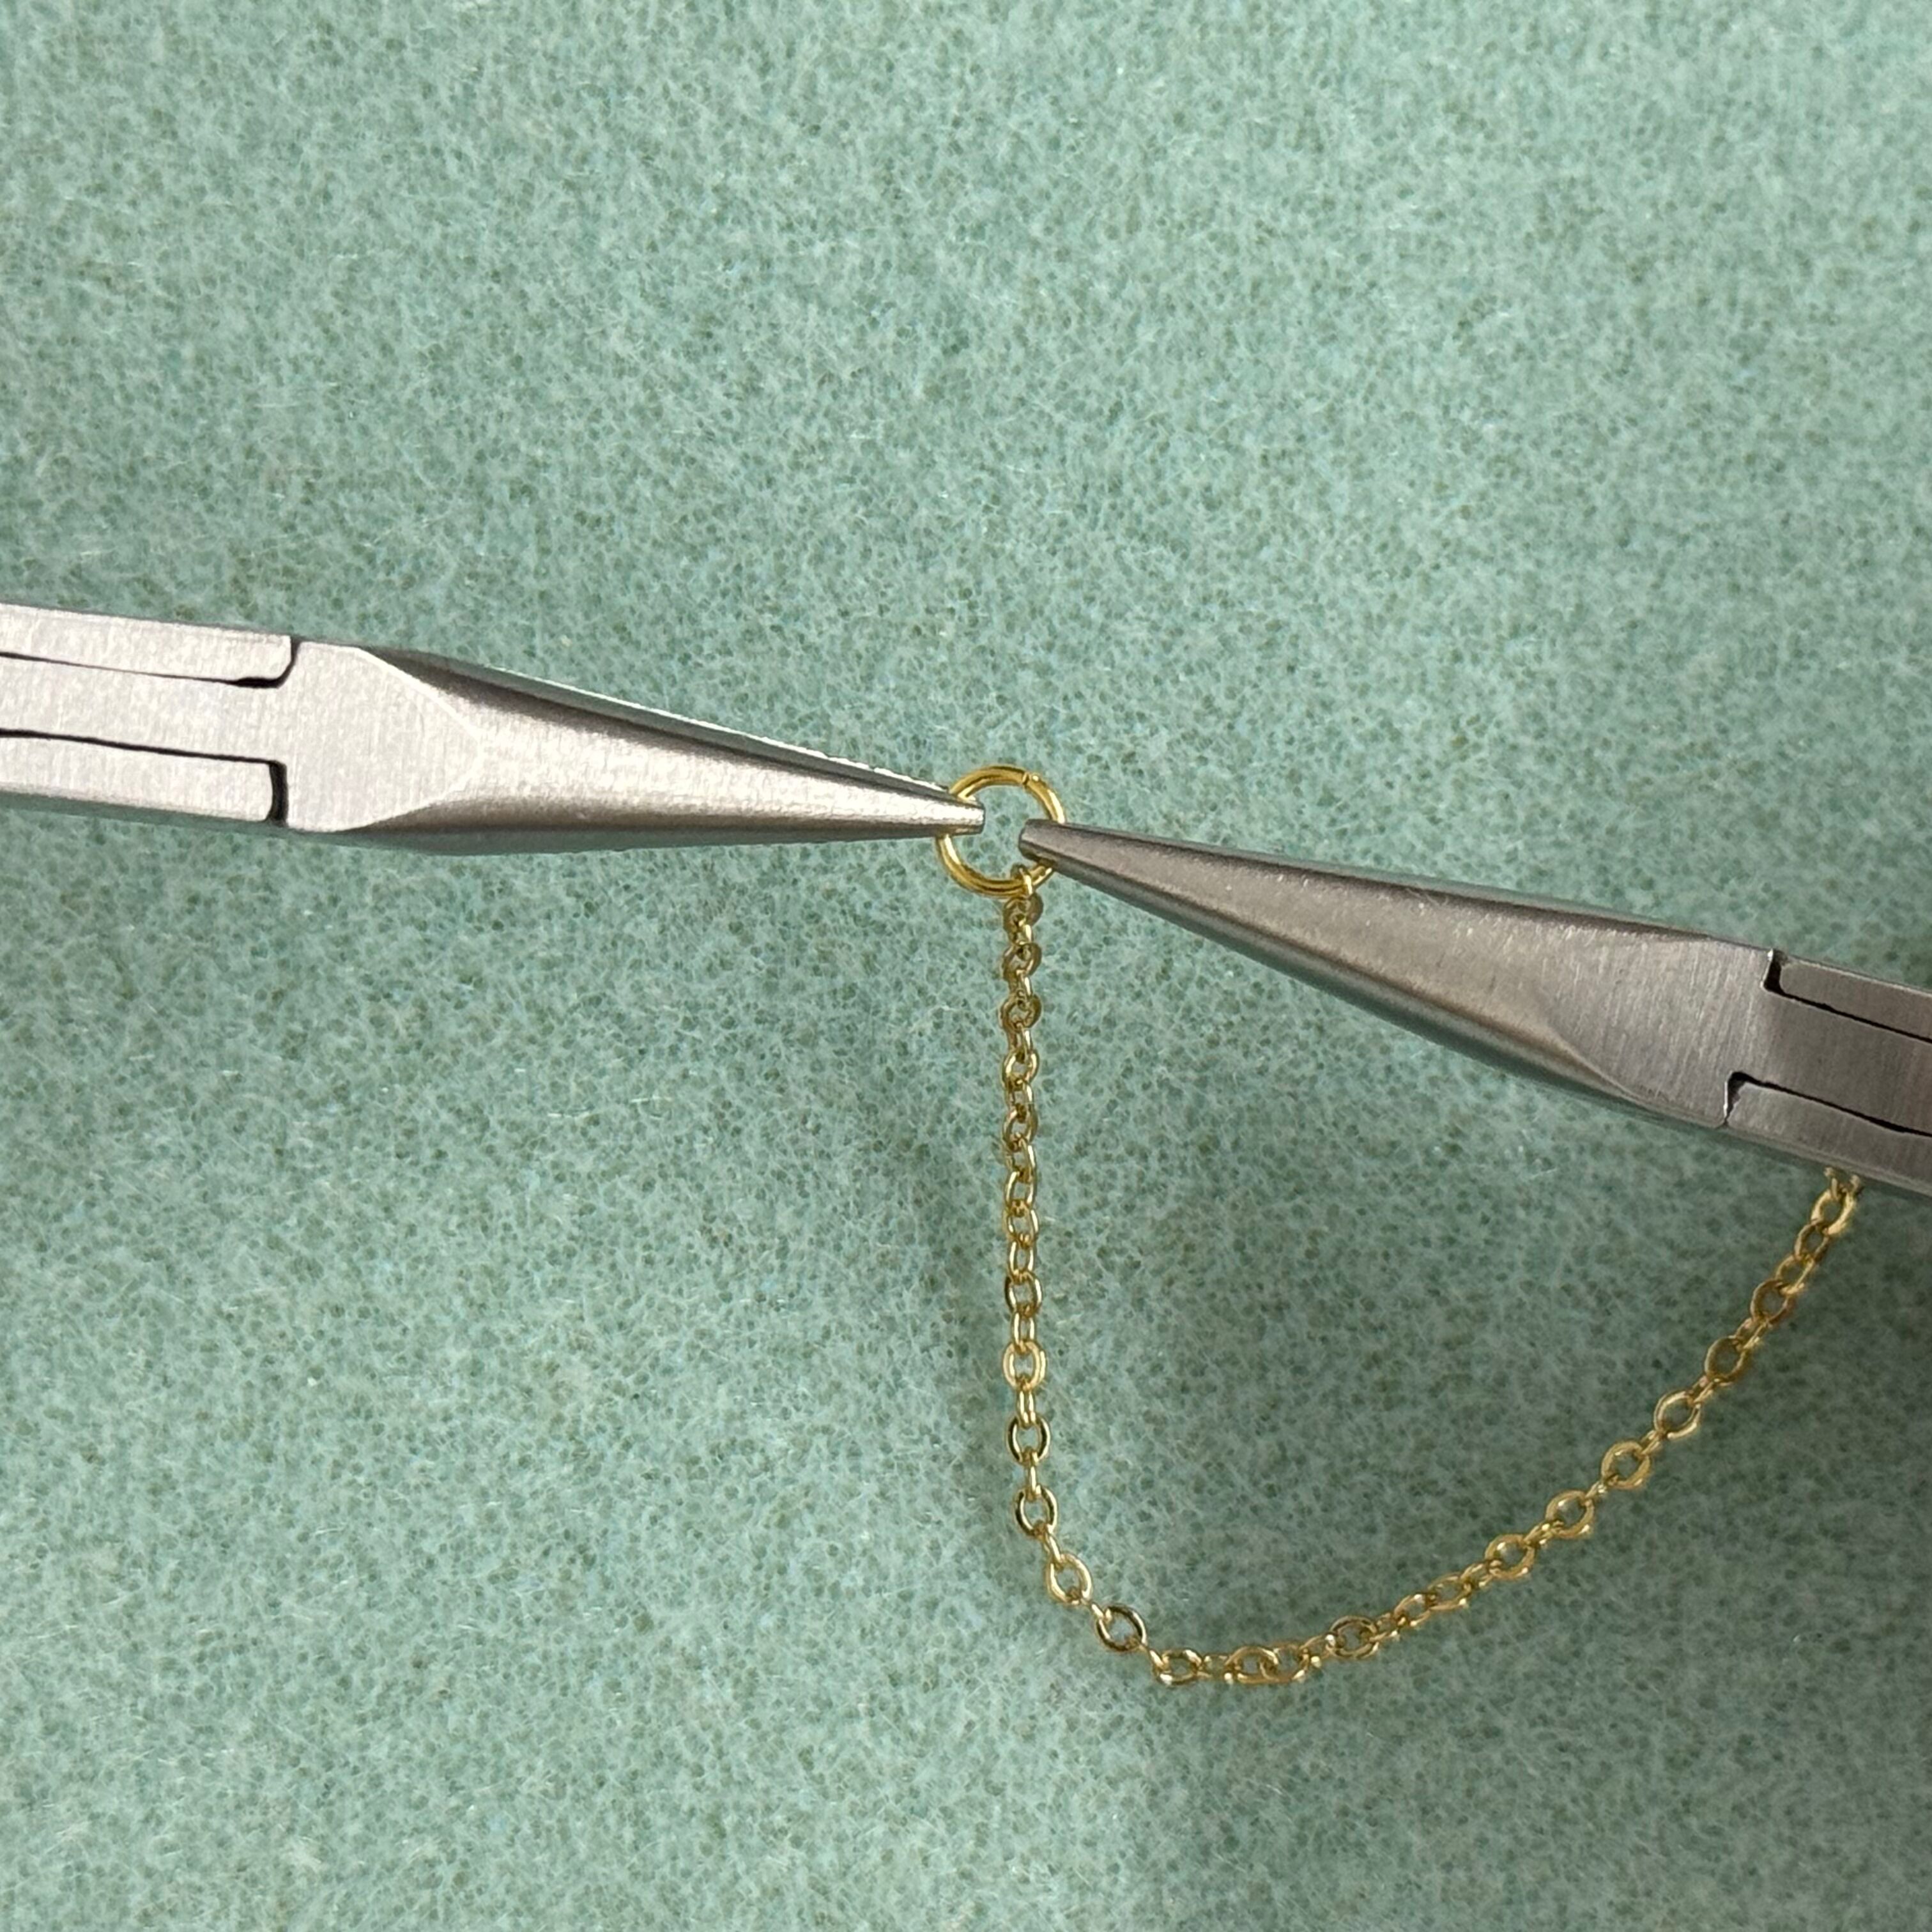
23. Add a jump ring to one of the sections of 11" chain and attach it to the side I am pointing to as well as the other side with the chain nose pliers.
24. Close the jump ring
25. Add a jump ring to the other section of 11" chain and attach it to the side I am pointing to as well as the other side with the chain nose pliers.
26. On one end of the chain, add a 4mm jump ring
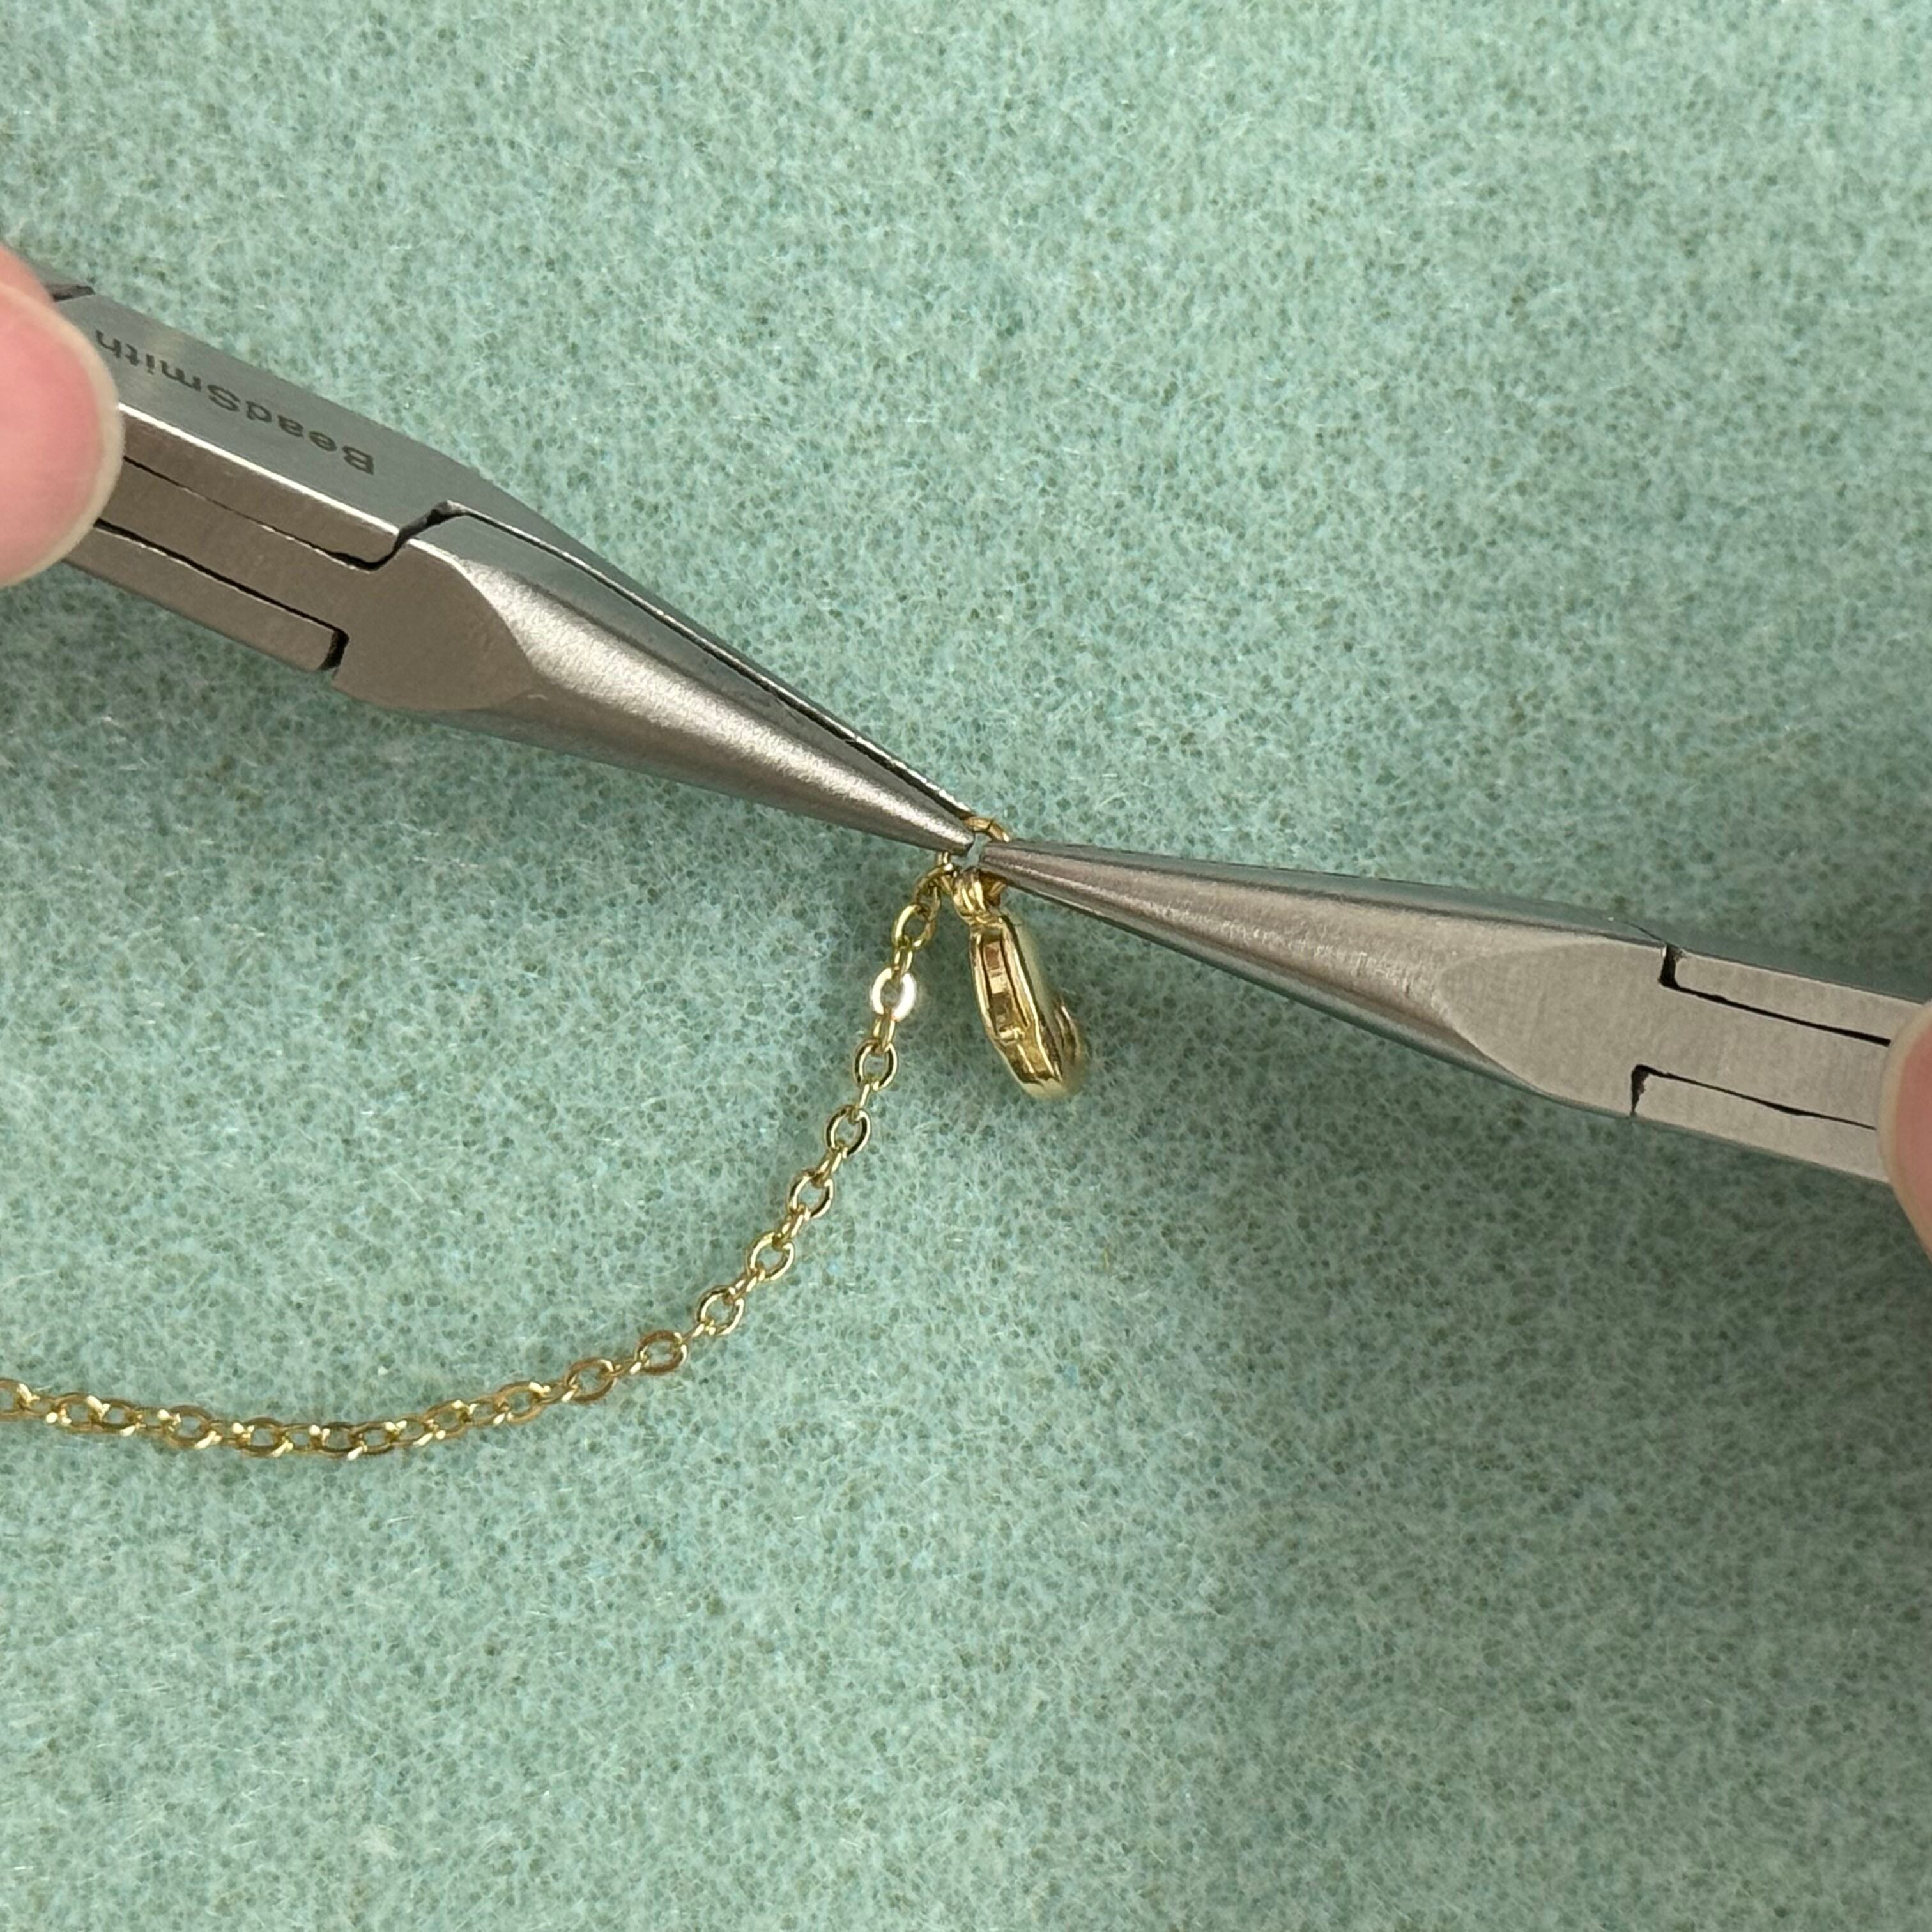
27. Attach the clasp (or clasp of your choice) to the other end of the chain using a 3mm 22 gauge jump ring
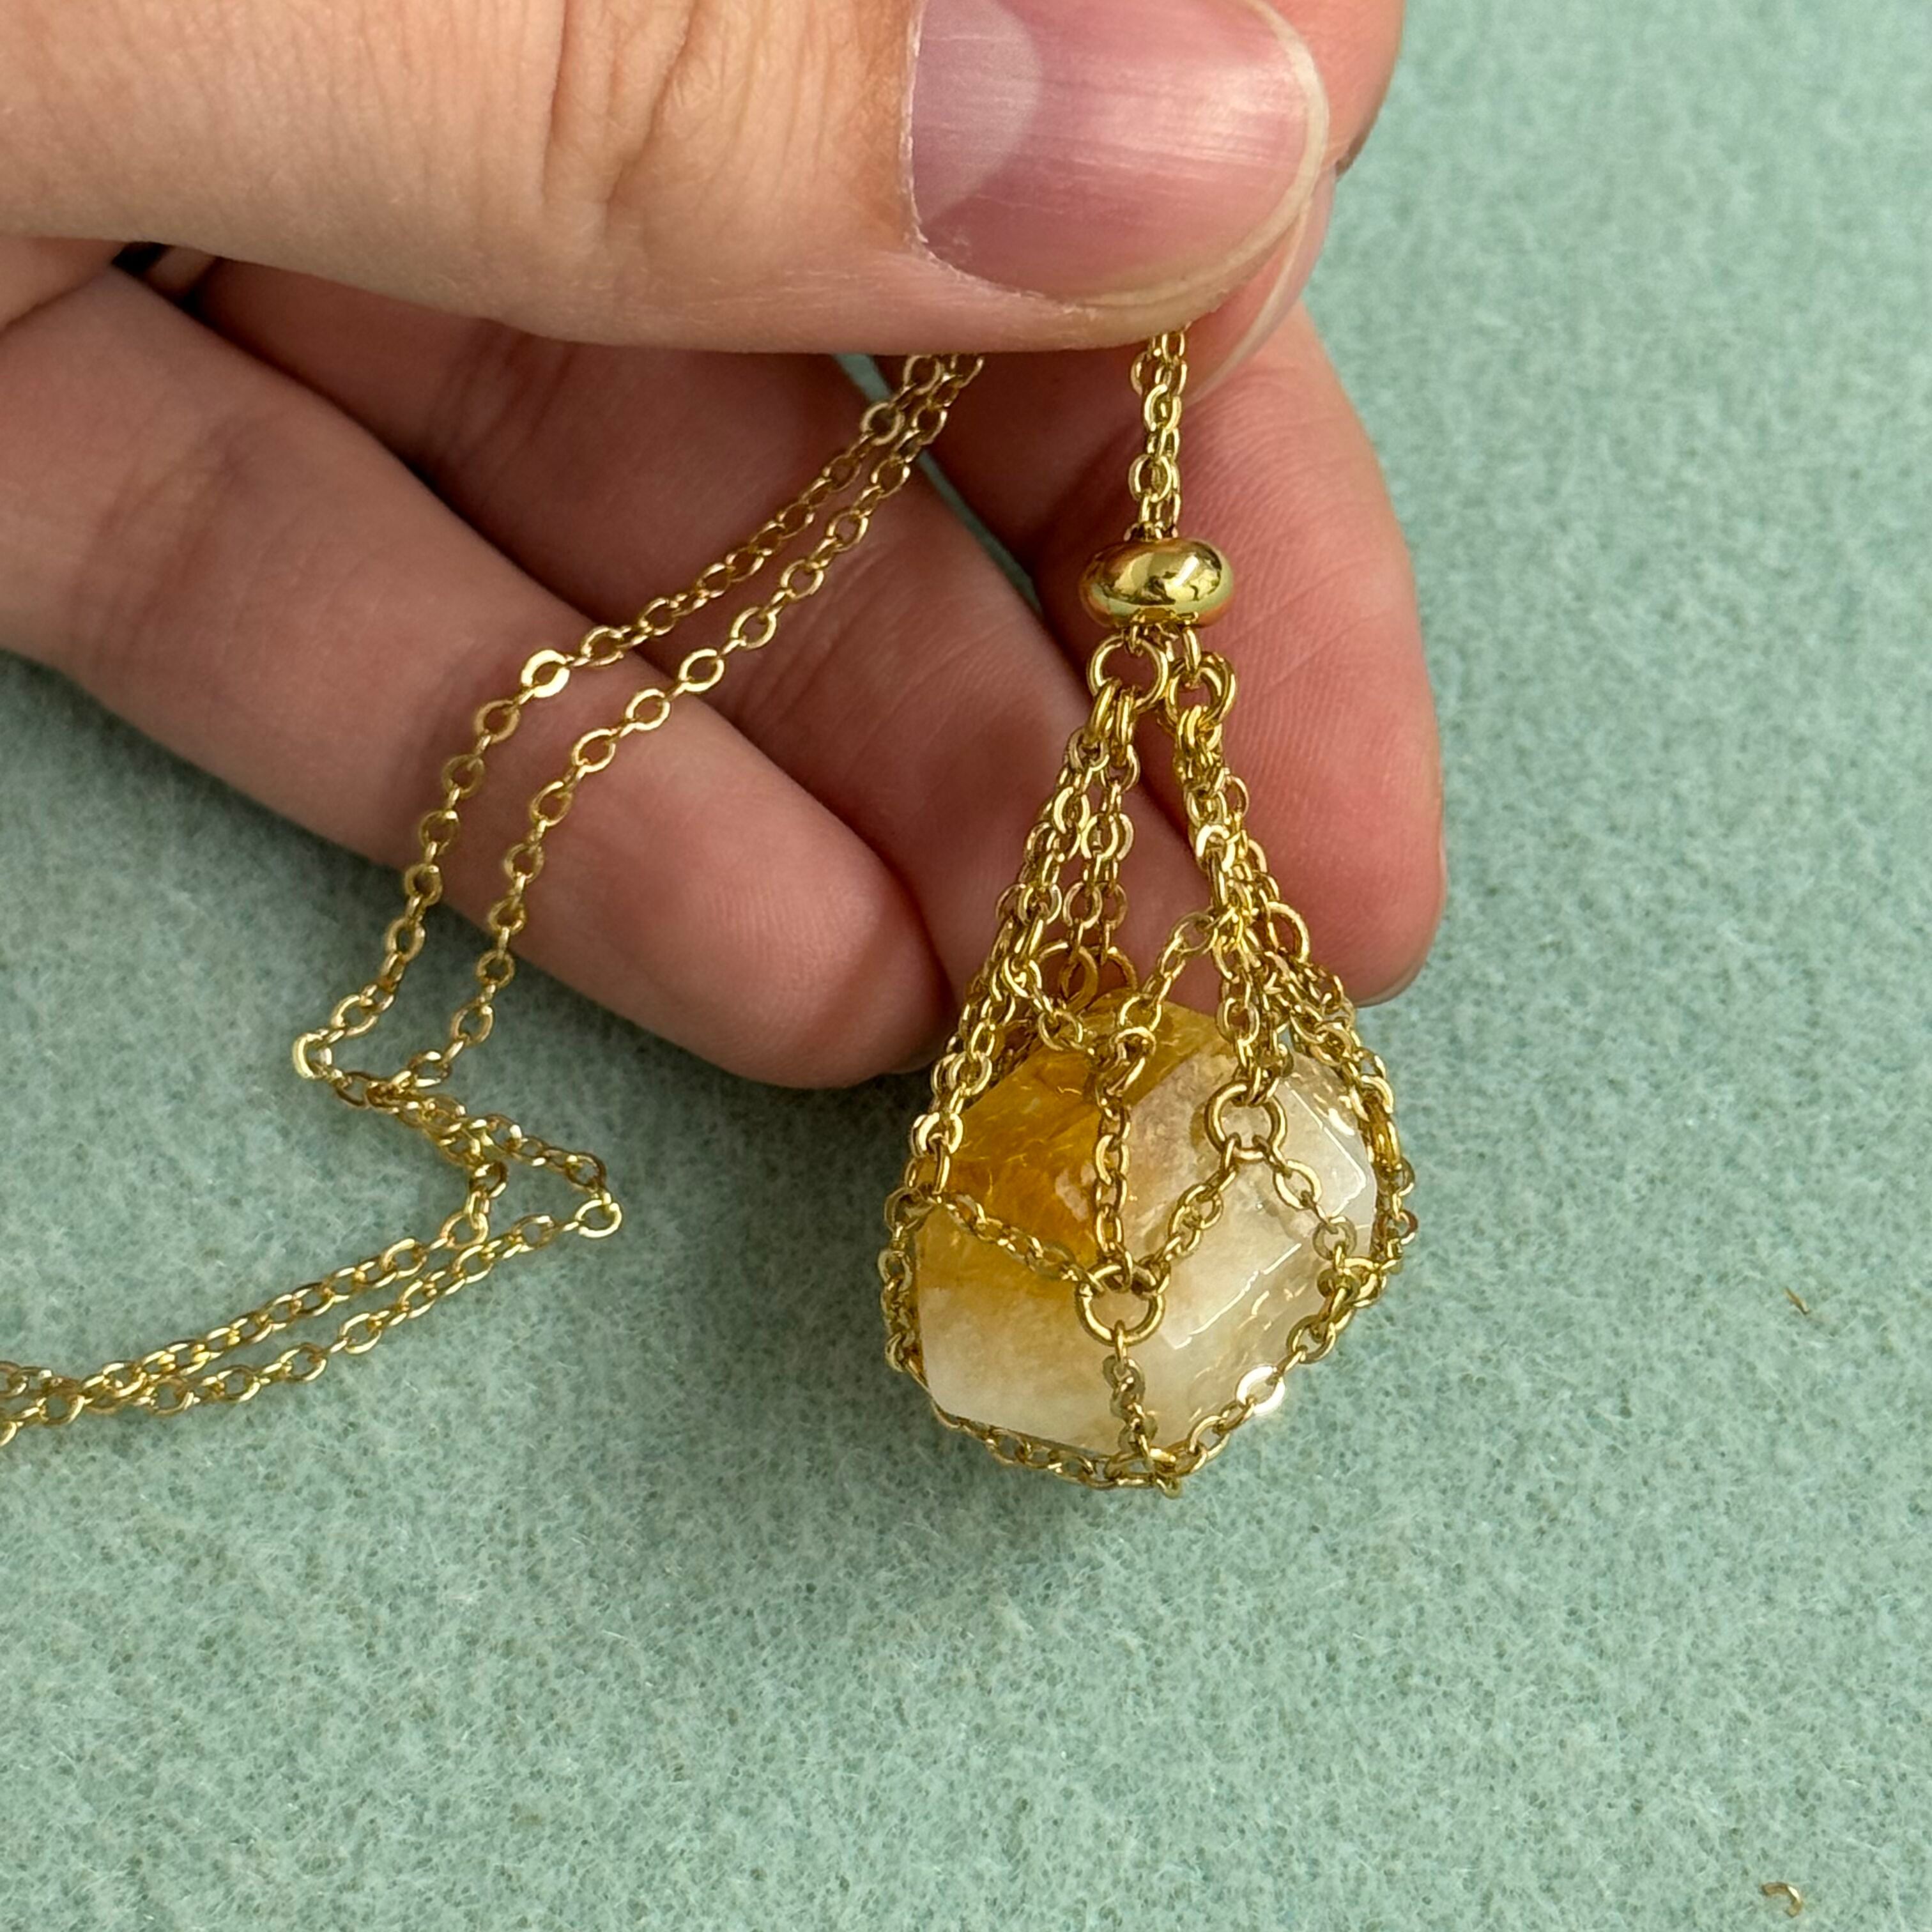
28. Insert the stone of your choice in the pocket and pull the silicone side bead down to keep the gem in place. Done!
Recent Posts
-

Cherry Blossom Flower 3D Brick Stitch Earrings
Cherry Blossom Flower 3D Brick Stitch EarringsThese earrings use size 11 Delica beads arranged in th …29th Apr 2024 -

"Abalone Sea" Dangle Earrings
"Abalone Sea" Dangle EarringsIn this tutorial, you'll blend delicate design with the luminescent bea …24th Apr 2024 -

"Gem Keeper" Chain Cage Pendant Necklace
"Gem Keeper" Chain Cage Pendant NecklaceNo hole no problem! Keep anything from gems with no holes, b …29th Mar 2024